
Getting Started
Get in Touch
Where we’re located:
We live, work, and play in beautiful Tallahassee, Florida.
Billing & Payment Mailing Address:
2910 Kerry Forest Pkwy, D4-282
Tallahassee, FL 32309 USA
We are SOC 2 Compliant

NOTE: The following documentation applies to EasyTerritory integrated with Microsoft Dynamics 365/CRM (D365).
The Postal Code Location Lookup plugin takes a postal code value from a record’s field and does a lookup against an EasyTerritory project, assigning the record to the territory found in your EasyTerritory project. This can be helpful in two scenarios, lead/account territory assignment and territory realignment.
The Postal Code Location Lookup plugin is a workflow activity used as a step in a workflow process within Dynamics D365.
To integrate the Postal Code Location Lookup plugin into your Dynamics instance following these steps:
Step 1: Install the EasyTerritory managed solution into D365. You can get the managed solution from us or Microsoft AppSource.
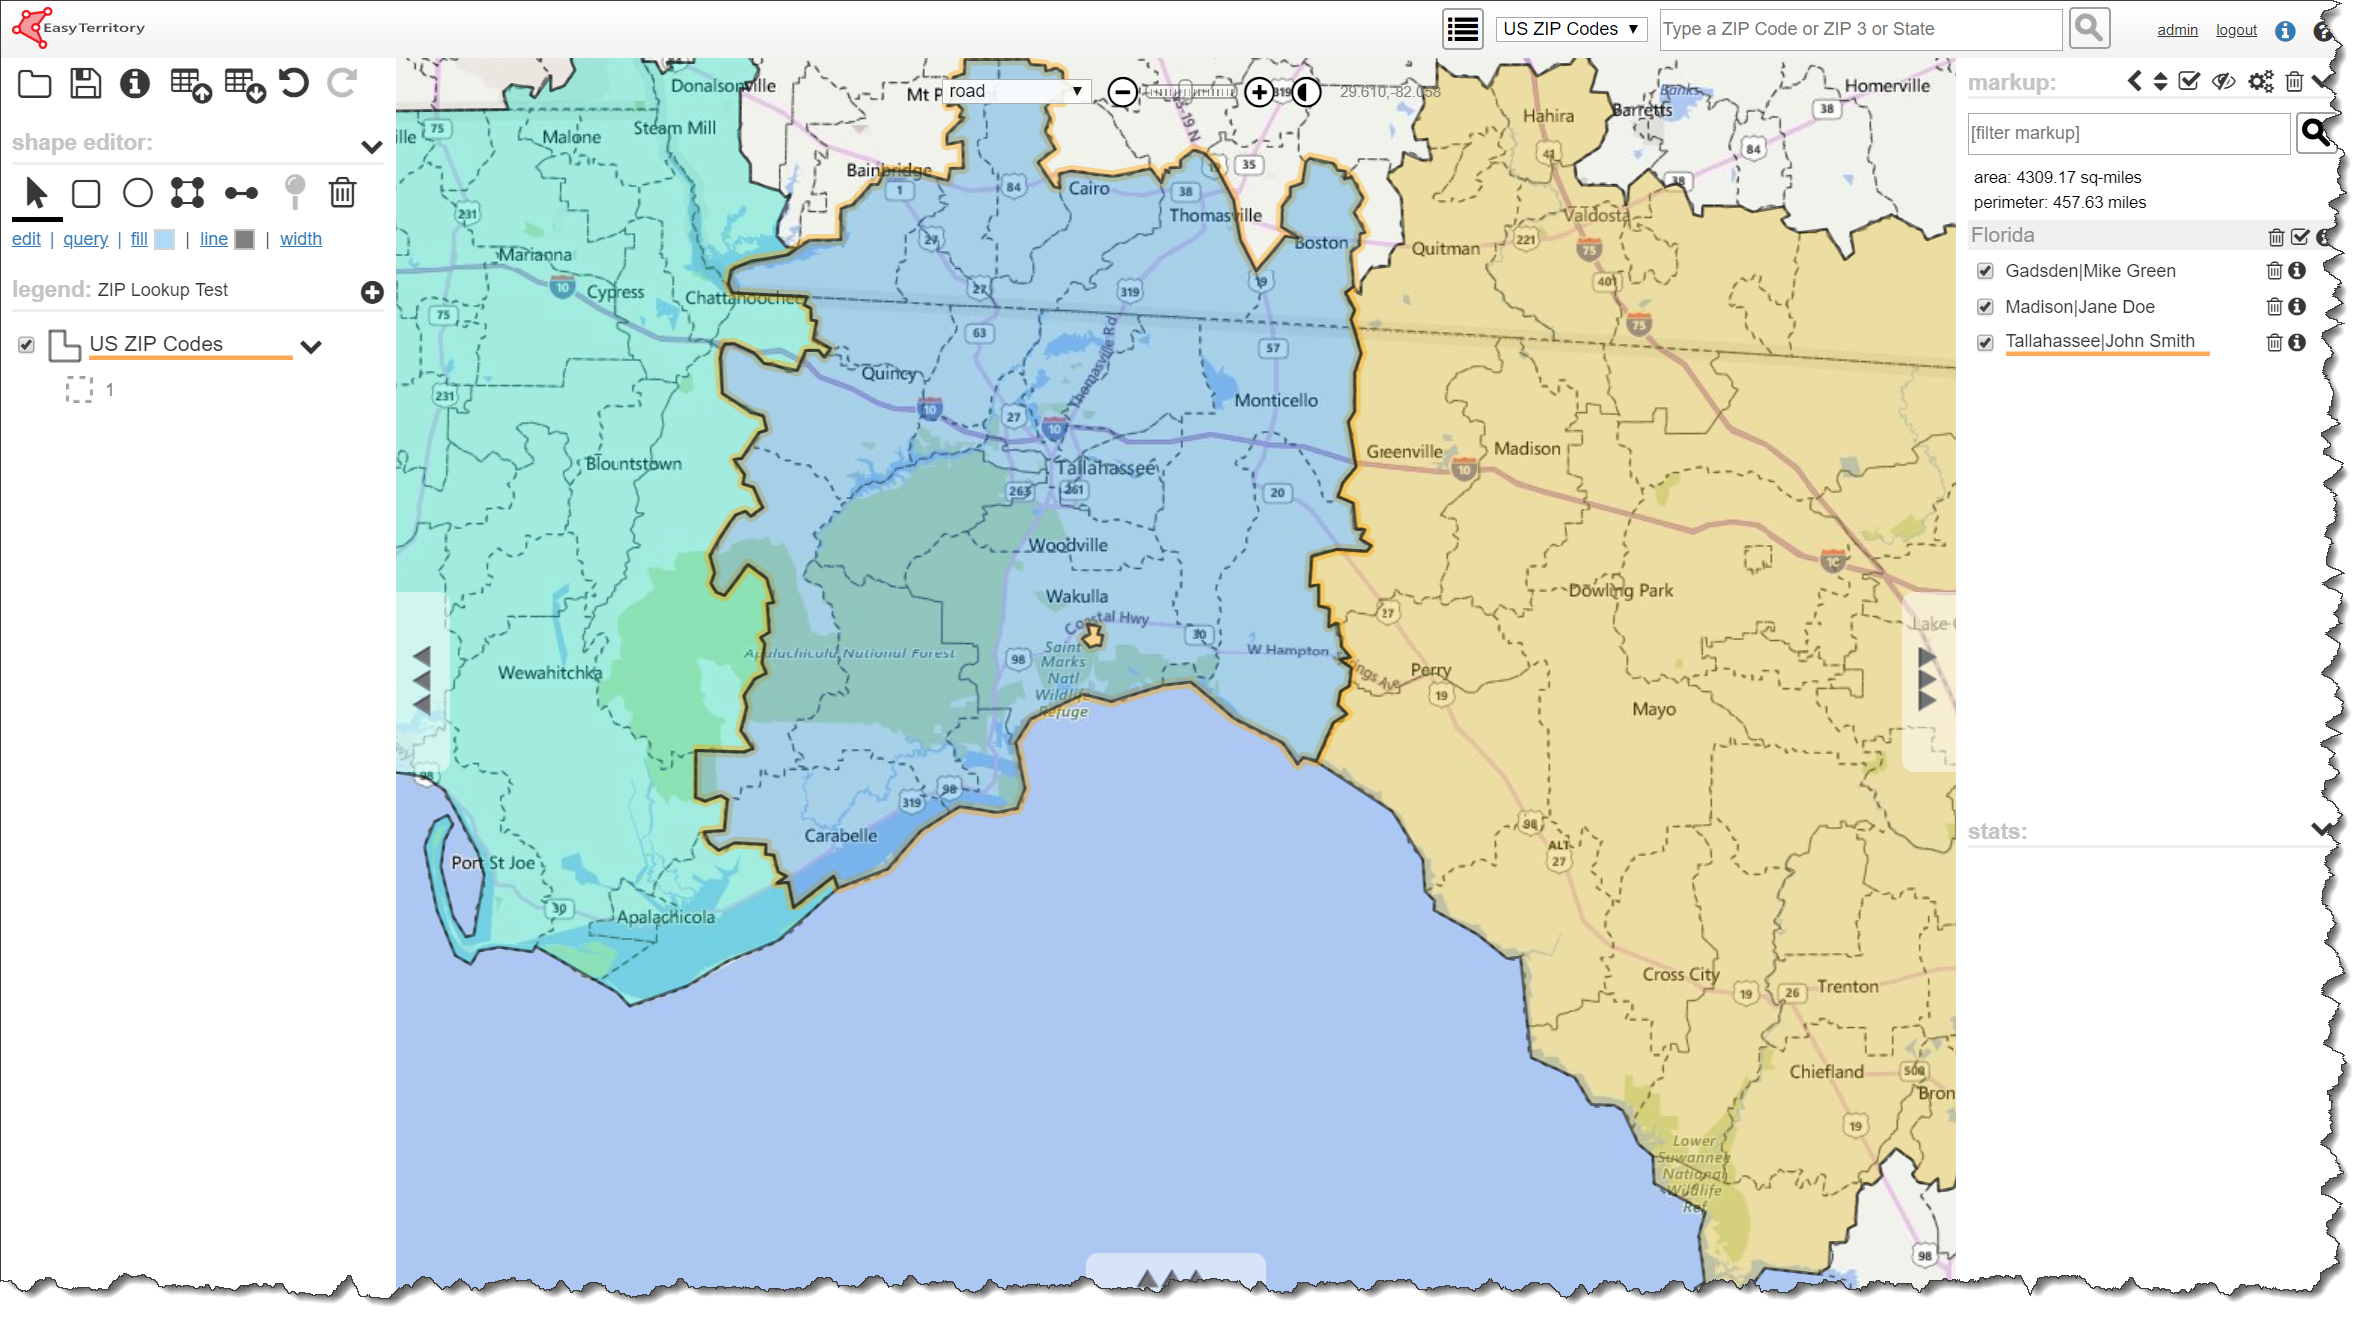
Step 2: In EasyTerritory, you’ll need to build your territories (from geographies such as US ZIP Codes) and save the project using the ProjectMarkupPlugin. The ProjectMarkupPlugin is a plugin executed from EasyTerritory on project save and it writes the territory information to a structured SQL table that is used by our REST API and this plugin. Follow these steps to set up the ProjectMarkupPlugin.
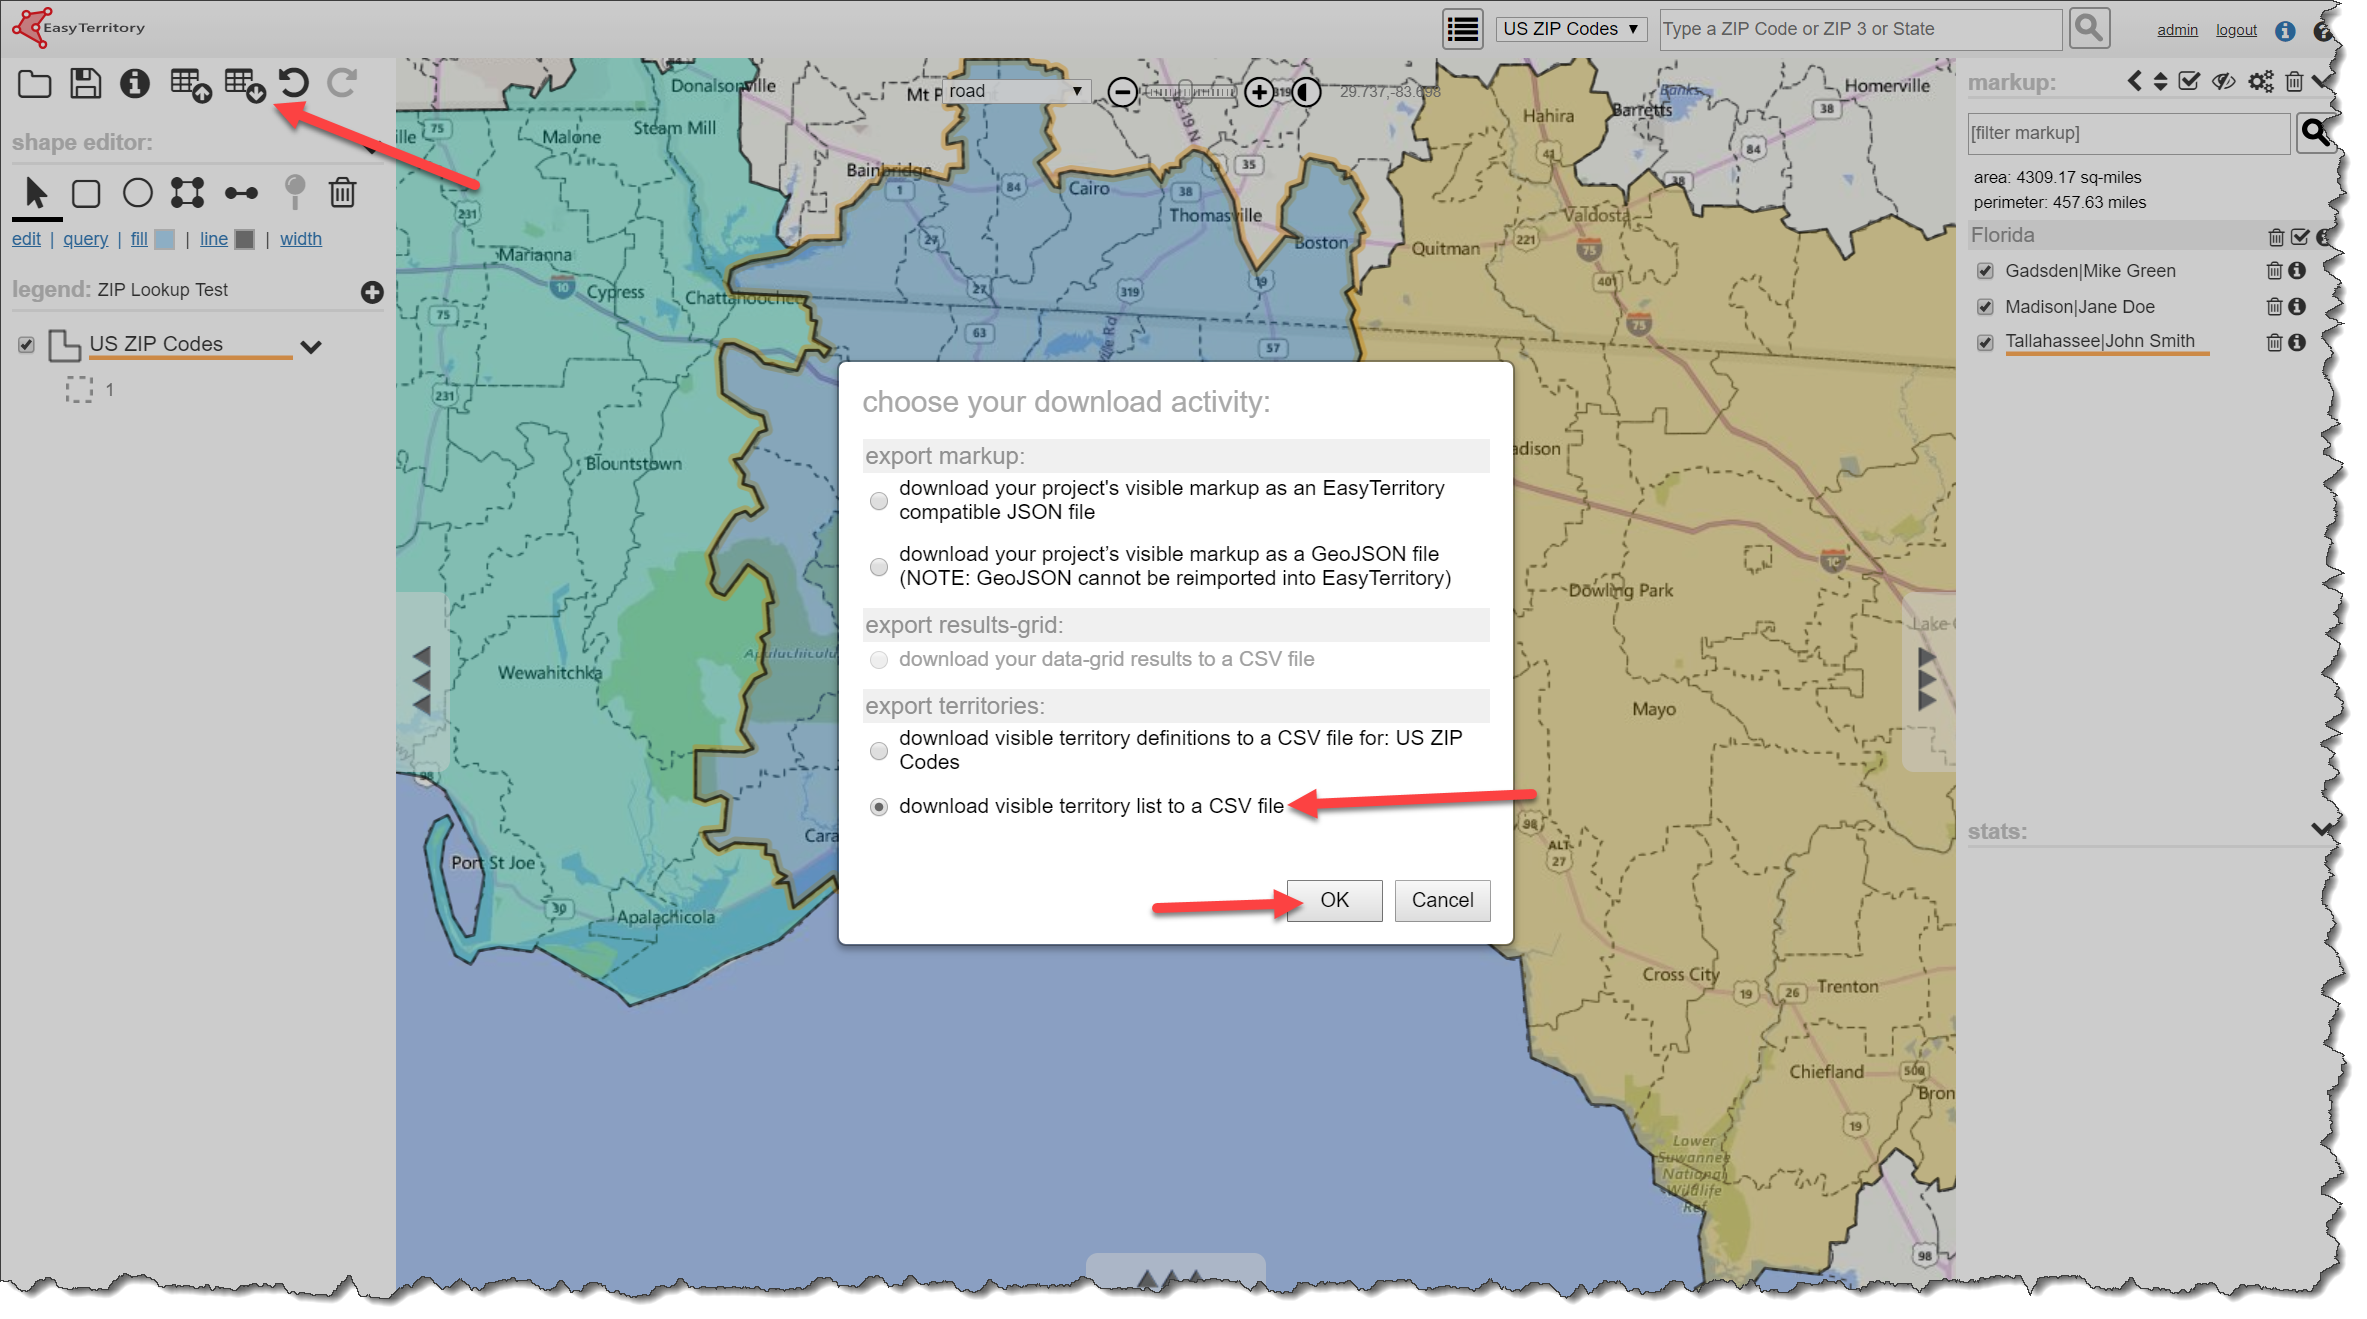
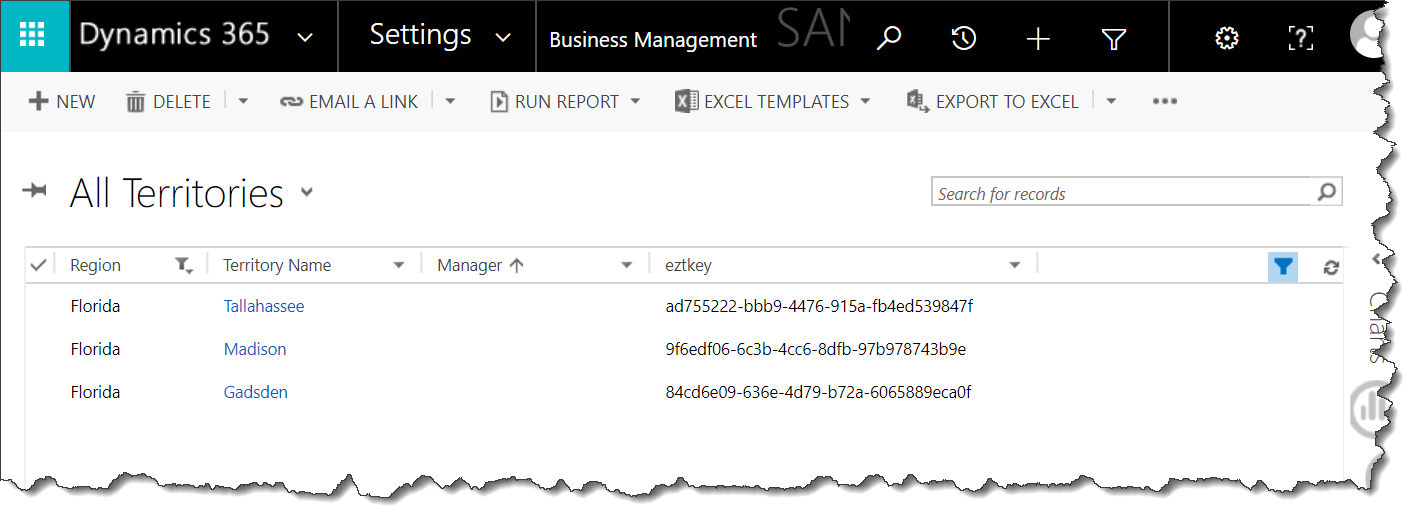
Step 3: Export your territory list from EasyTerritory and import the records into Dynamics 365.
In this step, we’ll export a list of territories and their IDs (markupId) from EasyTerritory so that we can import them into our Territory entity in Dynamics. Note, you can use the out-of-the-box territory entity or use a custom entity to store your territories. Prior to importing the data in D365 you’ll need to create a field on your entity for storing the ‘markupID’. We usually name that field something like ‘new_eztkey’, which can be a text field.
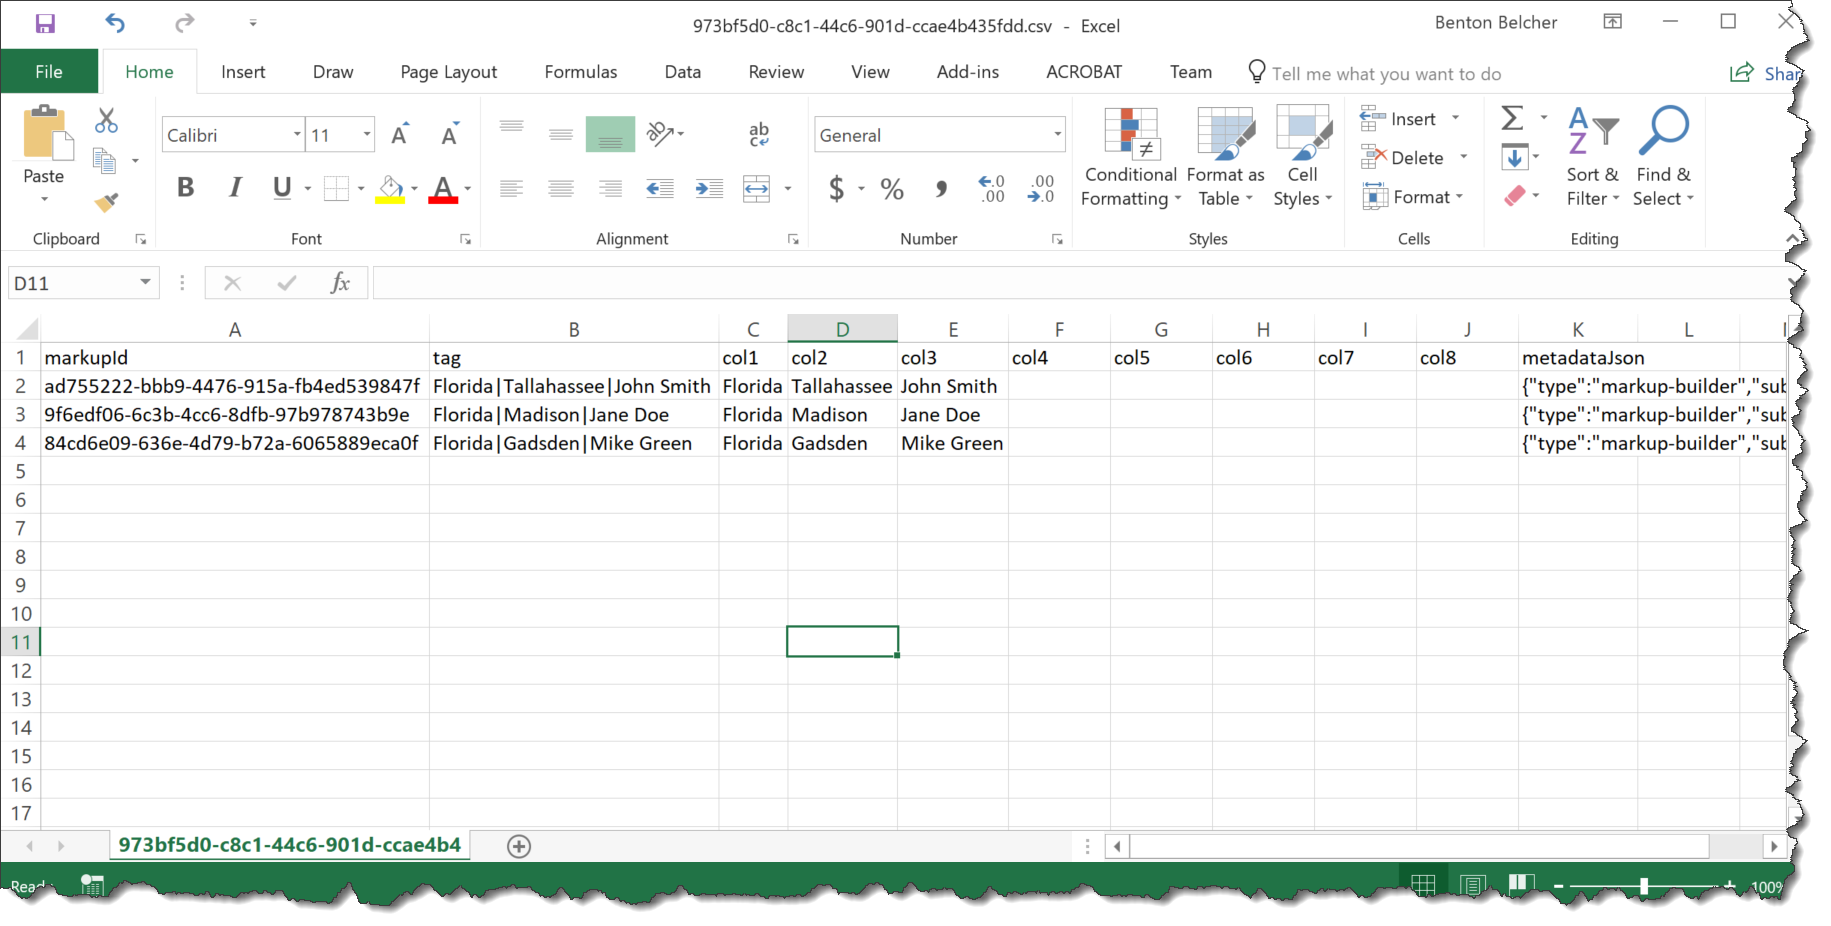
Example .CSV export:
Columns (‘col1’ – ‘col8’) are your labels split out by group and/or a pipe delimiter. The markupId column is the identifier will use in D365 to match the territory record.
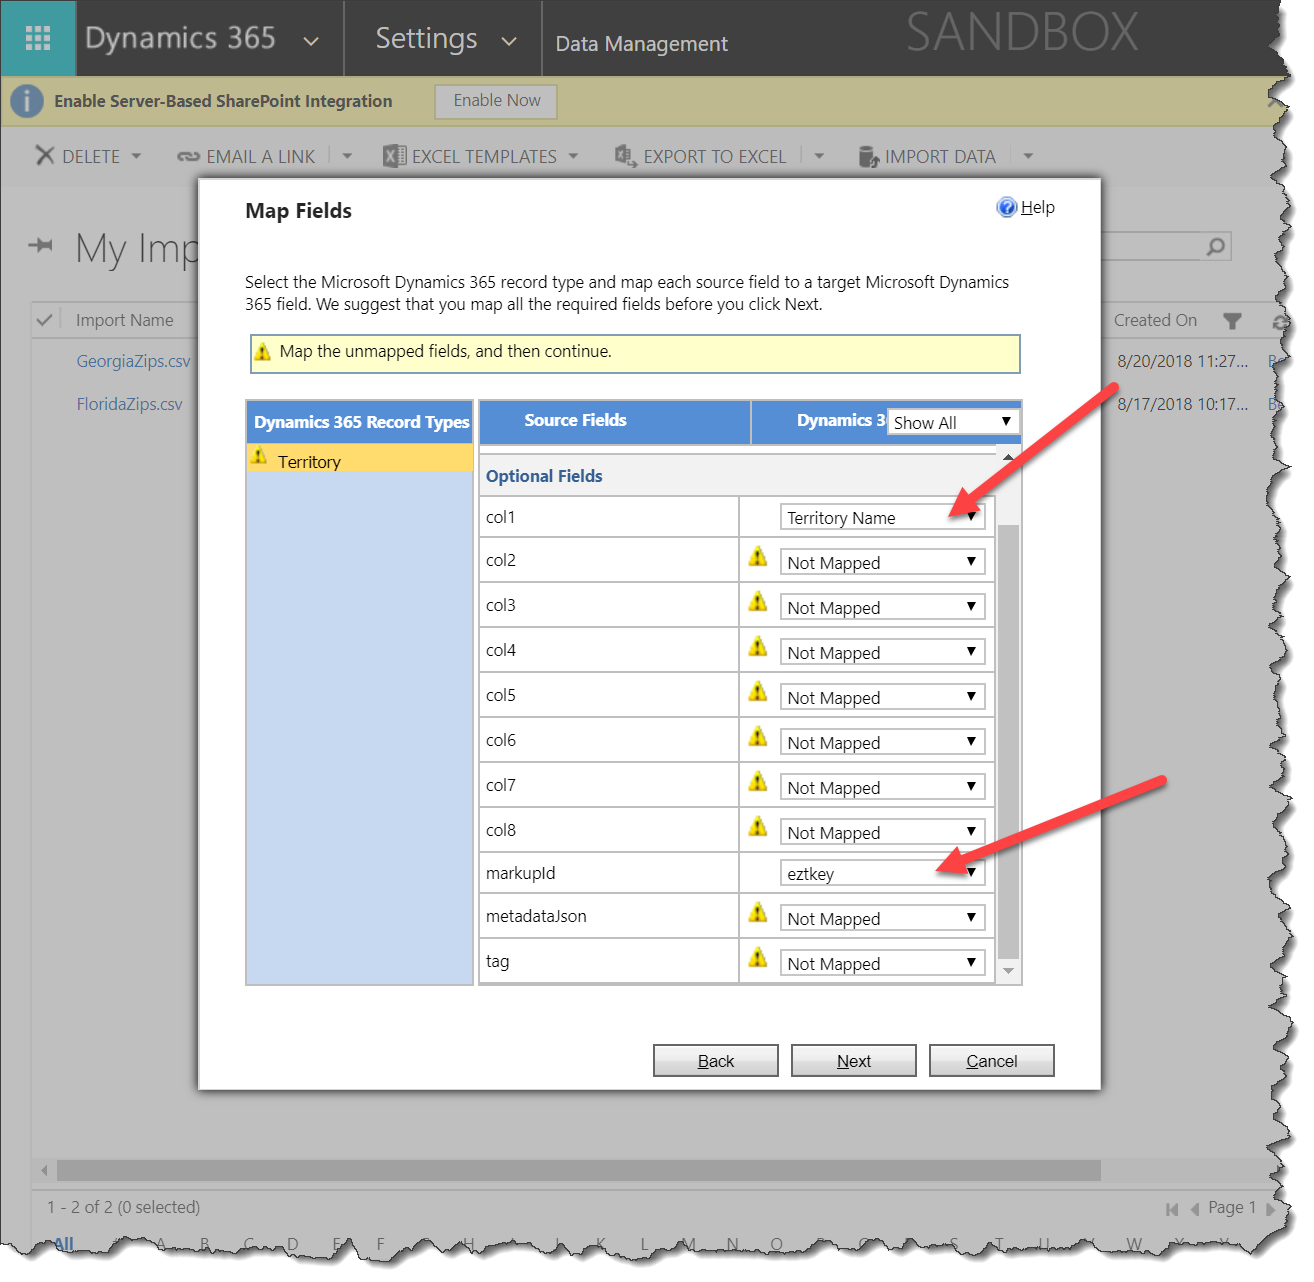
Import your territories into D365. For the column mappings, you’ll need at a minimum the ‘Territory Name’ (which can be col1 – col8) and the markupId (which will be the custom field you’ve created on the territory entity. e.g. ‘new_eztkey’) You can also create additional fields for storing the other column information from your EasyTerritory export, if desired.
With our territories now in D365, we can move on to configuring the project plugin.
Step 4: Create a new workflow in D365. In this example, we’ll create it on Lead entity for the purposes of lead assignment.
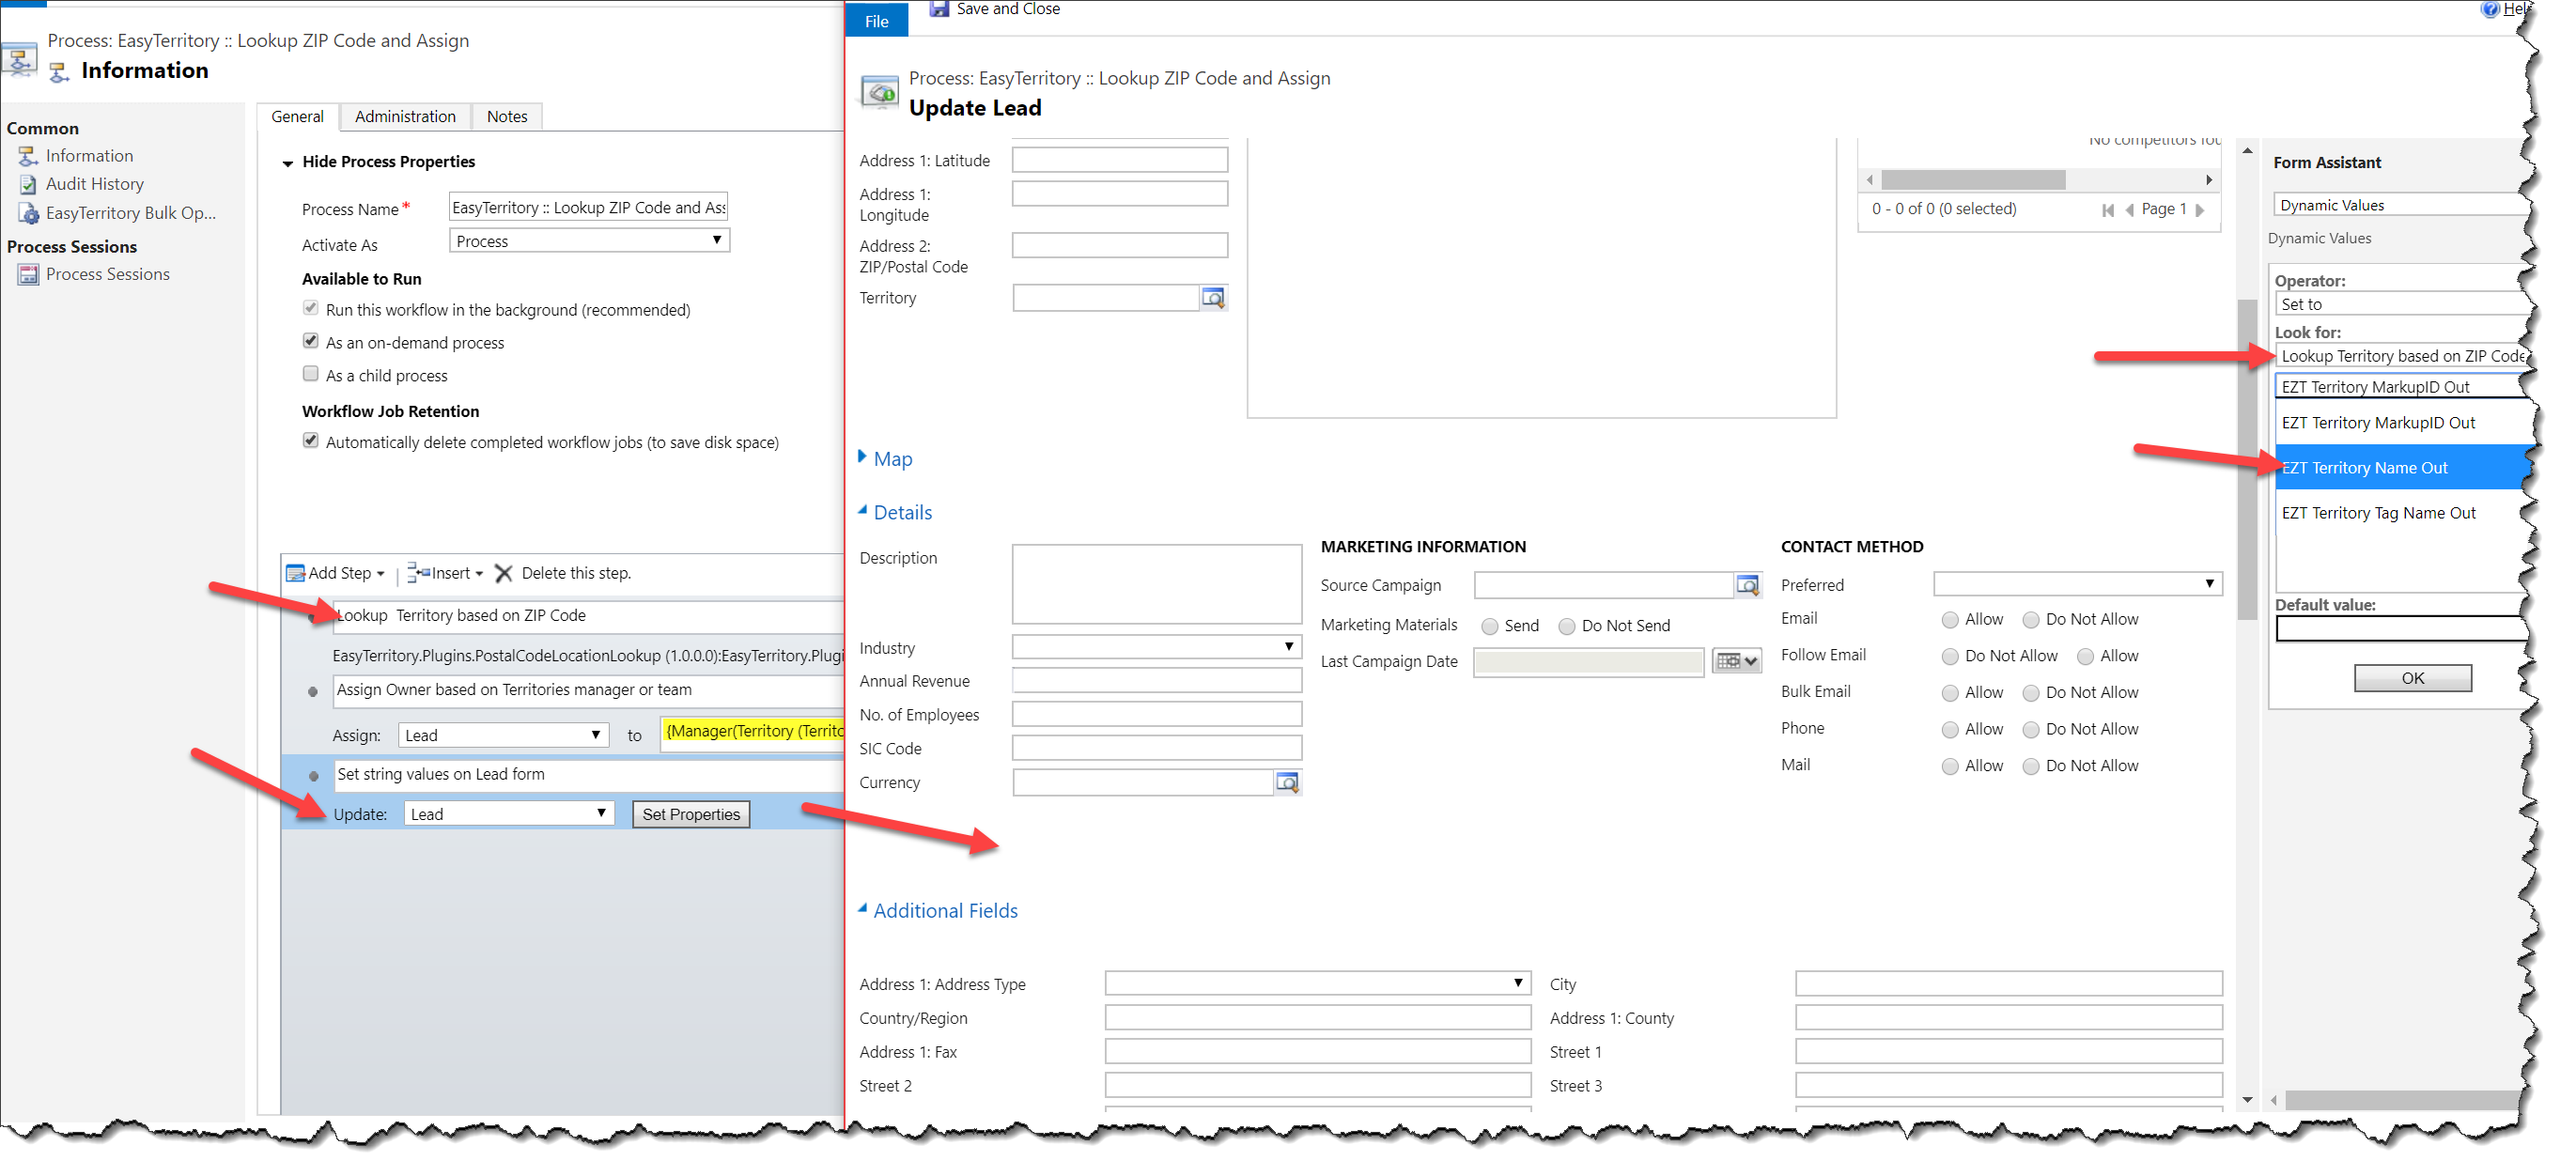
Add the ‘EasyTerritory.Plugins.PostalCodeLocationLookup’ plugin to your workflow.
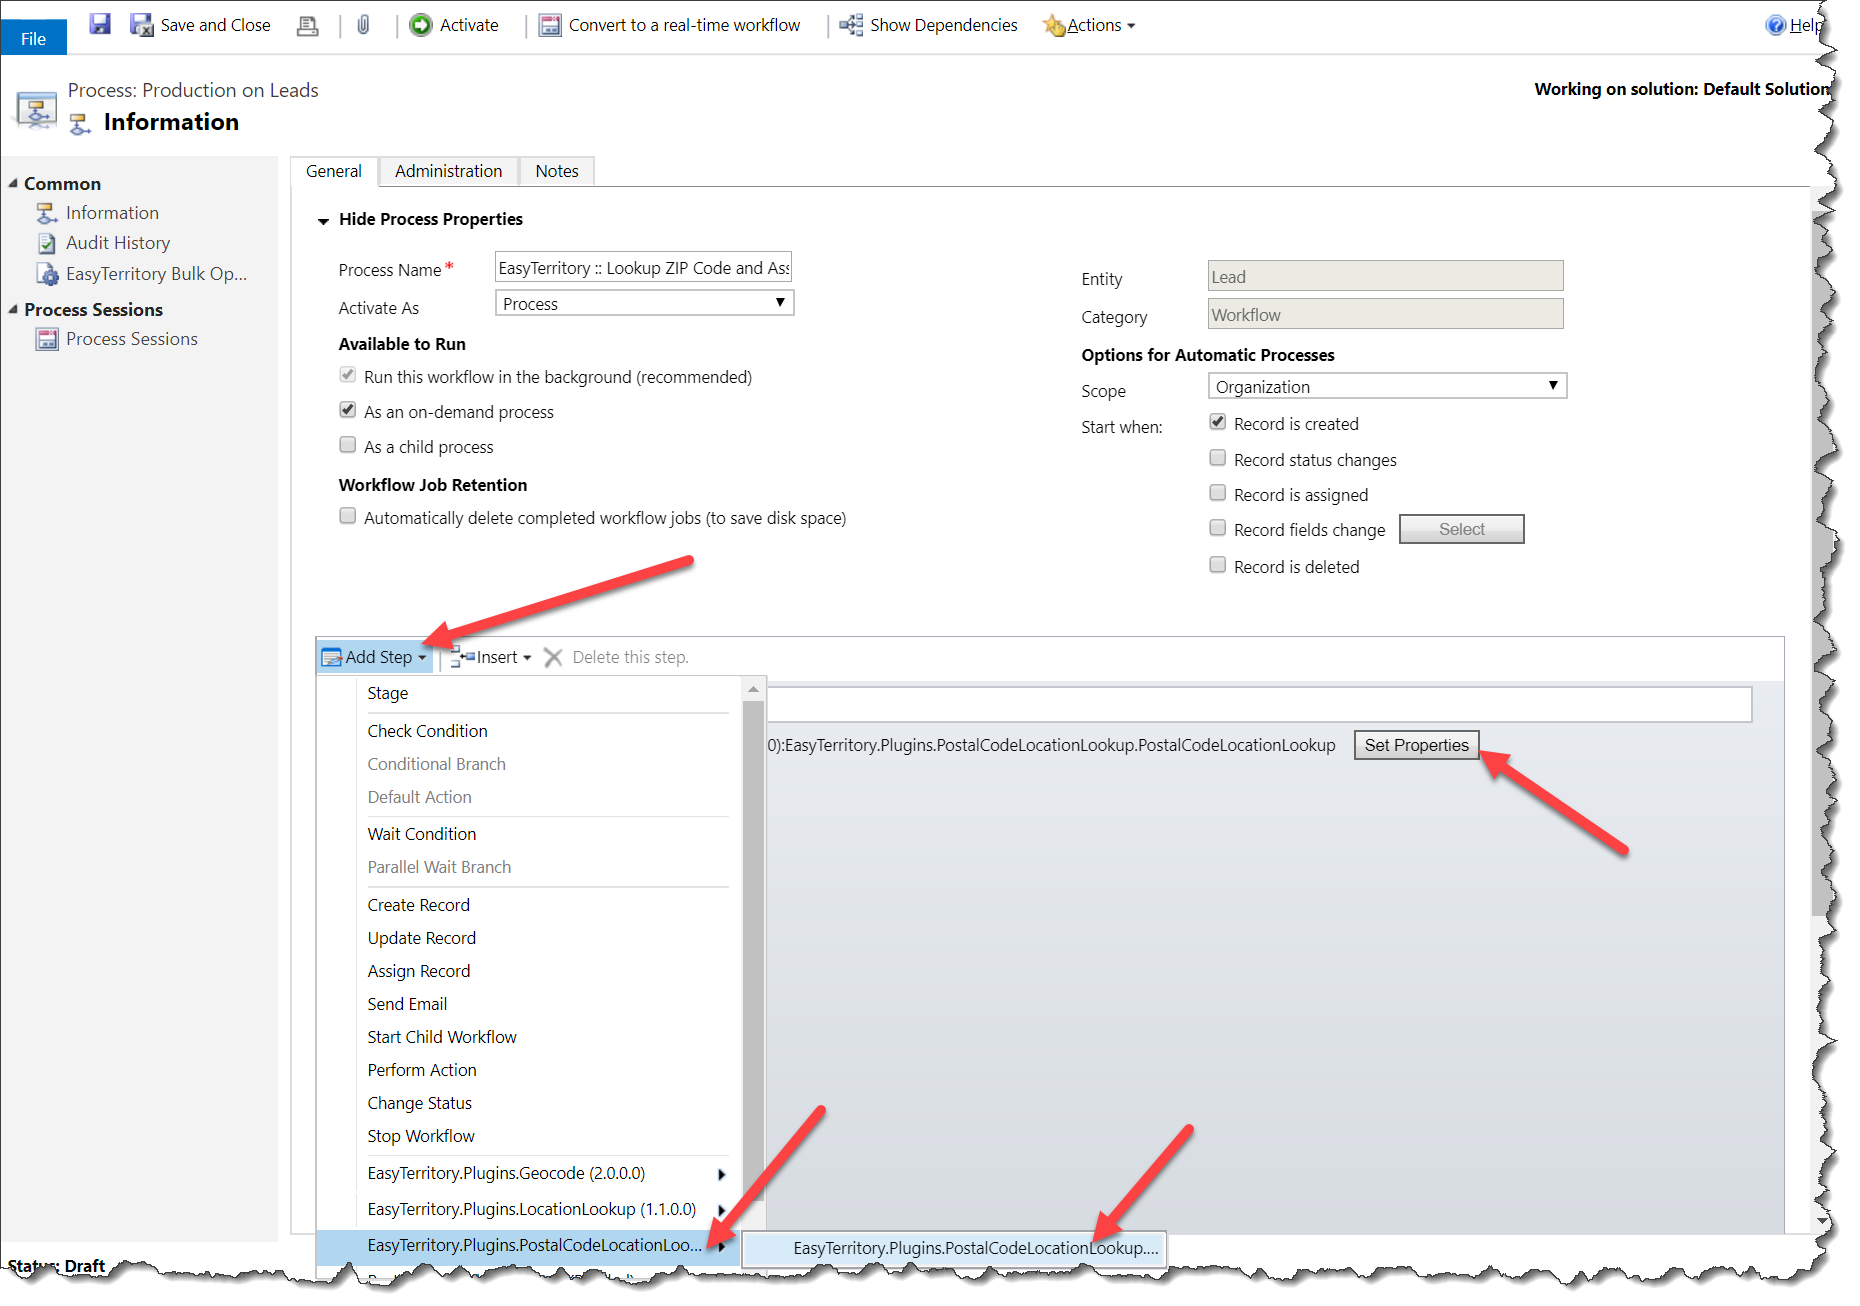
Click ‘Set Properties’ on the step and configure the properties of the plugin. See property definitions below.
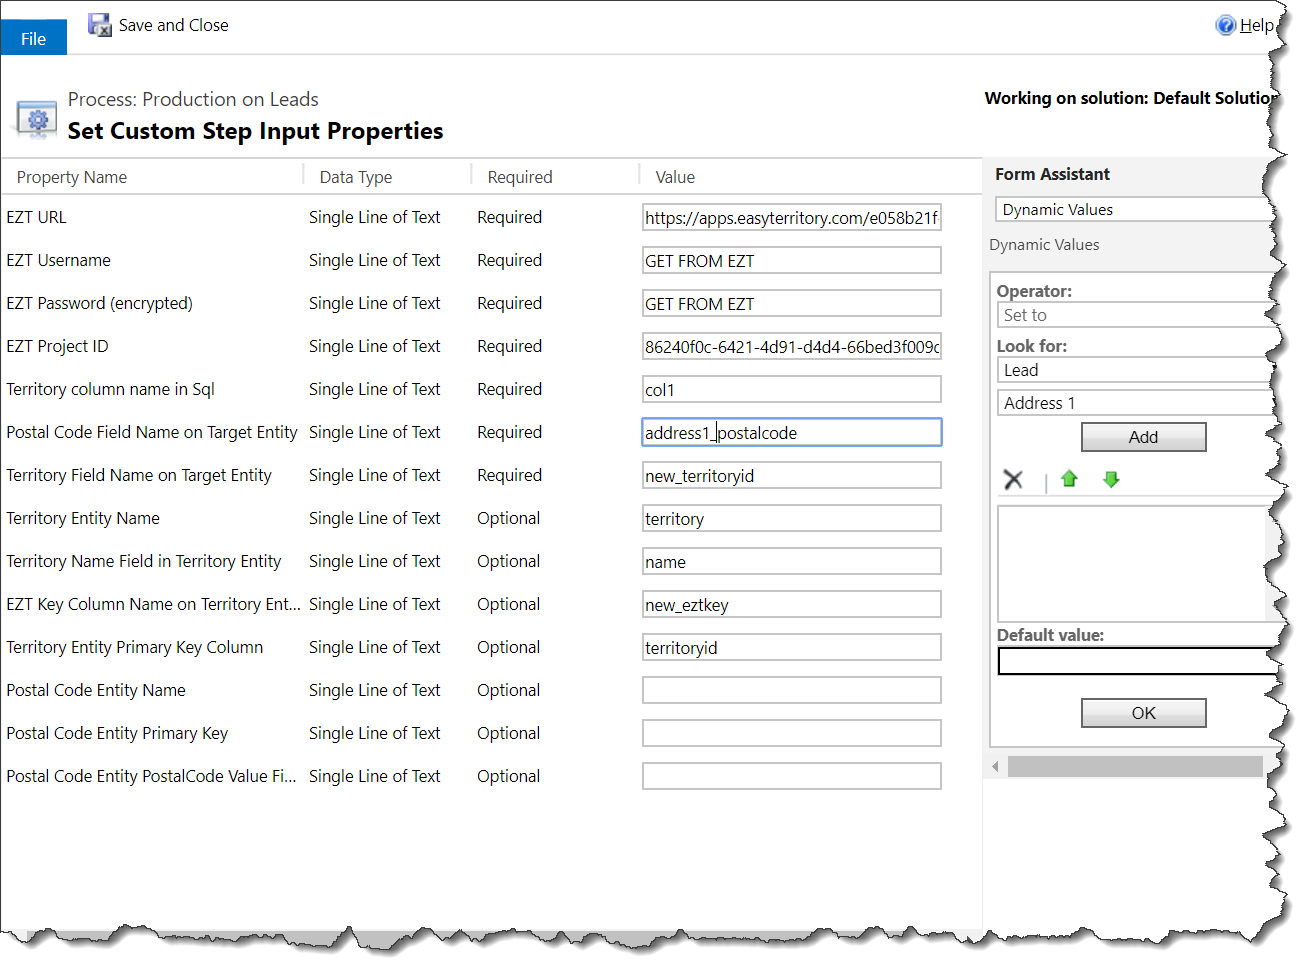
Use these four (4) properties if your ZIP Code field is a text (out-of-the-box postal code fields are text).
Use these three (3) properties if your ZIP Code field is a lookup to a customer ZIP Code entity where you’re storing a master list of ZIP Codes.
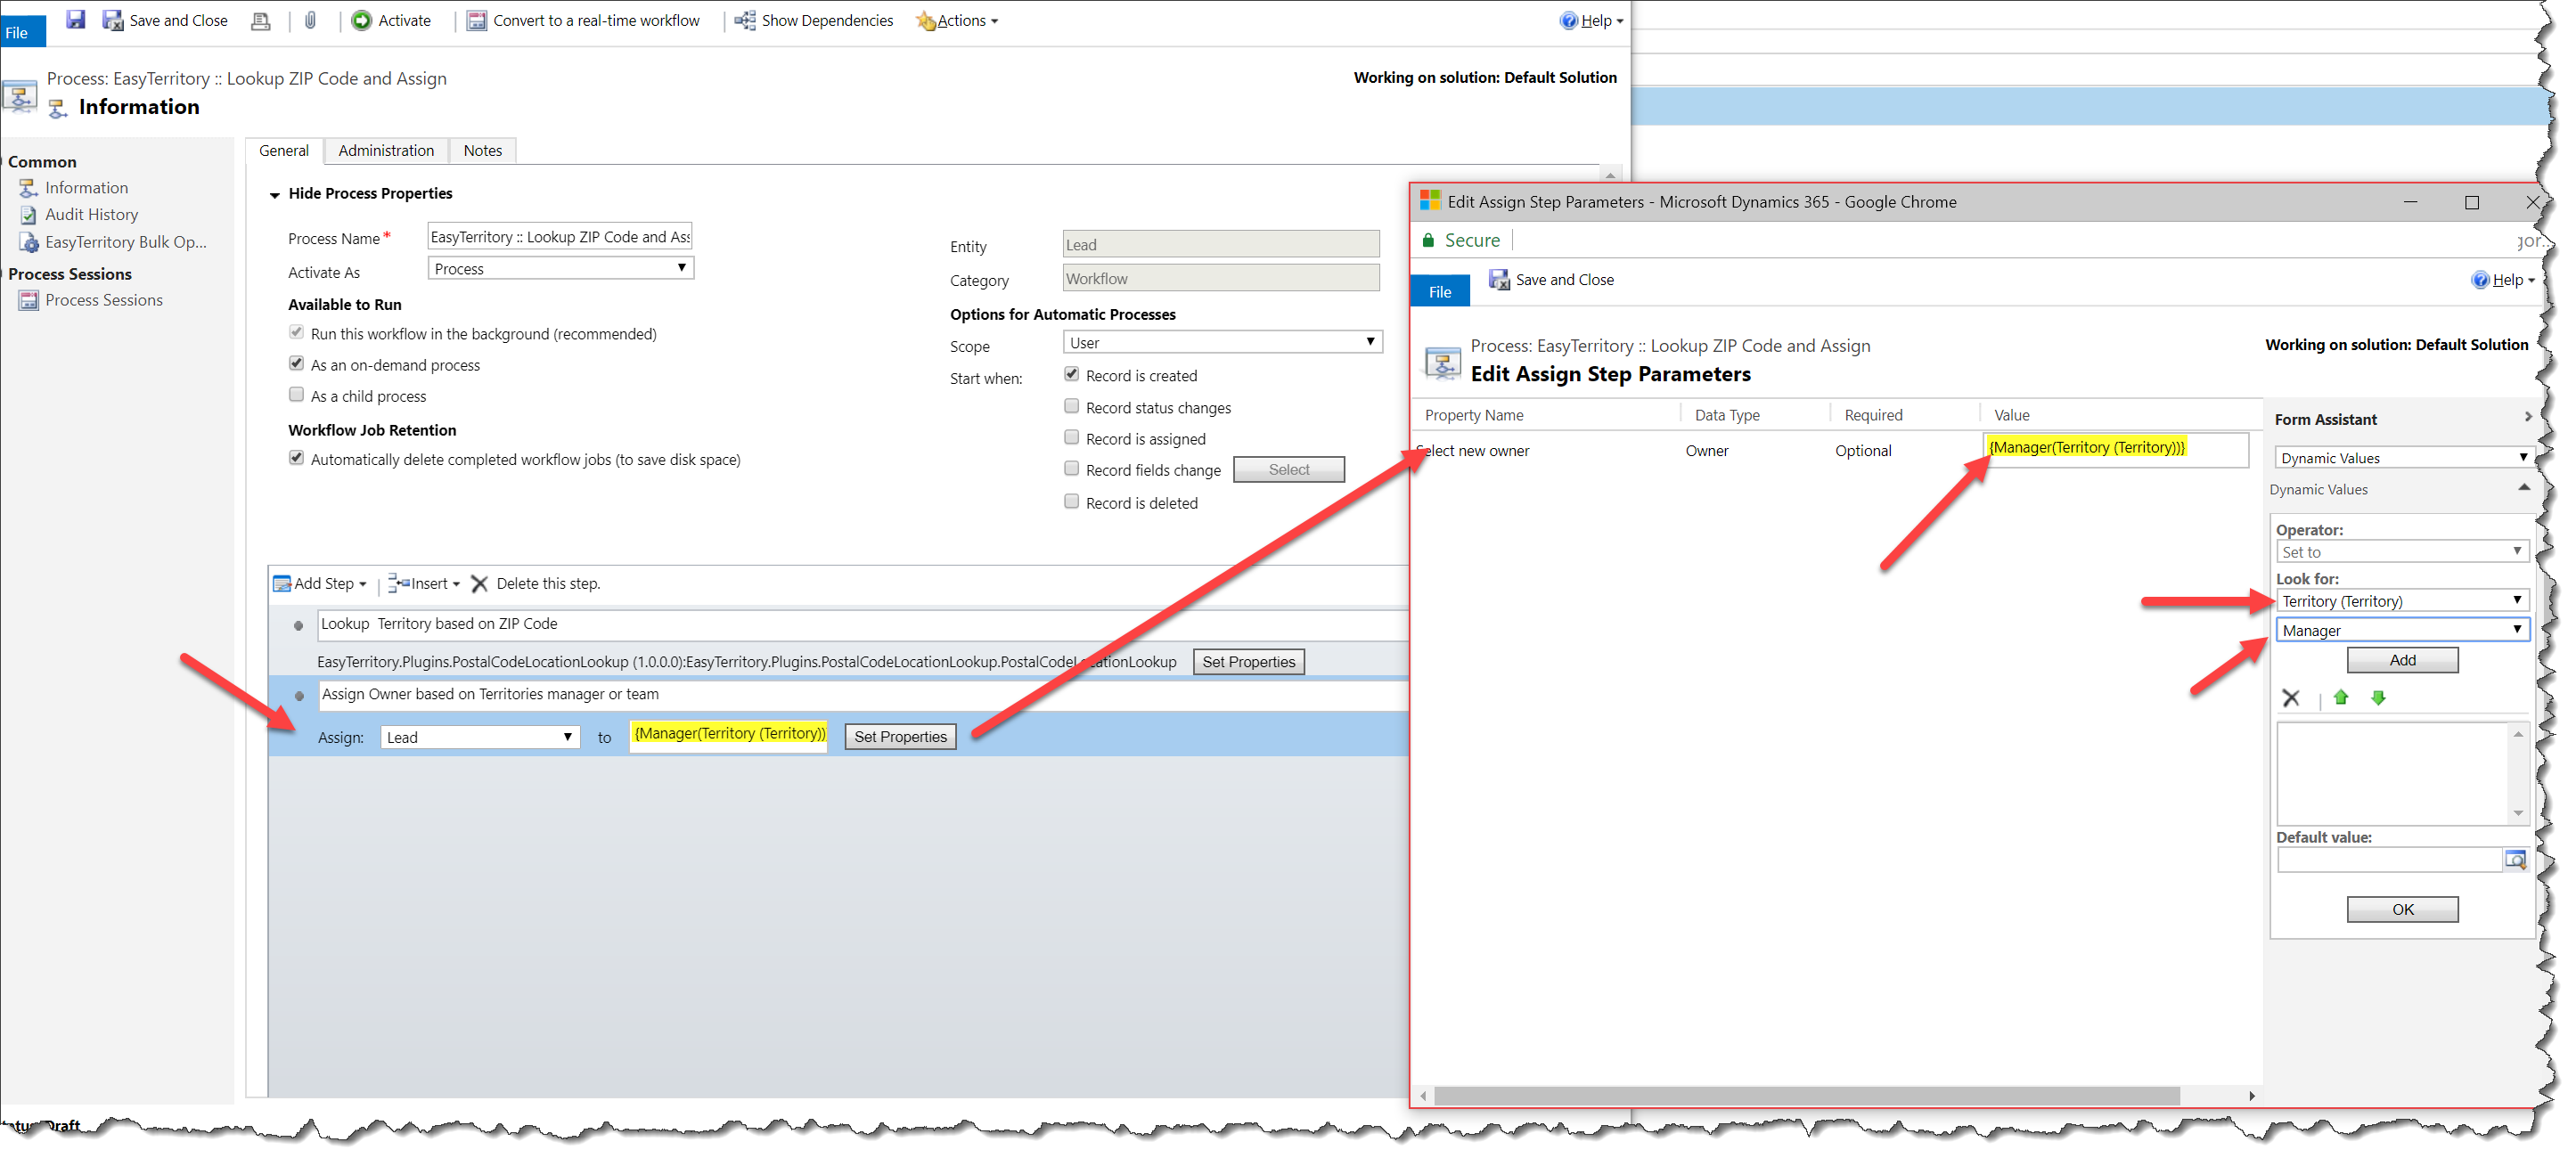
NOTE: In your workflow, you can add additional steps like assigning the Manager on the Territory record as the Assigned Owner on the Lead.
Additionally, EasyTerritory will return string values of the column defined as ‘Territory column name in Sql’ defined in the properties. This will allow you to set text field on an Update step within your workflow.
Step 5: Now that we have the workflow built, let’s test it!
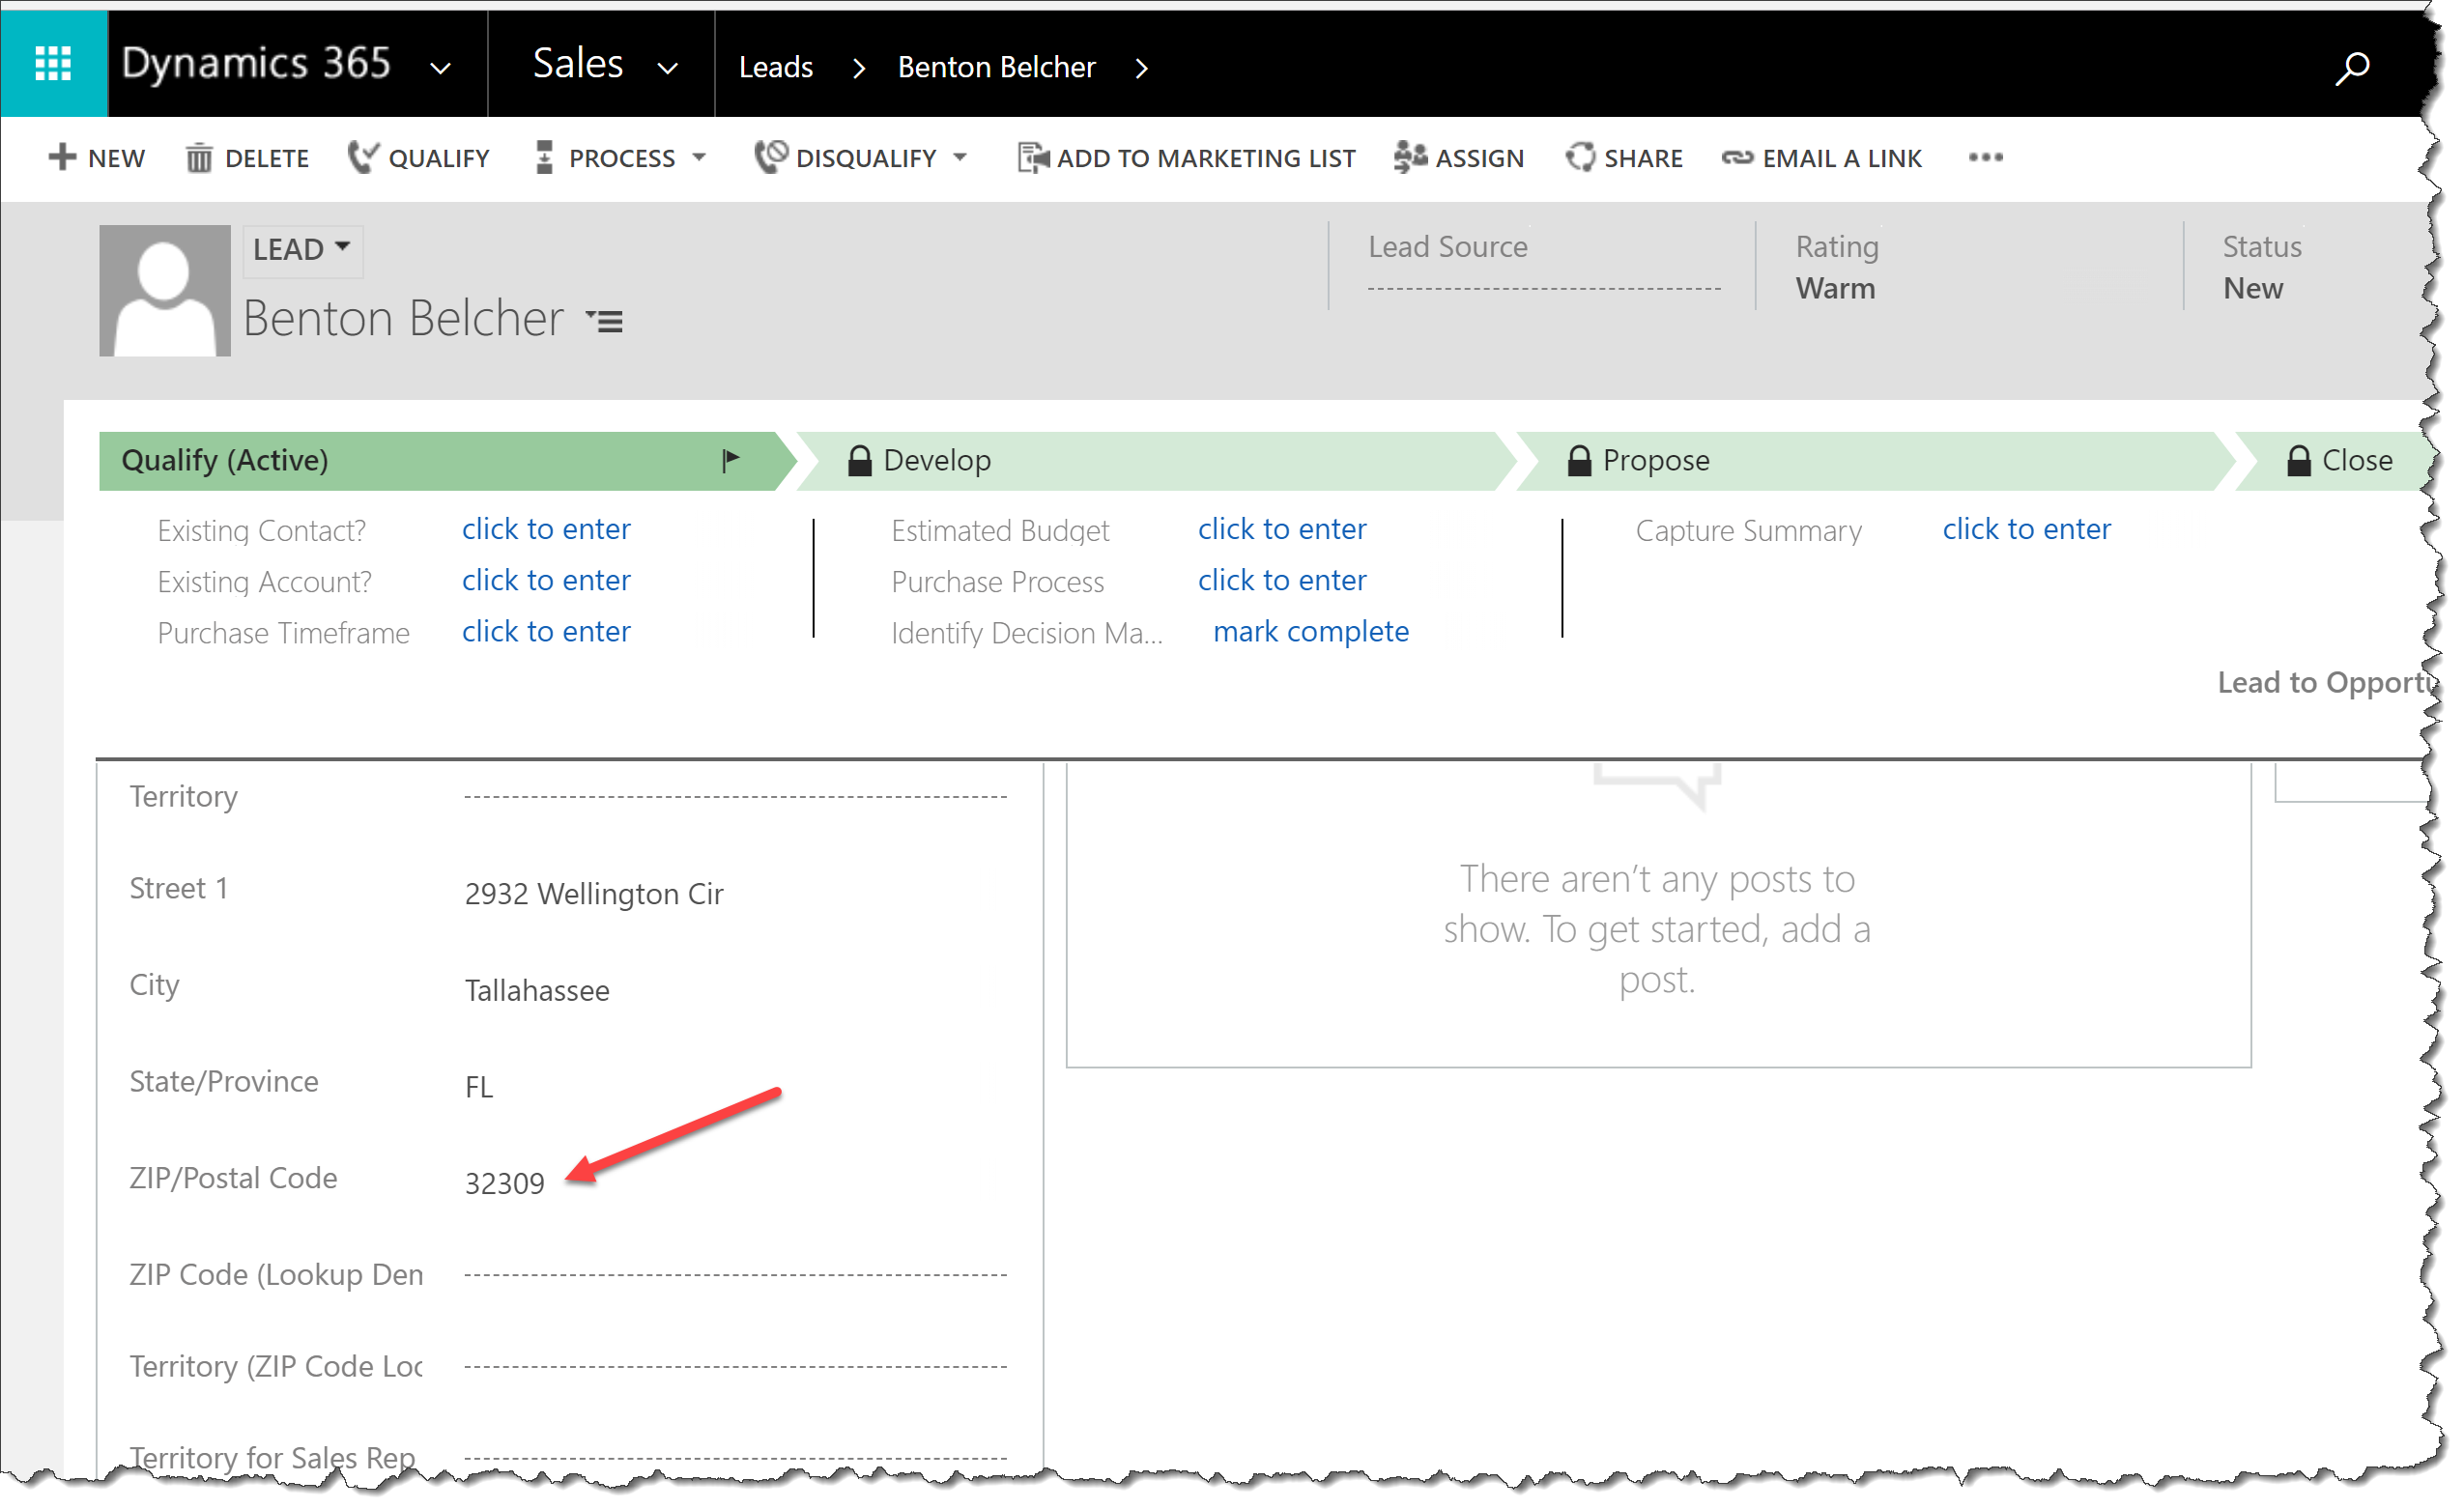
Create a new lead with an address that contains a ZIP Code from one of your defined territories.
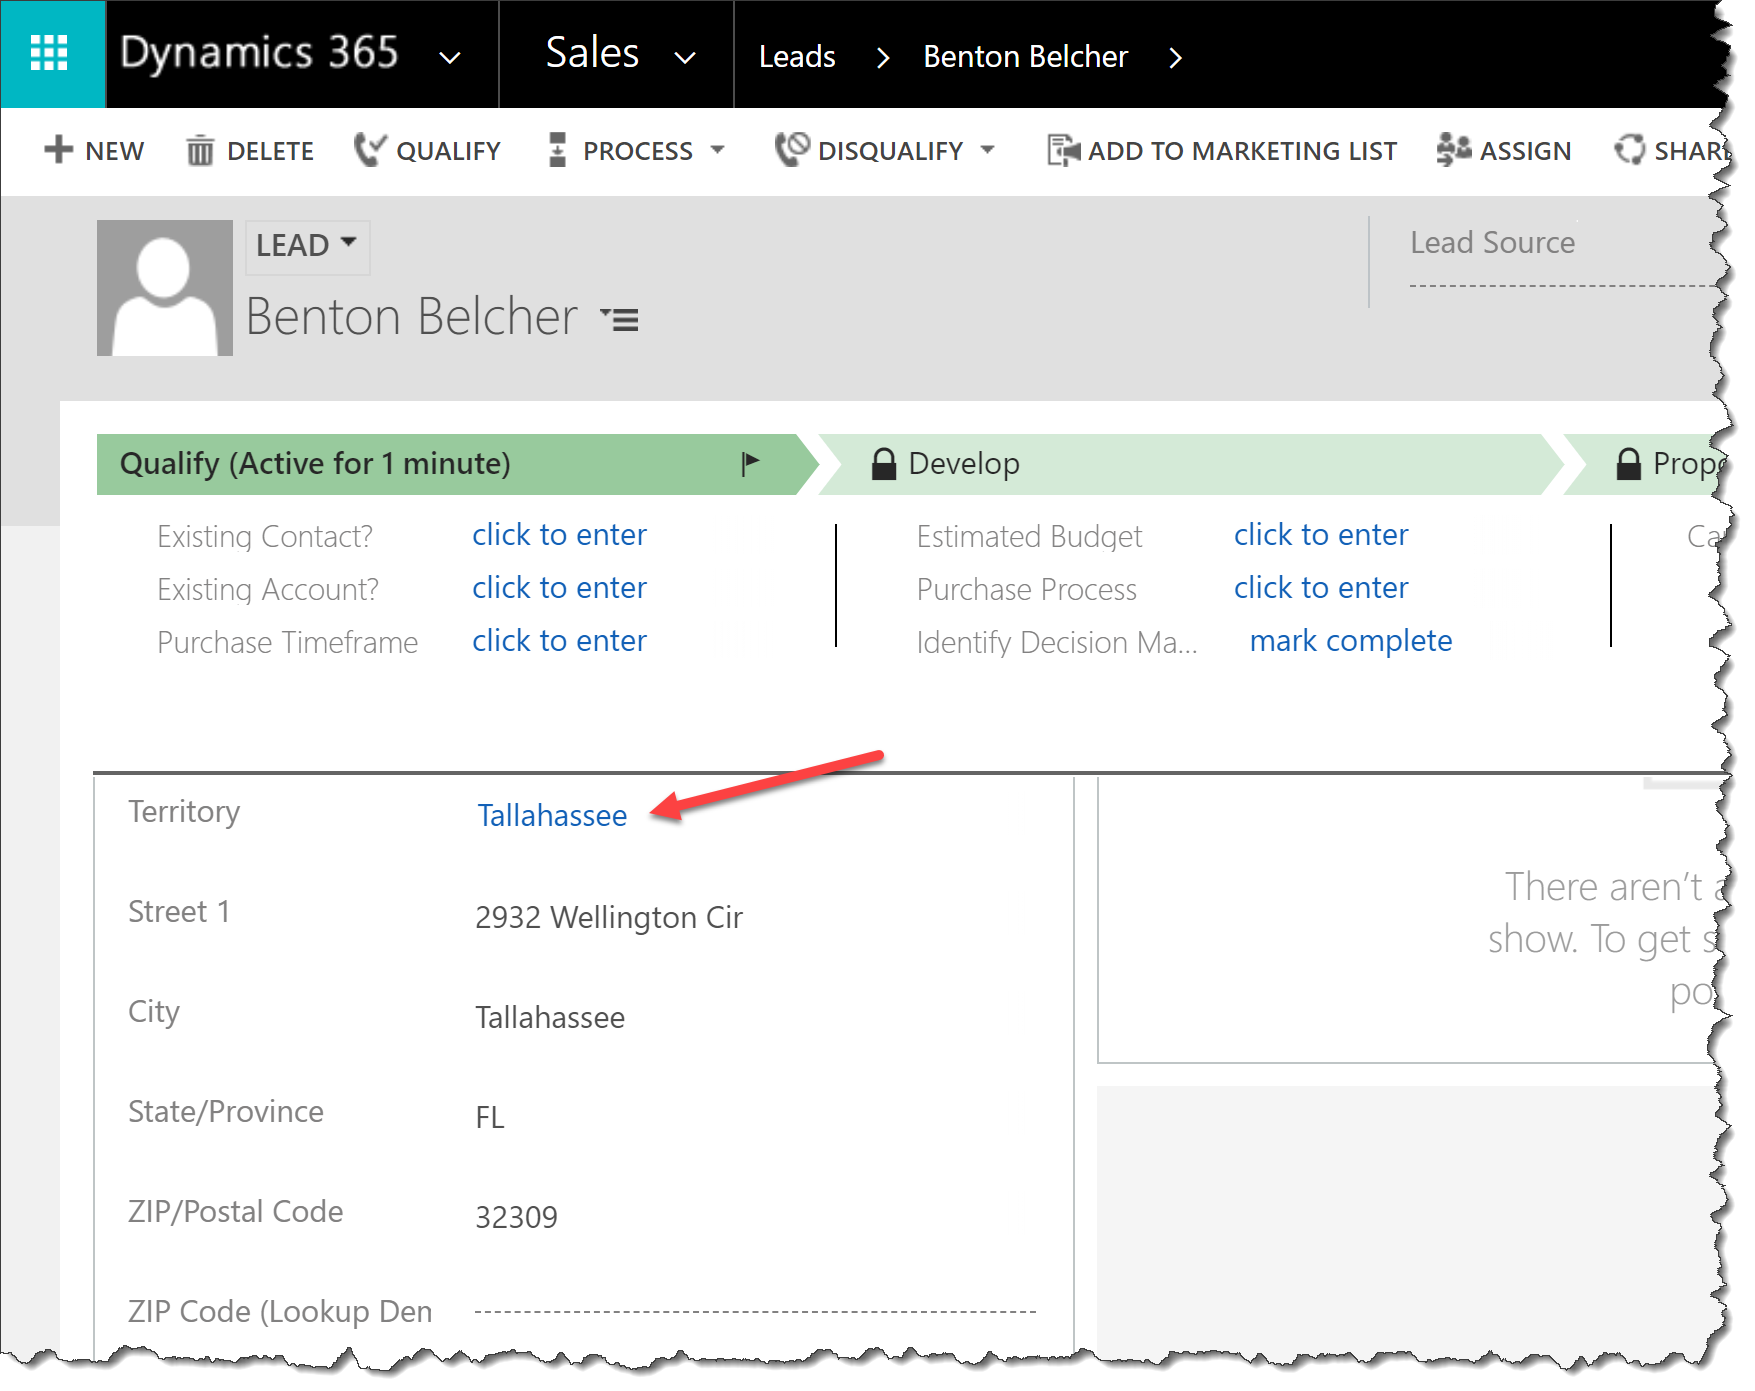
Once the workflow runs, the territory is set and the owner is assigned!
Step 6: The above example shows how to assign a territory to a Lead record and update the owner. One other use case that this addresses is a territory realignment. In the scenario where a new territory has been created or territories have been realigned, you can use the EasyTerritory Bulk Operartion utility to run your workflow in bulk. Using the Bulk Operation Utility is defined here.