
Getting Started
Get in Touch
Where we’re located:
We live, work, and play in beautiful Tallahassee, Florida.
Billing & Payment Mailing Address:
2910 Kerry Forest Pkwy, D4-282
Tallahassee, FL 32309 USA
We are SOC 2 Compliant

One of the benefits of EasyTerritory is the users’ ability to make their own territory data available for access through a REST API. This can be done using the Project Markup Plugin. Users can also use the plugin to create a layer in your EasyTerritory catalog that is based on your territory data.
The first step in setting up a ProjectMarkupPlugin is to create the source project. Users will simply build their territories in an EasyTerritory project using one of the geographric boundary layers, such as the ZIP/Postal Code layer, the Counties layer, or the State Boundaries layer.
NOTE: As in all EasyTerritory projects, territory hierarchies can be represented using Groups in the Markup Panel, as well as by using pipe dileniated values on the territory name:
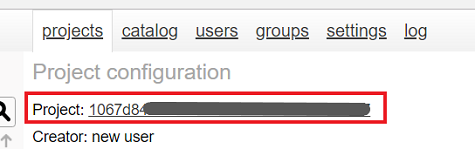
Once the territories are built, the user will need to obtain the Project ID for the source project. The Project ID can be found by going into the admin panel, clicking on the projects tab, and clicking on the source project.
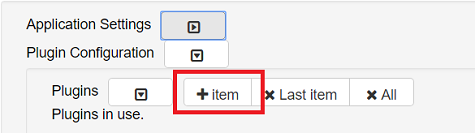
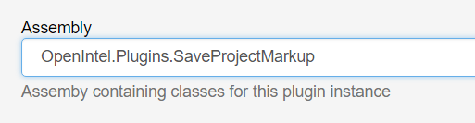
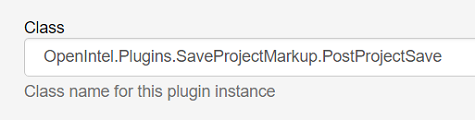
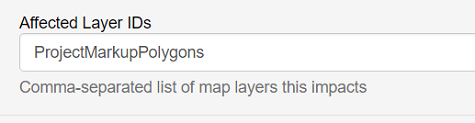
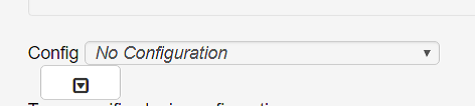
Once you have the Project ID, you are ready to setup the Project Markup Polygons plugin. The steps for doing this are as follows:
Once the Plugin is saved, the user will return once again to the source project. When clicking to save the project, a new check box should appear asking if the user wishes to run the Plugin.
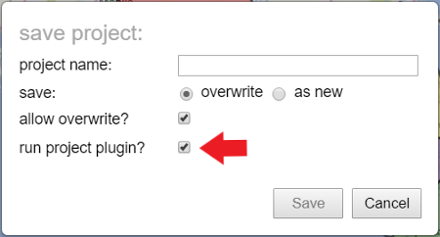
By checking the box and saving the project, the user’s territory data will now be saved to SQL Server and available for access through the REST API. As mentioned earlier, it can also be added to the user’s EasyTerritory catalog as a layer for other projects. Find the instructions for creating the custom catalog layer here.
For additional help please email: support@easyterritory.com