
Getting Started
Get in Touch
Where we’re located:
We live, work, and play in beautiful Tallahassee, Florida.
Billing & Payment Mailing Address:
2910 Kerry Forest Pkwy, D4-282
Tallahassee, FL 32309 USA
We are SOC 2 Compliant

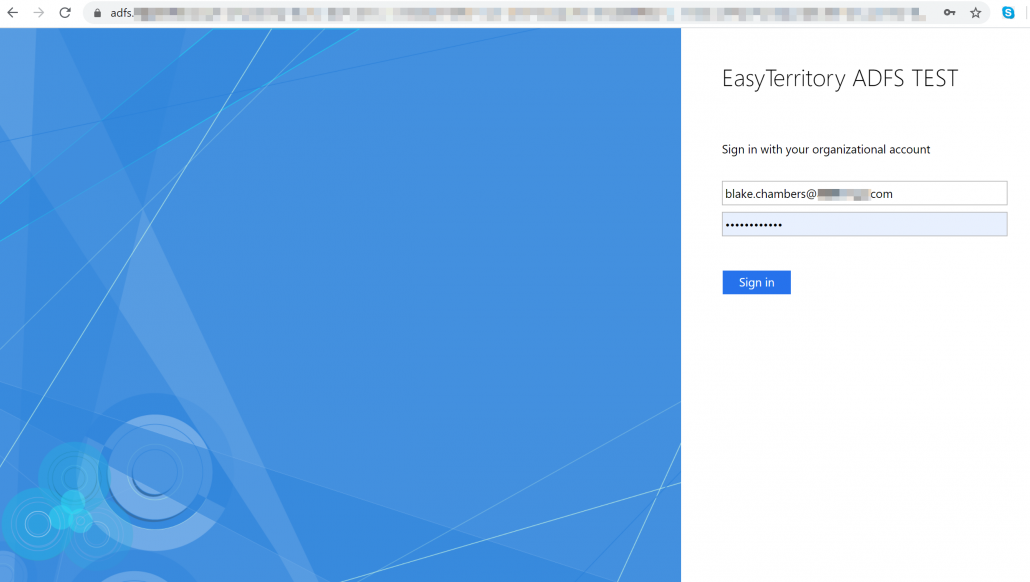
EasyTerritory (version 3.76.00+) supports Windows ADFS using OpenID- Connect authentication protocol. ADFS is a Single sign-on (SSO) feature that enables a user to login to the EasyTerritory application through ADFS sign-on page. ADFS will authenticate the user using Active Directory credentials and direct them to EasyTerritory to access the application.
The advantages of leveraging Windows ADFS with your EasyTerritory application are:
– Simple streamlined SSO access to your EasyTerritory application through company’s Windows ADFS sign-on page.
– Strengthens security with users not needing to remember additional usernames and passwords.
– Ability for companies to control users’ access to EasyTerritory within their Active Directory.
– User’s detail information is stored in Active Directory not in EasyTerritory.
– Supports multi-factor authentication (MFA).
– You will need to install ADFS on Windows 2016 or above.
1. On your Windows ADFS server, go into the ADFS Management Console

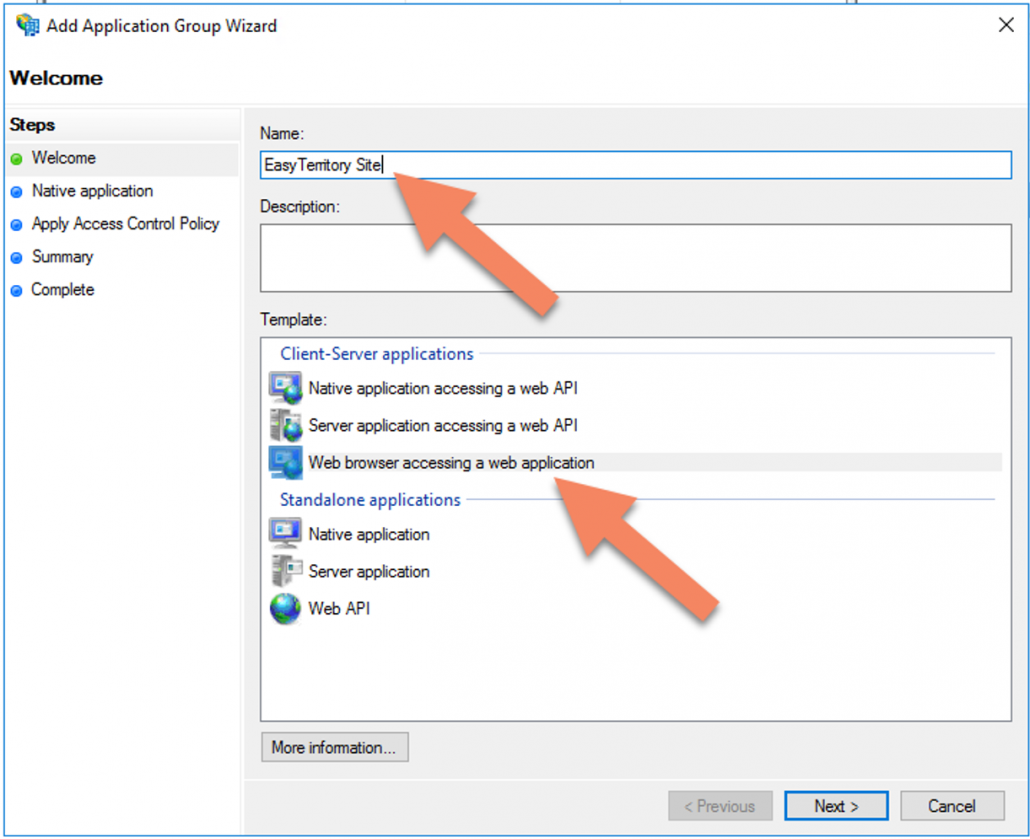
2. In the ‘Add Apllication Group Wizard’ enter the following:
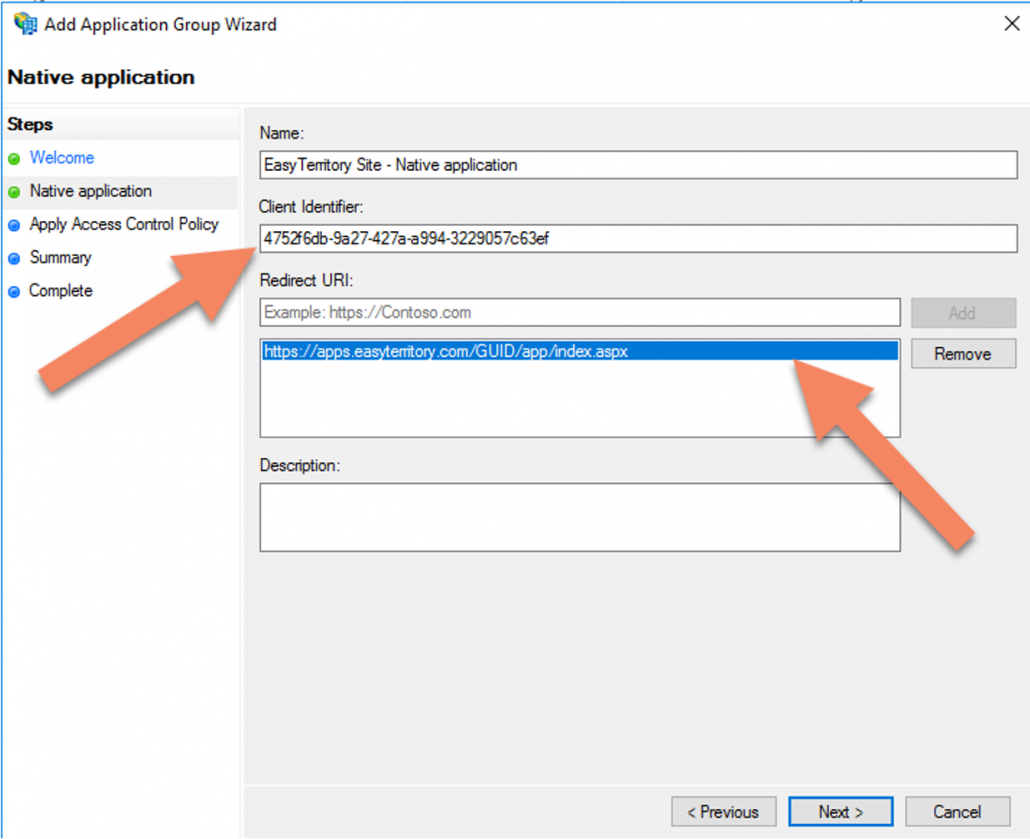
3. Click ‘Next’ and the following properties:
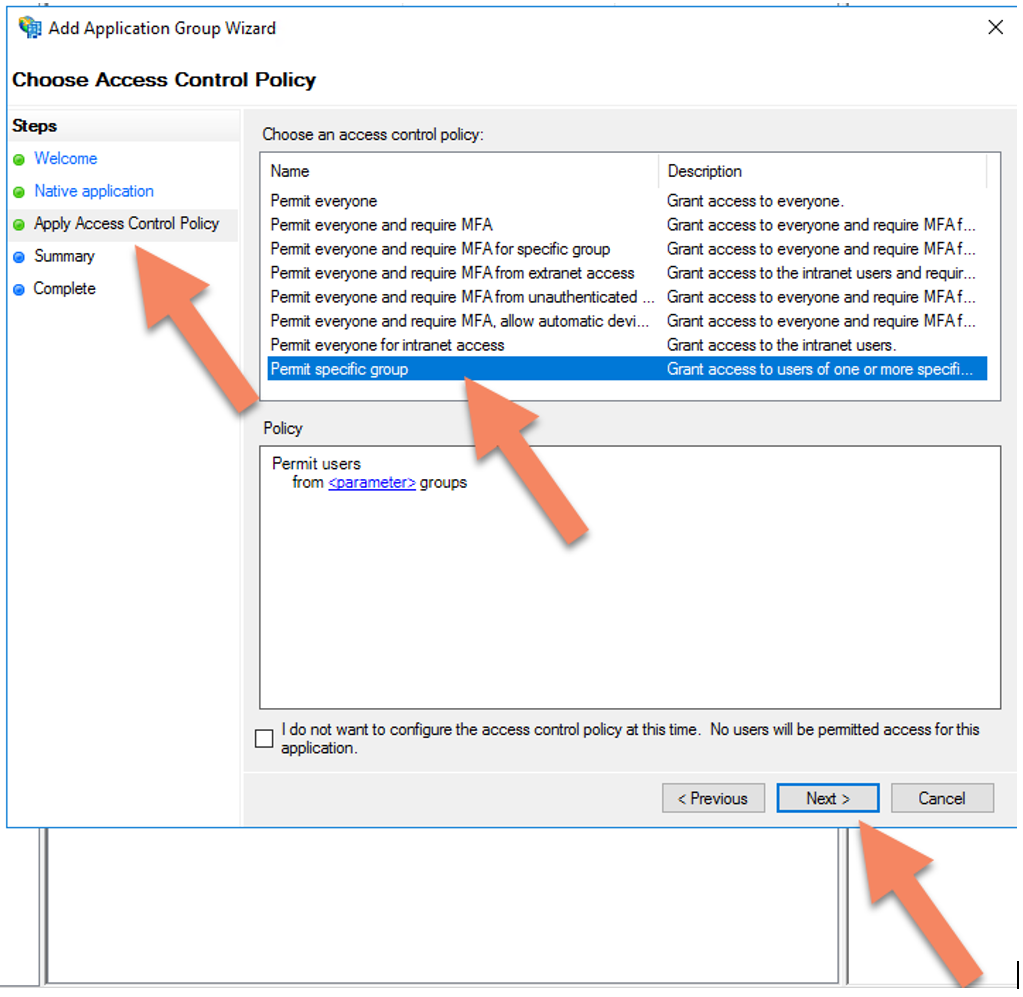
4. Click ‘Next’ and choose and access control policy (optional):
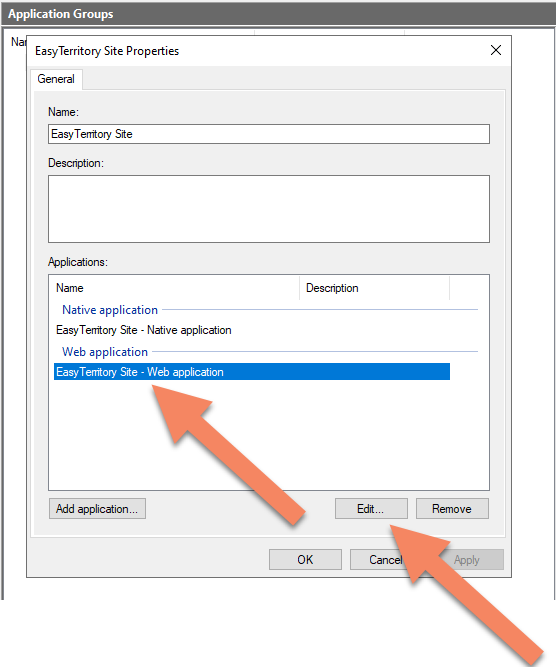
5) In the AD FS Management console. Select the target Application Group and in the properties console select Web Application and click edit.
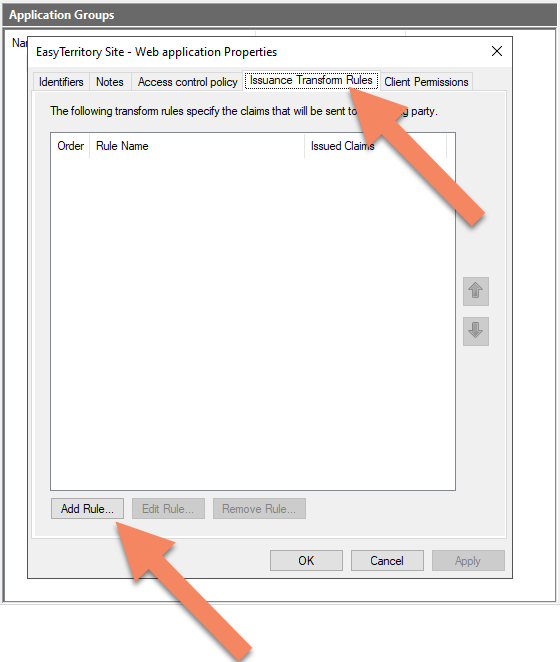
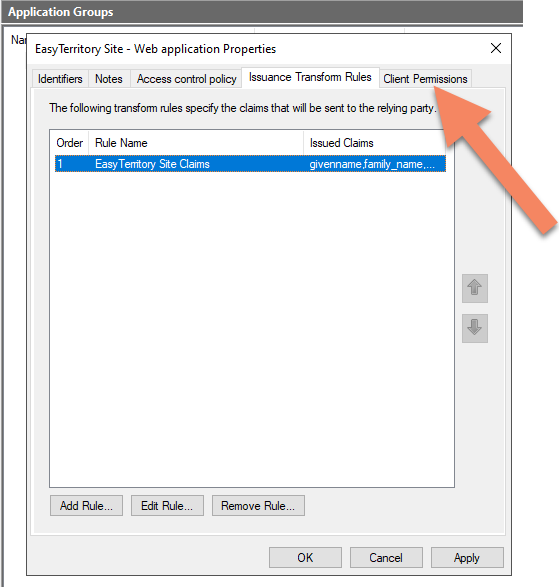
6) Back in the Web application Properties, select the table ‘Client Permissions’.
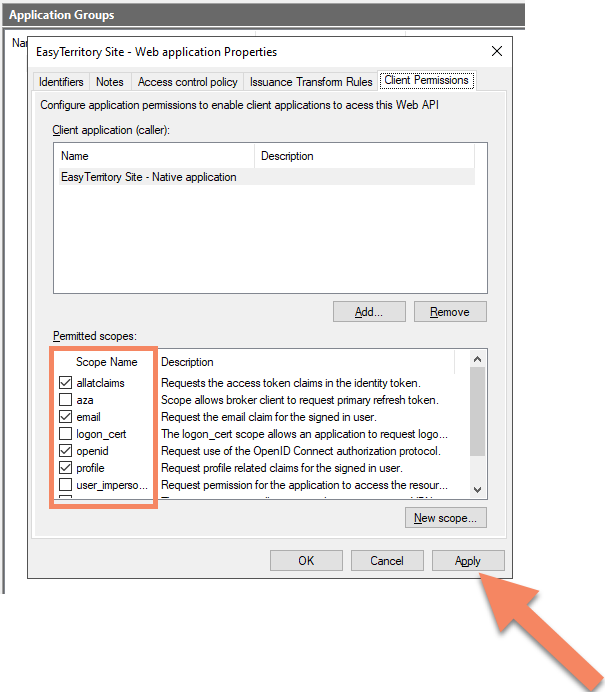
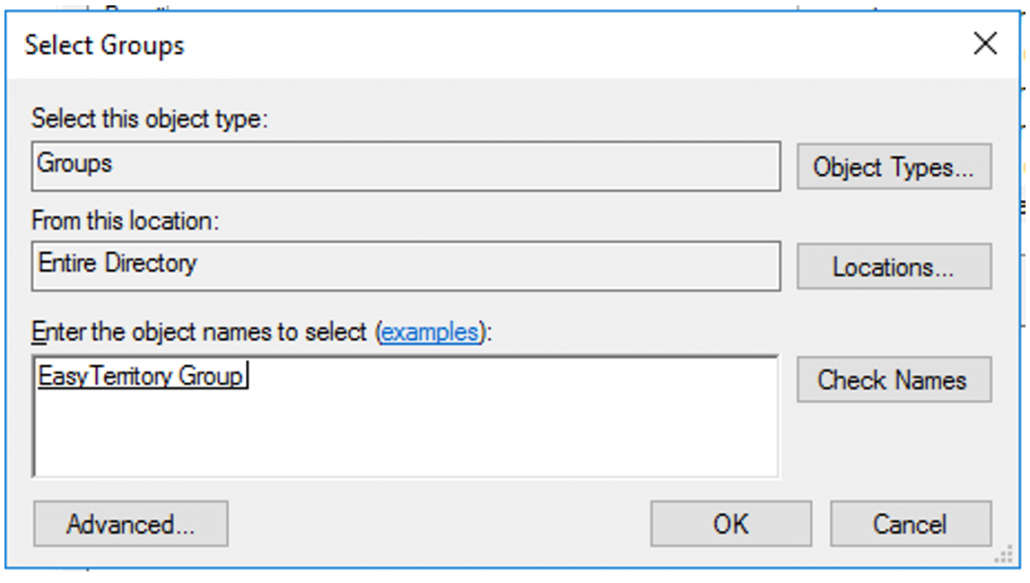
5. Select Application
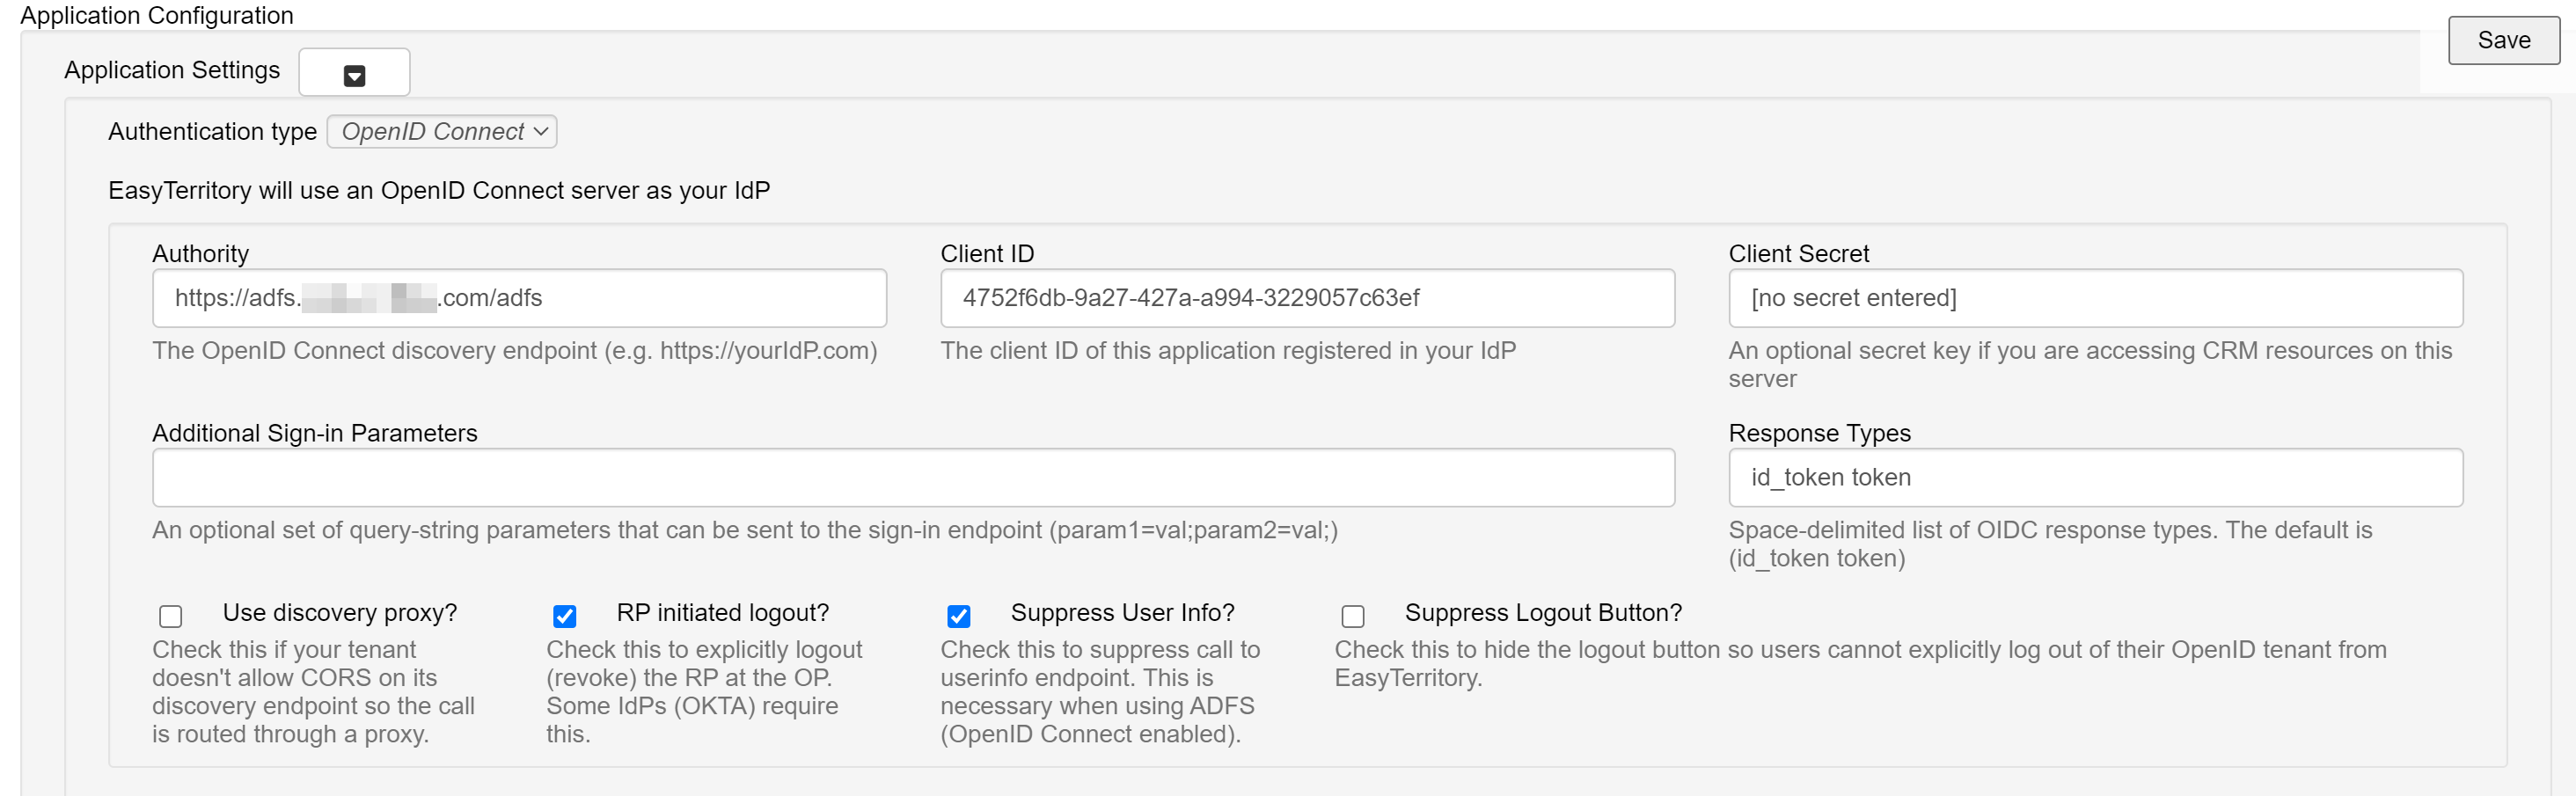
1. With an EasyTerritory ‘Admin’ account into EasyTerritory go to the admin settings panel and set the following properties. https://apps.easyterritory.com/GUID/app/index.html#admin
For any questions or support please contact us! support@easyterritory.com