
Getting Started
Get in Touch
Where we’re located:
We live, work, and play in beautiful Tallahassee, Florida.
Billing & Payment Mailing Address:
2910 Kerry Forest Pkwy, D4-282
Tallahassee, FL 32309 USA
We are SOC 2 Compliant

In addition to the various out-of-the-box geography layers that EasyTerritory has for users to add to their projects, EasyTerritory also supports the ability for users to add to their catalog a custom layer composed of territory boundaries built in an EasyTerritory project.
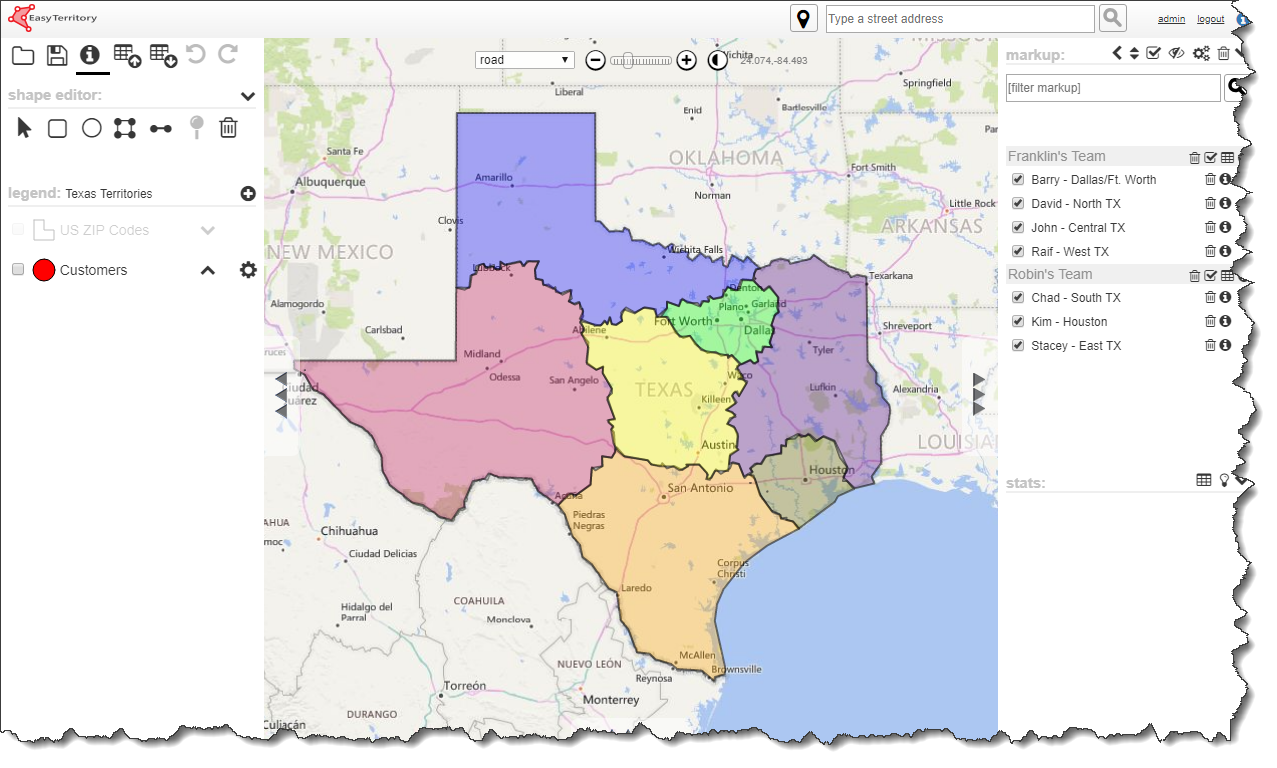
Before a user can add a custom layer to his catalog, he must first create the project that he wishes for the layer to be based on. For example, the user may wish to save a project with territories built based on ZIP Codes like this project in the state of Texas:
The next step is to setup a Project Markup Plugin using the Project ID for the project that the user created. Find the instructions for setting up the Project Markup Plugin here.
The user will next need to add the layer to his catalog. The layer can be either client-side or server-side, though the user will only have the ability to edit the colors of the layer if it is client-side. Find instructions for adding the client-side layer or the server-side layer here.
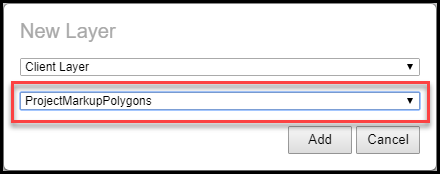
When selecting the MDN layer to use, click on “ProjectMarkupPolygons” in the dropdown:
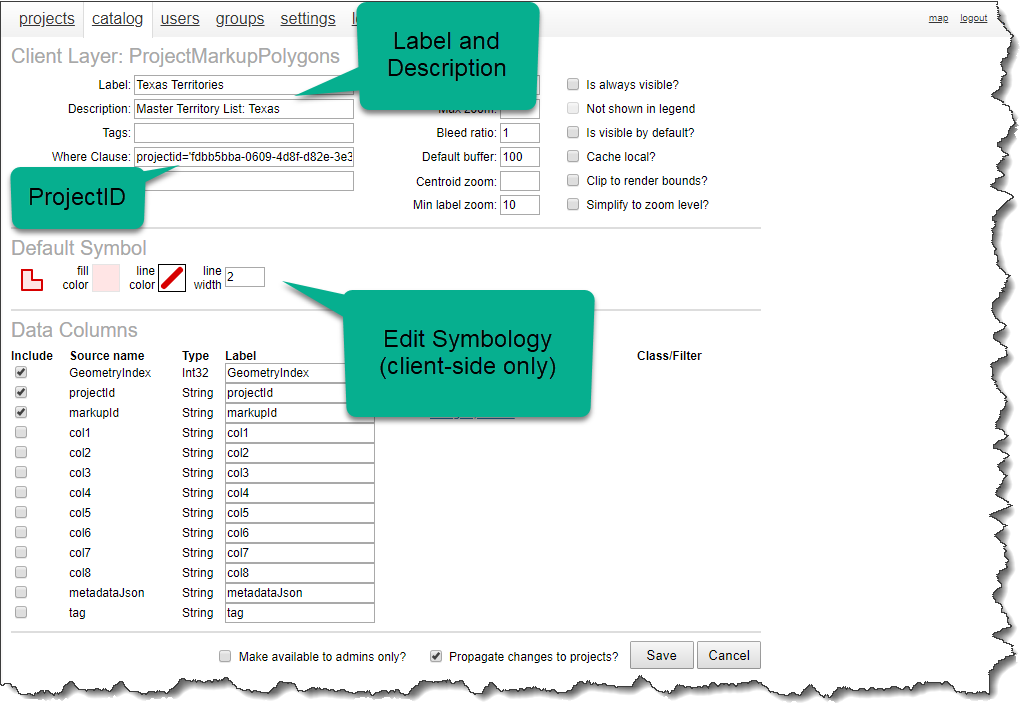
The user must add the Project ID of the source project as a Where Clause, and he can then update the label, description, symbology, etc. if he desires:
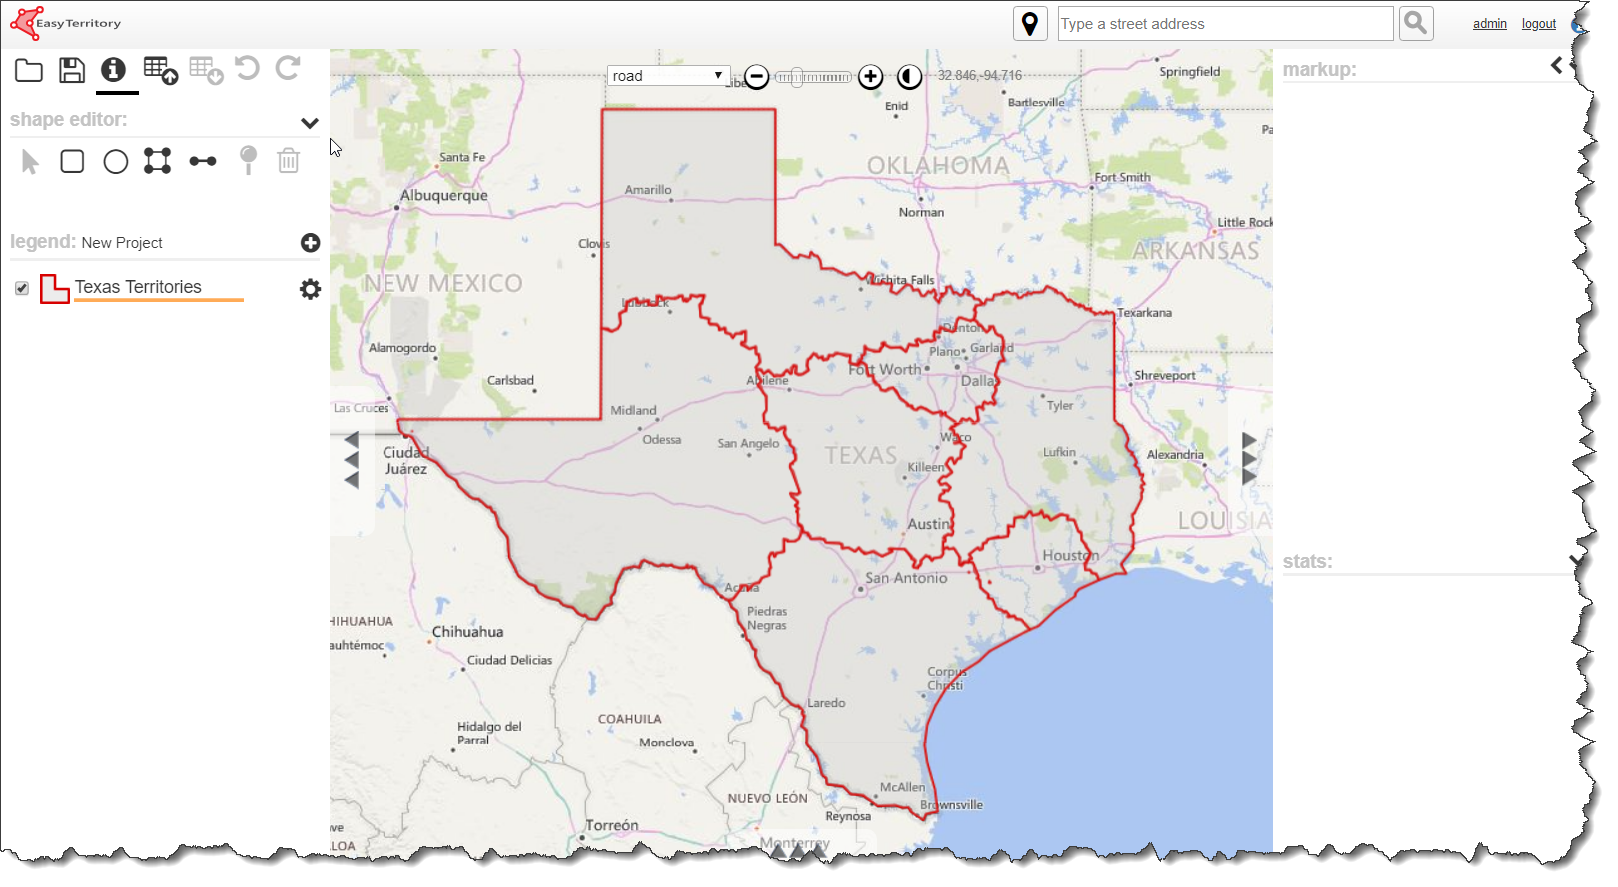
Once the user saves the ProjectMarkupPolygons layer, the polygons in the Markup Panel of the source project will be available in the catalog to add to any other project that the user creates. If the source project is saved with “run plugin” checked, any updates to the project will be reflected in real time for any project using the layer.
For additional help please email: support@easyterritory.com