
EASYTERRITORY ANNOUNCES APRIL 2017 RELEASE
The April 2017 release of EasyTerritory (v2.72.3) is available now. This release is packed full of exciting new features customers have been asking for. We will take a detailed look at some the new features below. If you are ready to upgrade, please contact your EasyTerritory account manager today.
- New BI-only mode
- New convert a custom layer to a catalog layer
- New custom point layers and add-point support
- And much more!
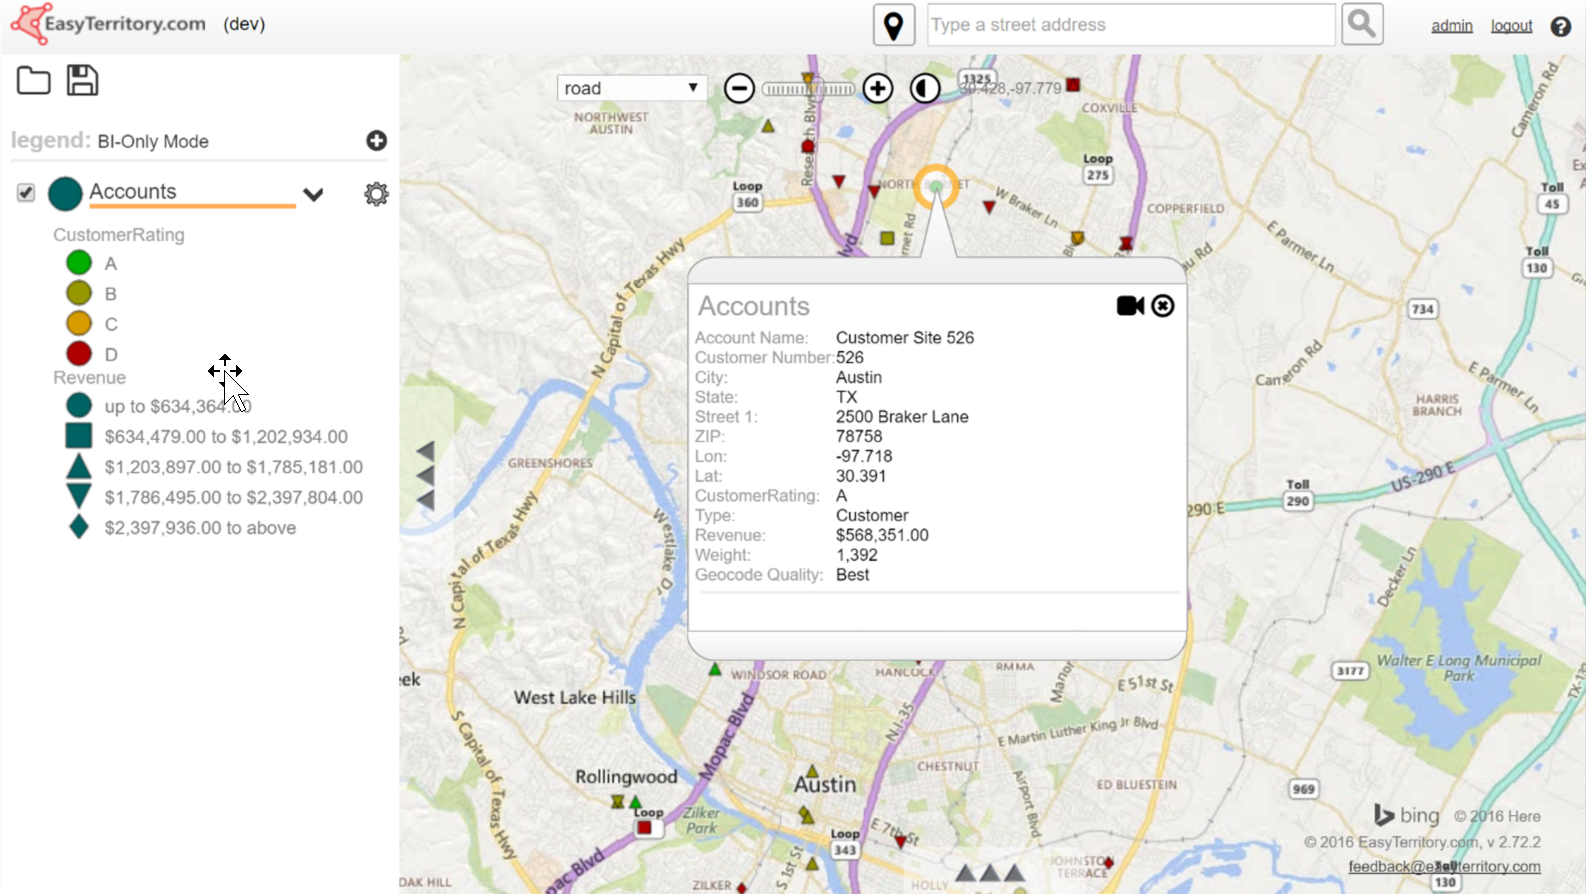
The new BI (Business Intelligence)-only mode allows deployments into scenarios where users have had minimal exposure to the vast feature-set of EasyTerritory. Such scenarios include public-facing applications where users only need to view shared data without requiring the sales productivity or territory management capabilities. In this mode, the mobile view, shape editor and markup panel are hidden and all importing and exporting is disabled. Read-only projects can be set up and pre-configured for users to open and view. Full access to the settings panel for classification and filtering is available and features on the map can still be queried and identified by clicking on them.
NEW MOUSE-HOVER OVER MARKUP
In previous versions of EasyTerritory, you had to select a markup shape to know which item it was in the markup panel. Now when you move the mouse over a markup polygon, such as a territory, its name will be displayed in the lower-left of the screen for quick reference.
DELETE ALL MARKUP NOW ALLOWS YOU TO SPECIFY “ALL” OR “ONLY VISIBLE”
When you click the delete-all icon in the markup panel you will now be prompted to either delete only markup with visibility enabled or all markup regardless of visibility-state. This provides a convenient means to delete large subsets of markup.
CONVERT A CUSTOM LAYER TO A CATALOG LAYER
This powerful new feature for our April Release allows a custom layer to be converted into a catalog layer. Let’s recap: custom layers are layers created by one of the following means:
- You upload a CSV/spreadsheet of points (addresses or latitude/longitude locations)
- You create a custom data-join layer from a spreadsheet and a catalog layer
- You open a project from a Dynamics CRM fetch XML view
- You add a new custom point layer (see below)
These custom layers are created from datasets loaded into a user’s project. As such, they are only available in the project they are created in. If you need to share data from a custom layer, previously you had only two options. The first was to make your project available to other users. However, this is not always desirable as other users might want to see the same data differently than how you configured it in your project (e.g. symbology, classifications, filtering, etc.) The other option for Enterprise users was to save a custom layer in a project to a SQL Server table which is shared as a regular catalog layer with other users. Yet this approach is more complex and requires a SQL table for access along with several configuration settings in EasyTerritory.
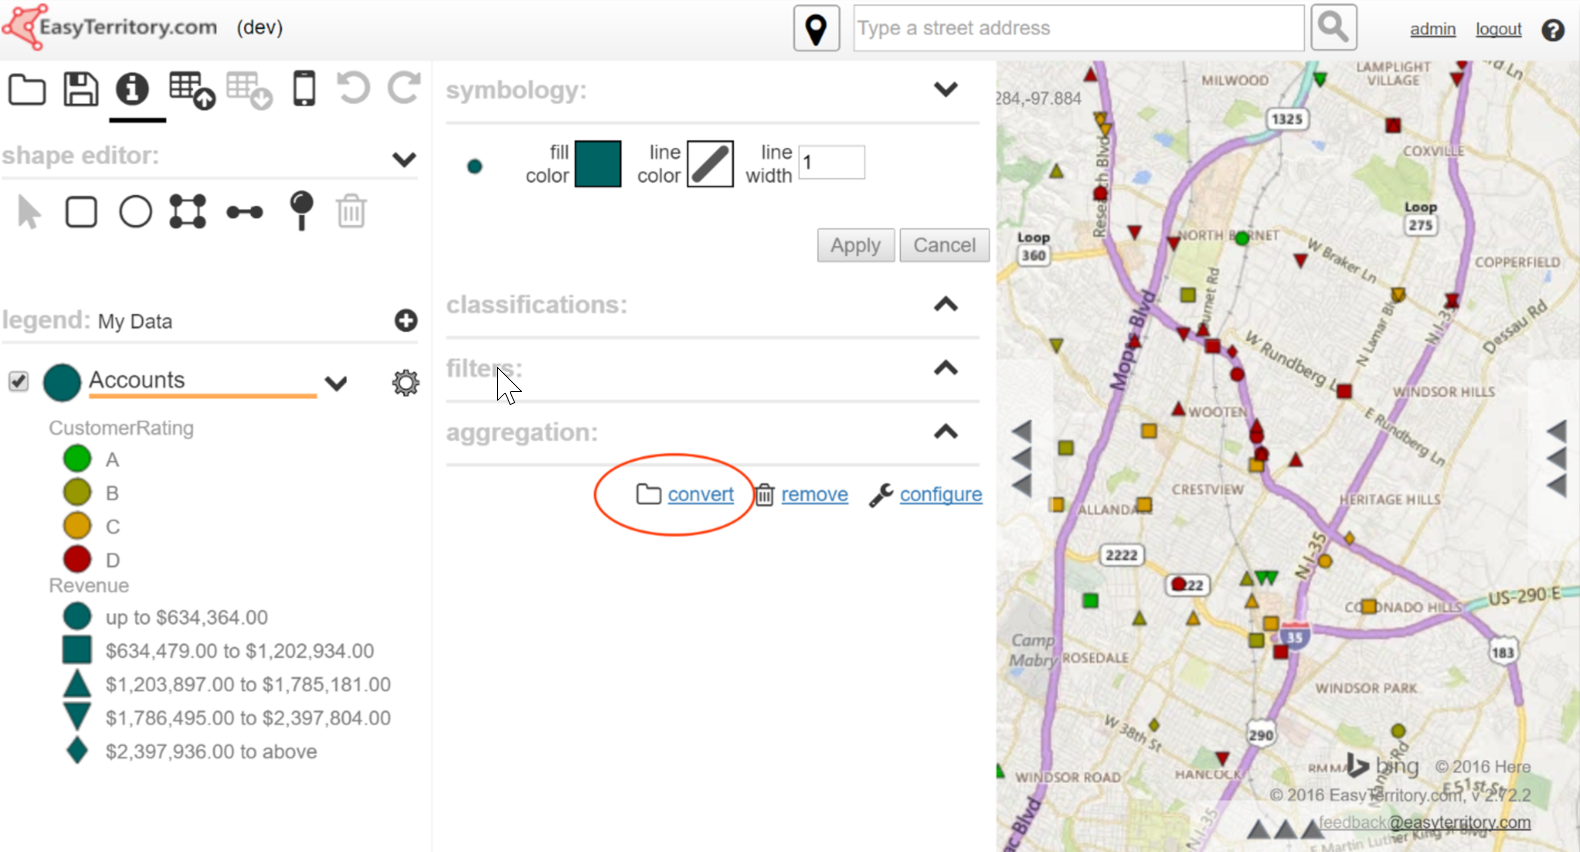
In our April 2017 Release, administrative users can now convert a custom layer into a catalog layer. By doing this, other users can add the catalog layer to their personalized projects independently. The administrator may at any time modify the custom layer in his or her project and update the associated catalog layer on save. This is useful, for example, if you are managing a set of customer locations and need to add new customers or relocate and delete others. Updates to the custom layer in the catalog are immediately reflected in other user’s projects incorporating the catalog layer upon next open.
This may seem like such a convenient feature that it should be used in all sharing scenarios. But this is not the case. Here are the reasons why you might not want to use the convert custom layer to a catalog layer feature:
- You have a very large CSV or join dataset (> 10K records). Keep in mind the entire catalog is loaded into the client’s browser at start-up. Keeping the catalog download footprint small will reduce the user’s start-up time. However, a small number of reasonably sized custom layers in the catalog will not noticeably affect start-up time.
- You want the dataset available to some users but not others. Catalog layers can only be flagged for general access or admin-only access. If you have groups of users needing different access to datasets, you will need to use group support which allows controlled access of specific projects to groups of users.
Here are the scenarios where you should consider converting a custom layer into a catalog layer:
- Your CSV upload or join dataset is not very large
- Your custom layer comes from a Dynamics CRM Fetch XML call. These layers never store the data in the catalog (or project) as the records are always fetched from CRM on project-open using the user’s CRM credentials. These custom layers can be freely added to the catalog without concern for catalog download footprint.
- You want all users to have access to the dataset
- You need to periodically edit the data but do not have the system administrative authority or tools to configure a SQL table and all of the ancillary support in EasyTerritory.
NEW CUSTOM POINT LAYERS

Users can now add one or more custom point layers to their projects. This allows you to build location datasets on the fly or flag important locations in a project. The custom layer can be queried, classified, filtered, analyzed and exported just like any other data layer. To add a new point to a custom point layer, use the new pin icon in the shape editor. Just select the pin and click on the map. Once the pin is dropped you will be prompted to edit the label field and optionally others.
NEW REMOVE OPTION IN SETTINGS PANEL TO REMOVE A CUSTOM LAYER
If you add a custom layer to your project, you no longer have to open the rolodex to remove it there. There is a new link at the bottom of the settings panel to remove a custom layer.
SETTINGS PANEL IS NOW AVAILABLE TO REGULAR ADMINS
Previously the admin setting panel was only available to the super-admin. This restriction has been loosened to allow regular admins access to these settings. It is recommended you use the encryption option for plugin connection strings, especially if you have multiple administrators.
REALIGN TERRITORY NOW SUPPORTS THE ABILITY TO “REALIGN TO REMOVE”
In past versions of EasyTerritory, if you realigned a zip code, for example, out of a territory, you had to place in in another territory or a new shape. This created two steps if you only wanted to delete it. You had to realign to new and then delete the new shape. There is now a third option presented to the user to realign the shape for removal.
NEW ALL-STATISTICS SUPPORT FOR POLYGONS LOADED INTO THE RESULTS-GRID
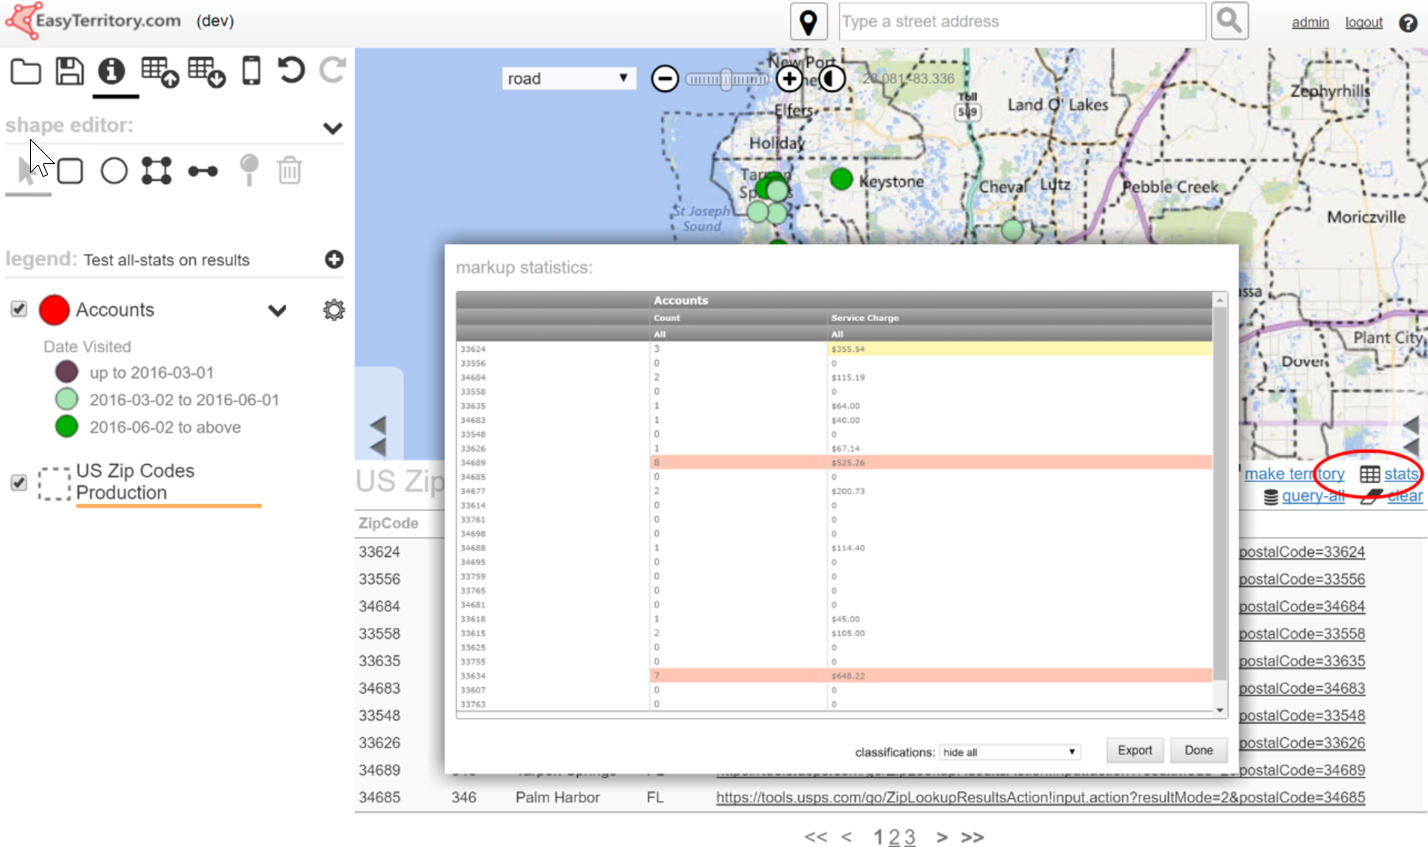
The all-statistics feature previously only worked on polygonal markup and was useful for territory realignment. In our April Release, we have added this capability to the BI side of the product. You can now query a set of polygon features from a layer (e.g. geographic, political or territory boundaries) and get instant shape statistics across all point features in your project.
RANGE CLASSIFICATIONS AND FILTERS NOW HANDLE NON-NUMERIC CHARACTERS
In previous versions if you set up range classifications the underlying data is expected to be numeric. We now handle formatted string data (e.g. money format) so that you do not have to scrub this data prior to loading into EasyTerritory.
ALL CSV EXPORTS NOW SUPPORT DIRECT-TO-CLIENT
Prior to the April Release, CSV download datasets were first uploaded to the server and the user was provided a download link. This was helpful in that the link could accessed later to download the file again. However, the downside was long delays uploading and downloading the file. Very large files greater than 10MB would take a noticeable amount of time to make the roundtrip. In the April Release this feature has been reworked to write directly from the client to the user’s download folder. This greatly improves transit time and allows for much larger (up to 500 MB) CSV downloads.
