The following documentation explains how to set up a territory lookup workflow within SugarCRM. Territory lookups can be very useful in two scenarios: territory realignment and lead/account ownership assignment. The EasyTerritory Territory Lookup Plugin for SugarCRM will automatically set the ‘Assigned To’ field on a record based on the territory’s set ‘Assigned To’ value.
Follow these steps to setup the EasyTerritory Territory Lookup workflow plugin within SugarCRM
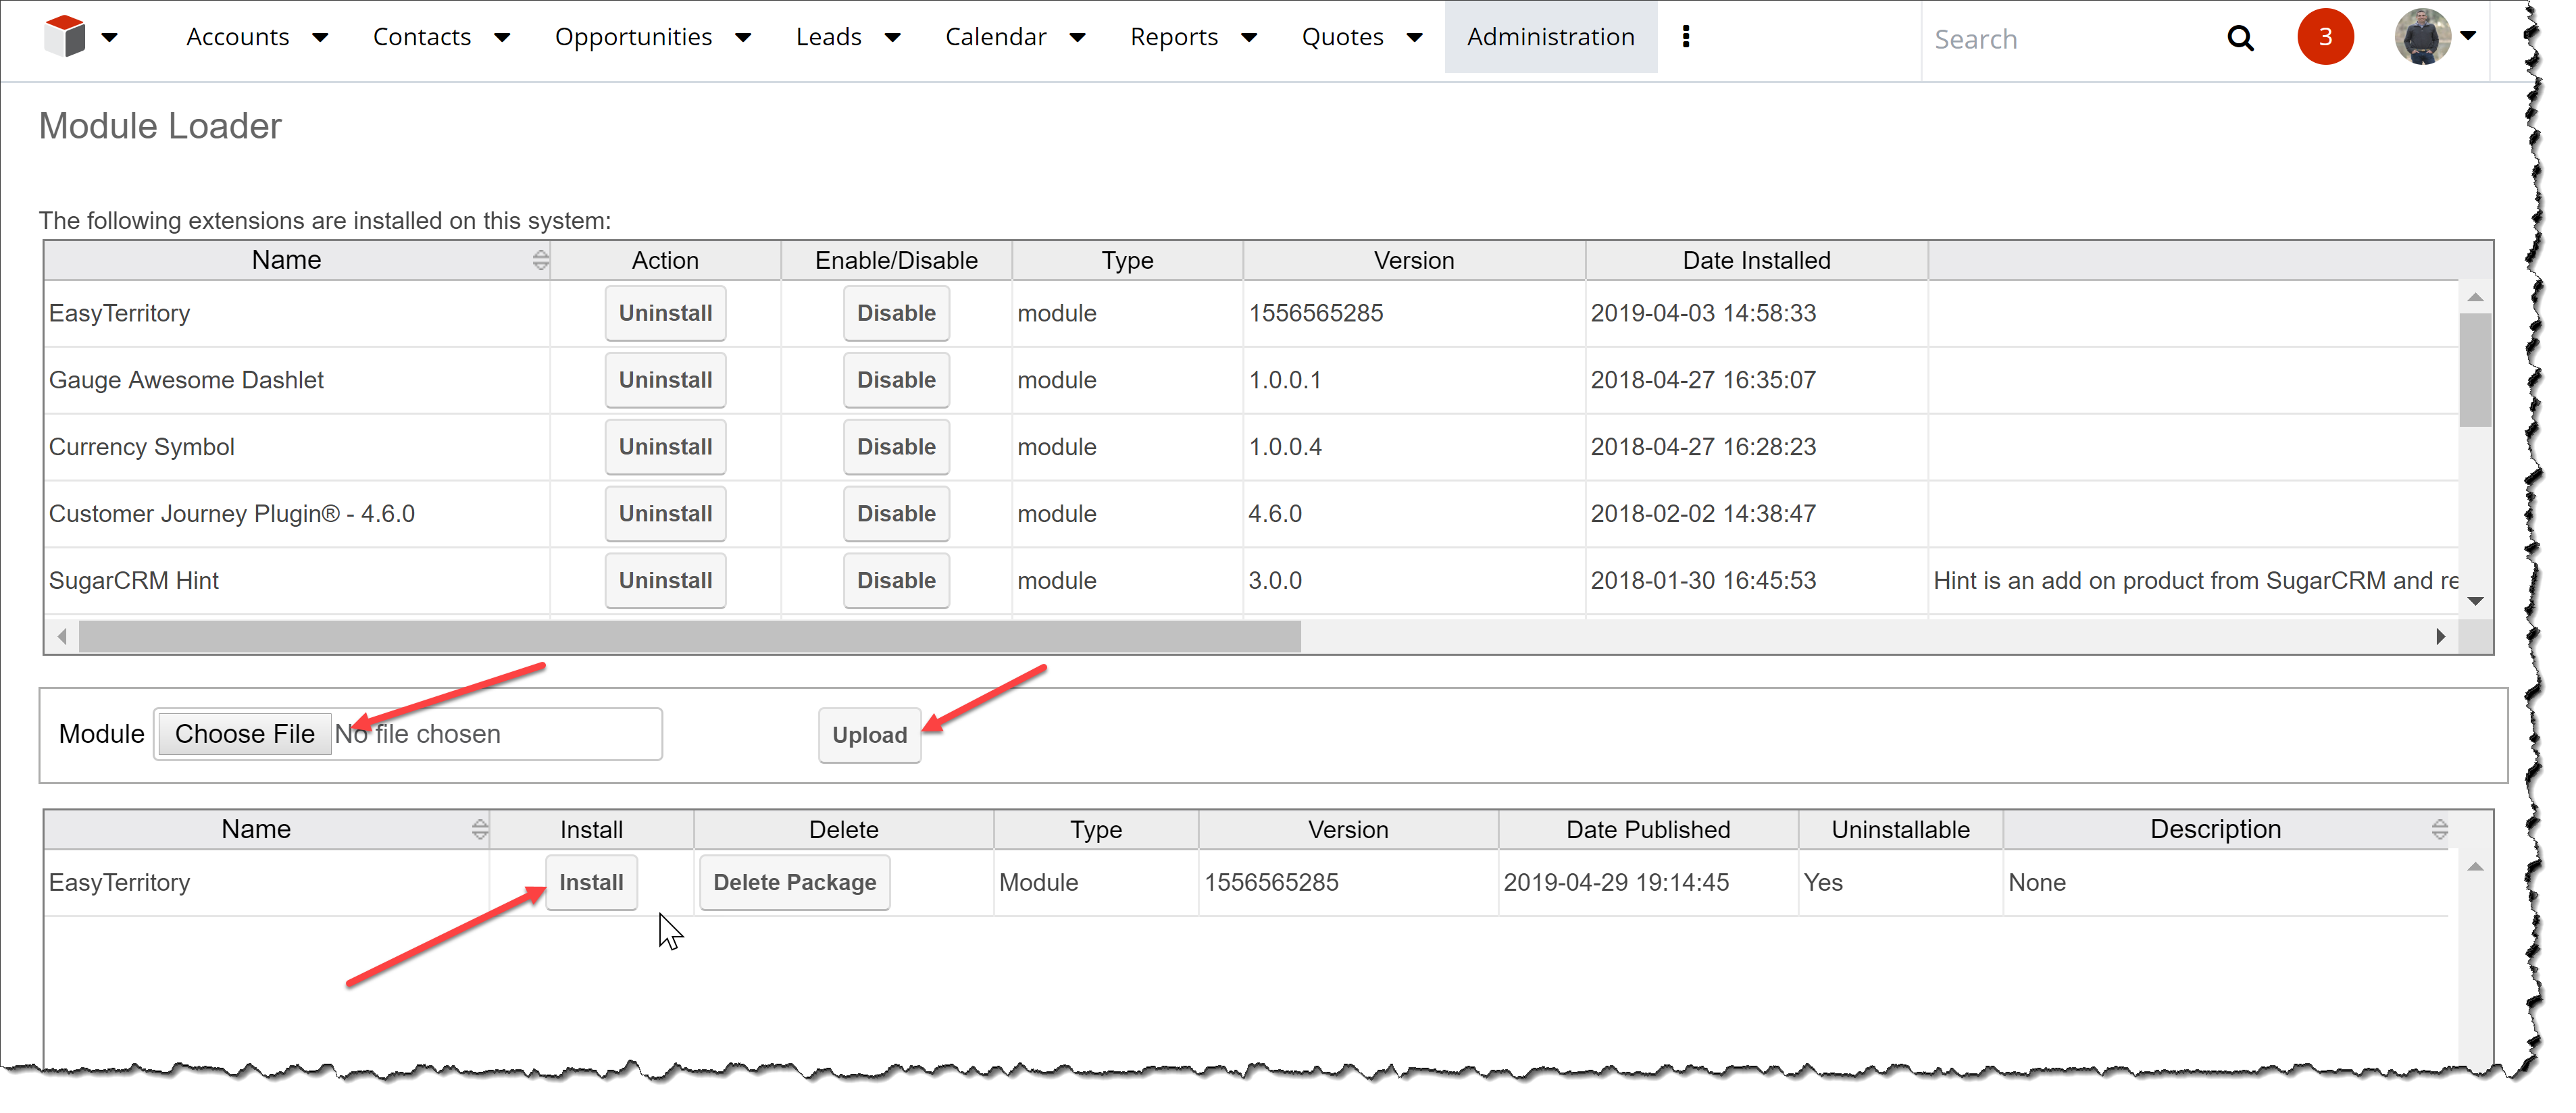
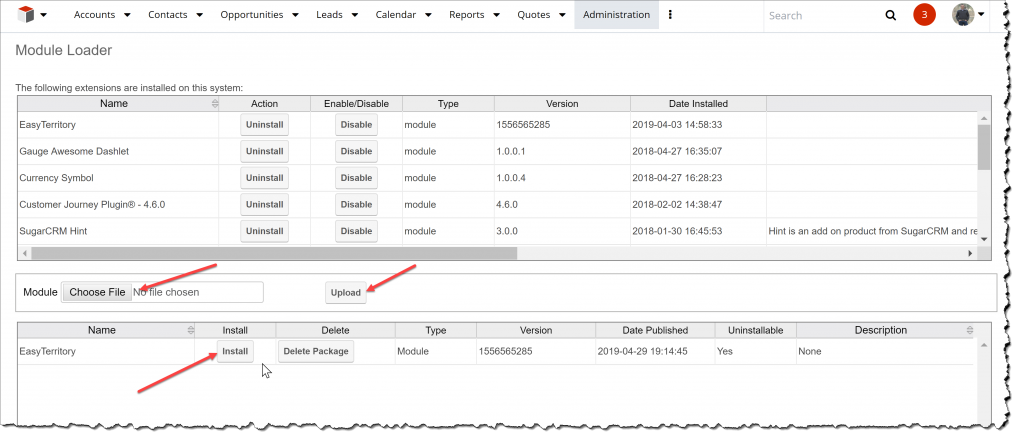
- Import EasyTerritory module package into your SugarCRM instance. Note: You can request the module package by emailing: support@easyterritory.com. Once in SugarCRM, navigate to the Administration > Developer Tools > Module Loader, then load the module package into SugarCRM.
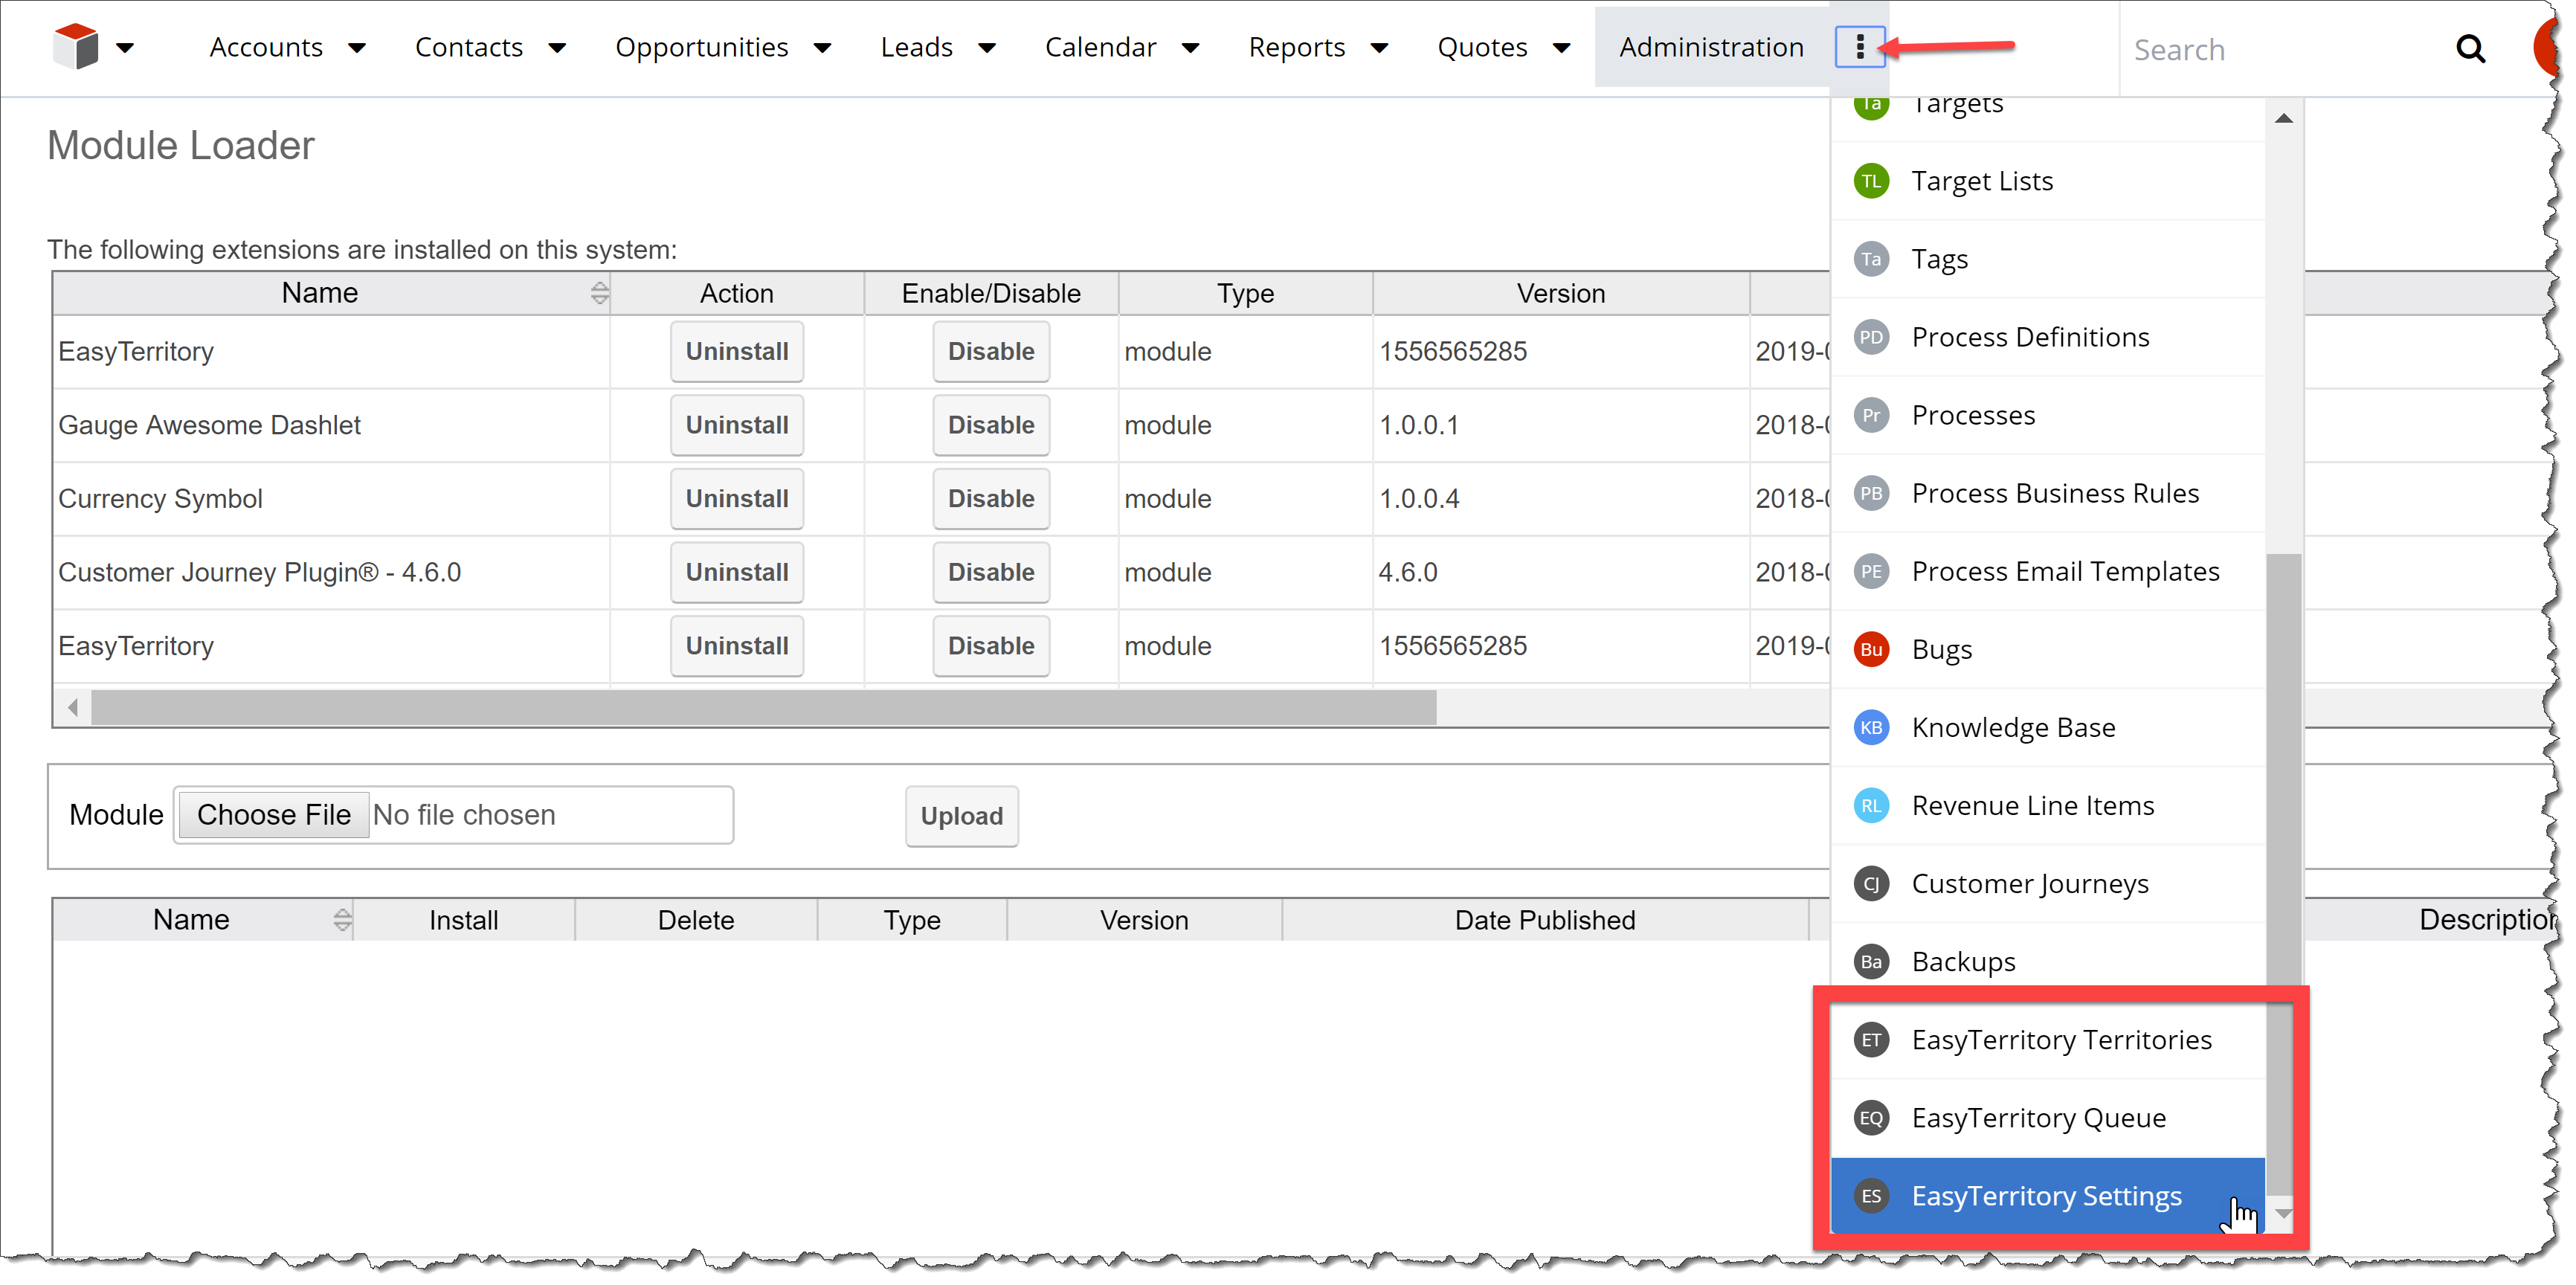
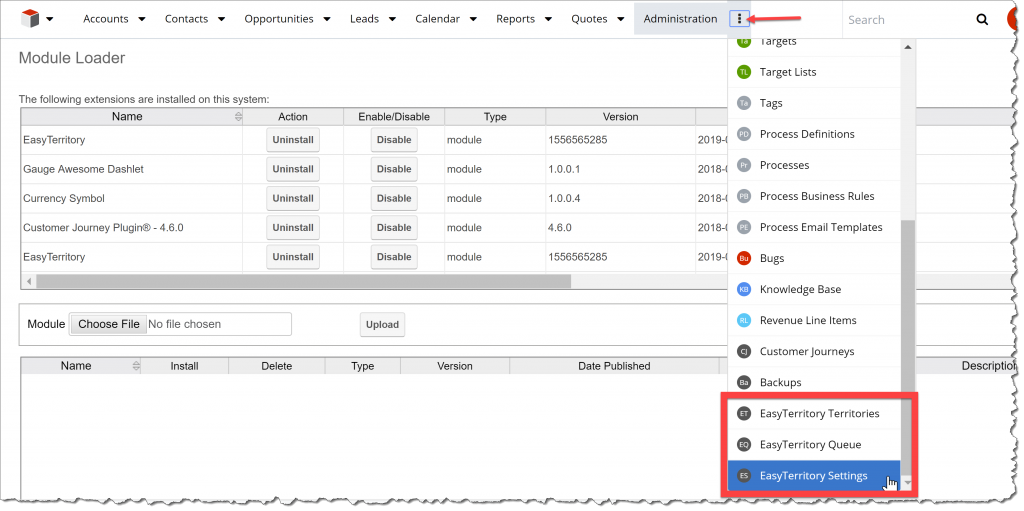
- Once, the EasyTerritory module is successfully uploaded, refresh SugarCRM in the browser and confirm that the EasyTerritory modules are present. ‘EasyTerritory Territories’, ‘EasyTerritory Queue’, and ‘EasyTerritory Settings’.
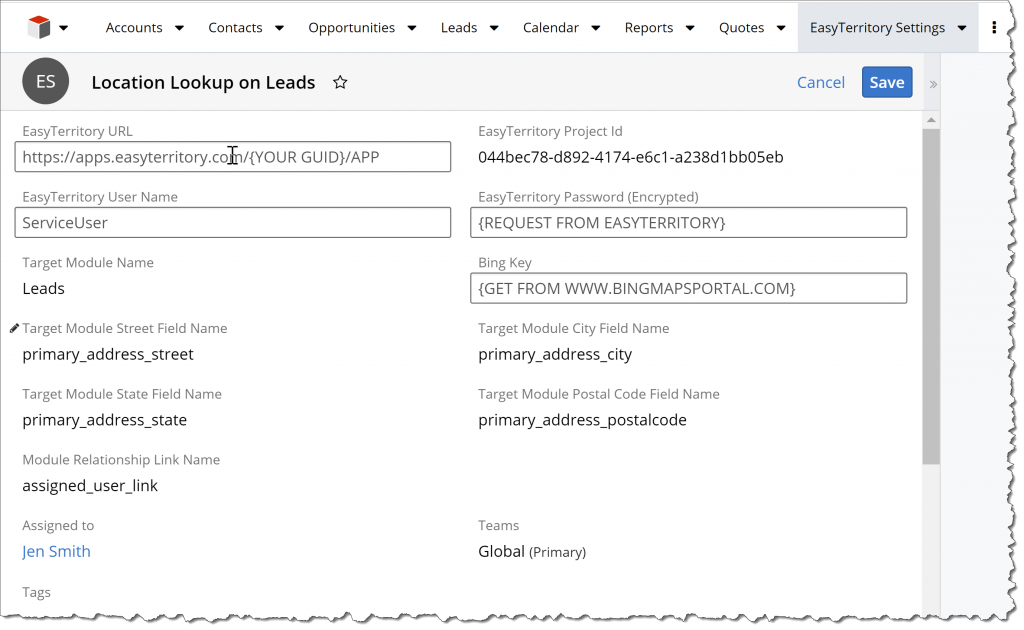
- Set up the ‘EasyTerritory Settings’ configuration for the modules you want to assign territories on.
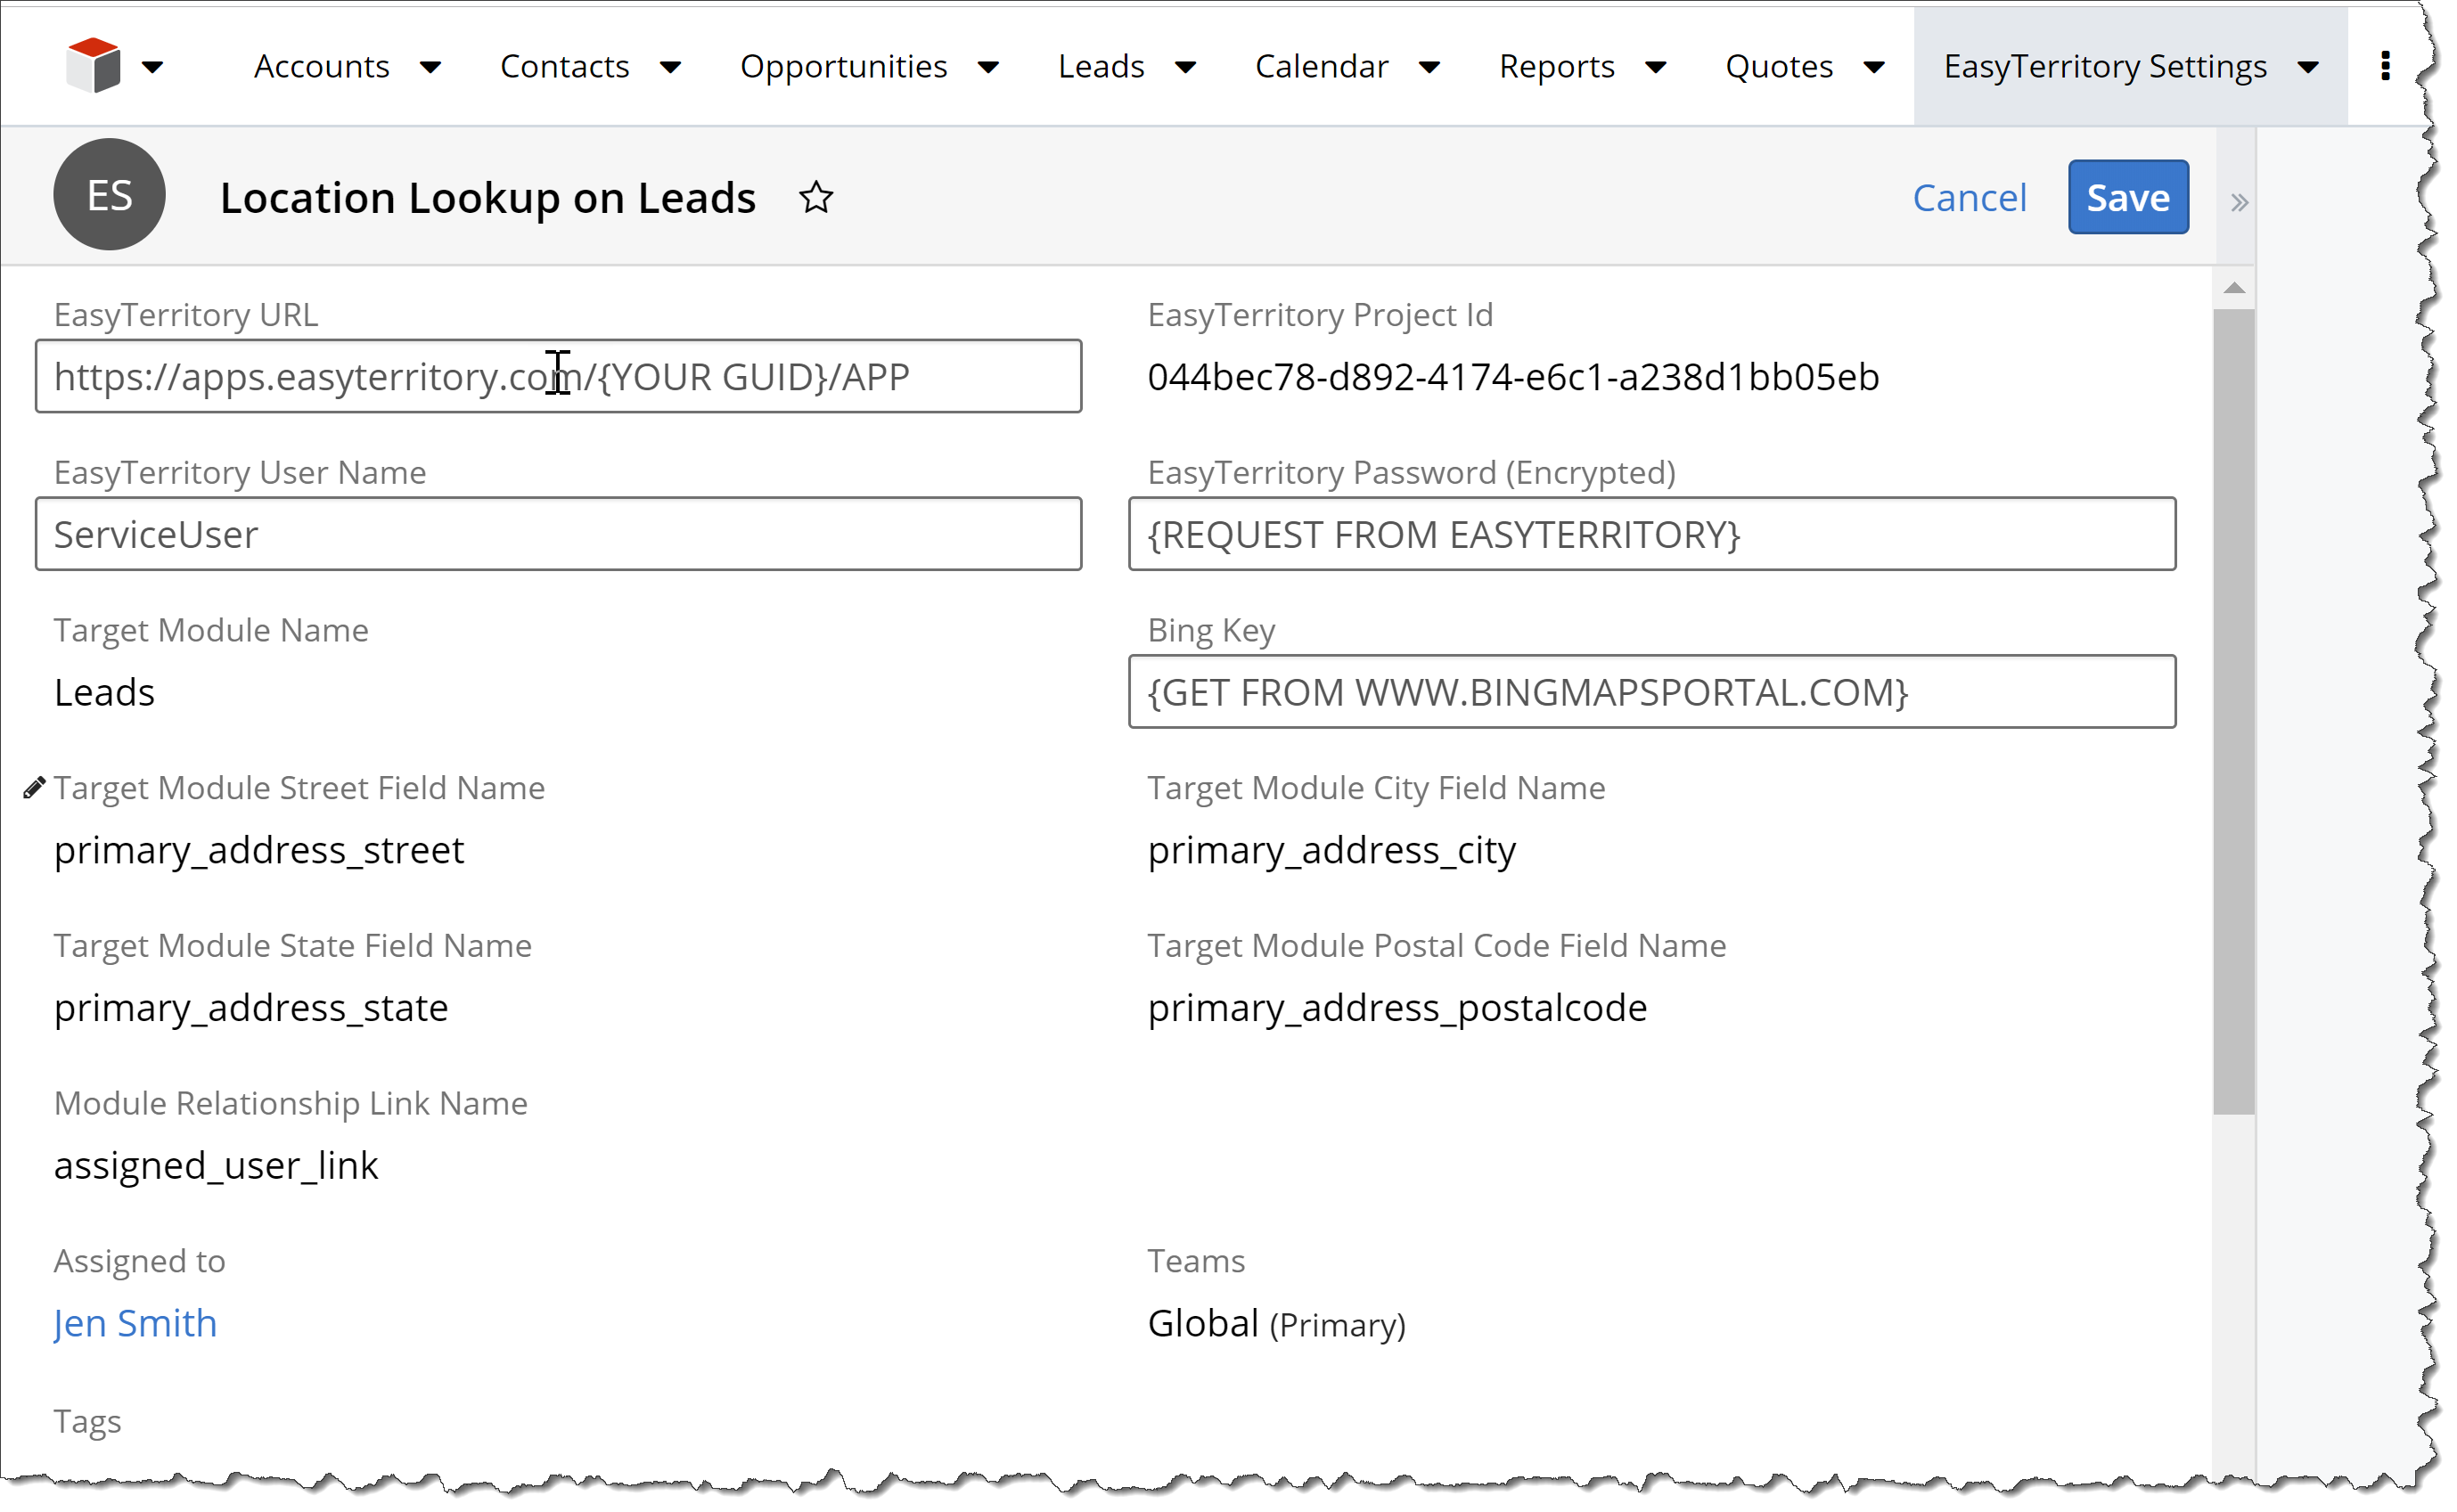
- Navigate to ‘Administration’ > ‘EasyTerritory Settings’ and create a new configuration for each module you want to perform territory lookups on (e.g. Leads or Accounts).
- Set the following properties:
- EasyTerritory URL: Your EasyTerritory Site (example: https://apps.easyterritory.com/{EZT Instance GUID}/{YourEZTInstanceType [DEV], [TEST], or [APP]. Note APP = Production.}/
- EasyTerritory Project ID: Your EasyTerritory Project to run the plugin against. To build an EasyTerritory project with territories and to set up the plugin, follow these steps: Project Markup Plugin
- EasyTerritory User Name: Service User Name (this is set up in the EasyTerritory Admin Panel)
- EasyTerritory Password (Encrypted): You will need to get encrypted password from EasyTerritory support. Please email your dedicated support or pre-sales contact to obtain this.
- Target Module Name: Name of the SugarCRM Module you want to run your plugin on (e.g. Leads or Accounts).
- Bing Maps Key: A Bing Maps Key is required to geocode a record. You can get a trial or basic Bing Maps Key here: https://www.bingmapsportal.com
- Target Module Street Field Name: {Example: primary_address_street}
- Target Module City Field Name: {Example: primary_address_city}
- Target Module State Field Name: {Example: primary_address_state}
- Target Module Postal Code Field Name: {Example: primary_address_postalcode}
- Module Relationship Link Name: This is the name of the relationship between the target module and the user module. {Example: assigned_user_link}
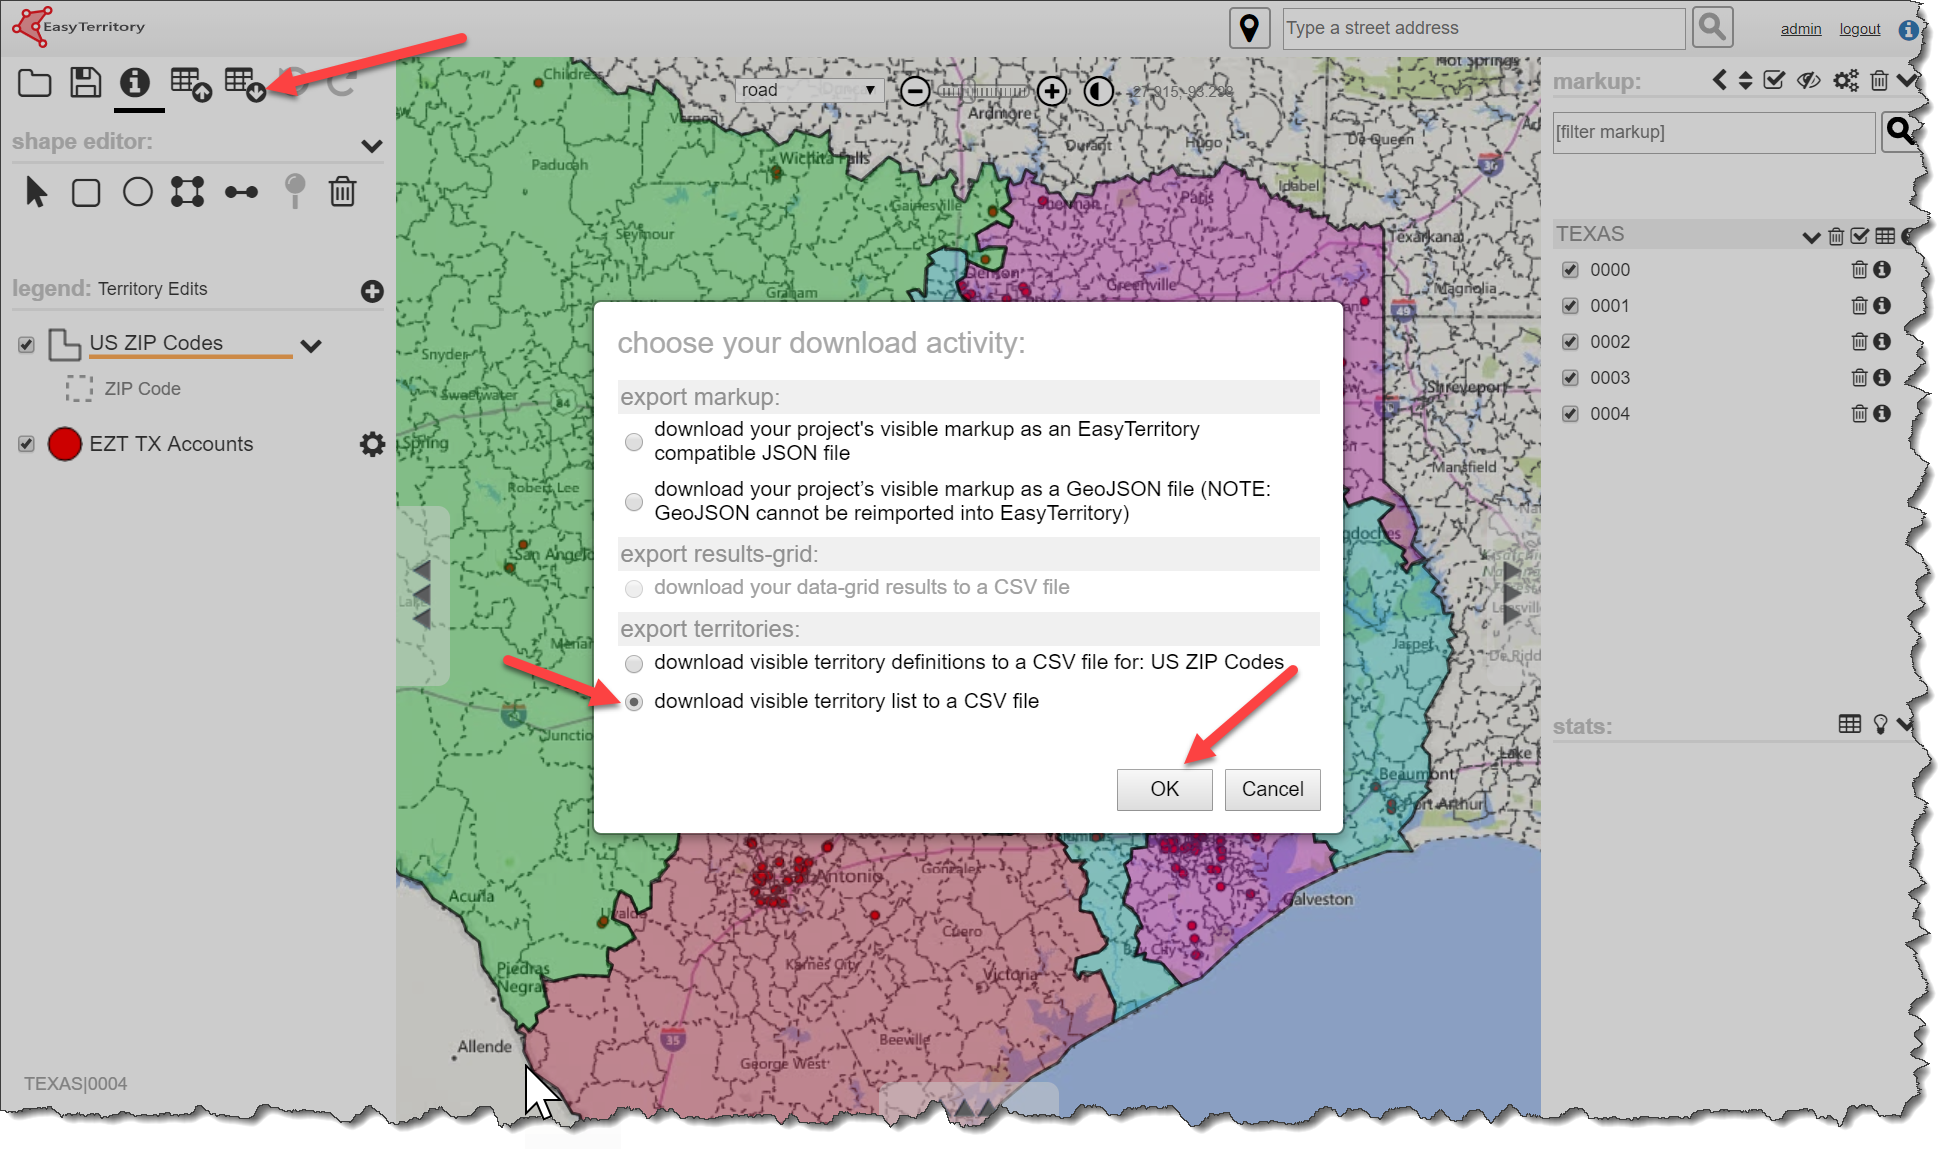
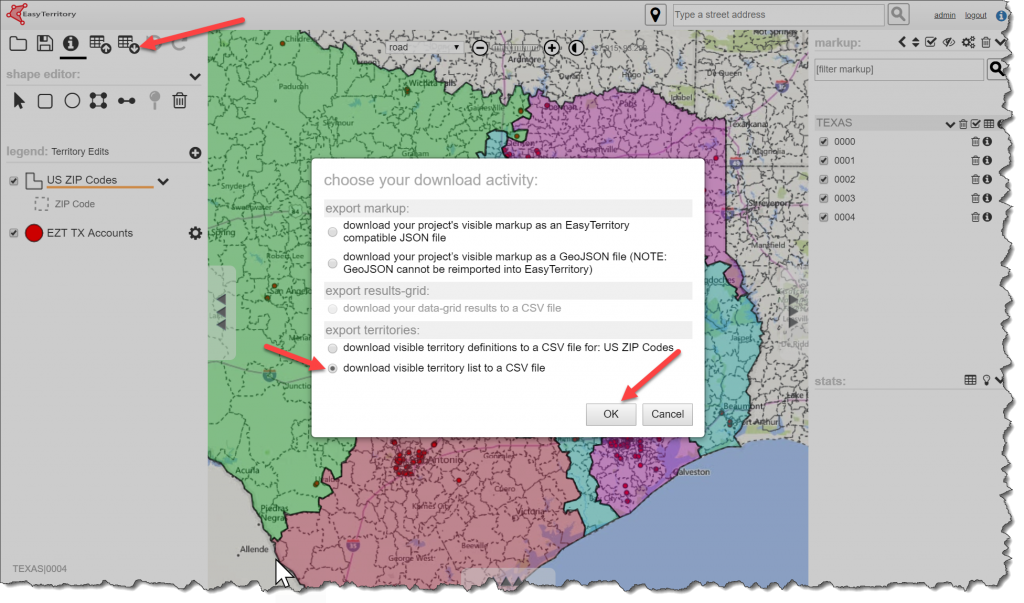
- Export your territories from EasyTerritory with the MarkupID to import into the ‘EasyTerritory Territories’ Module.
- If you haven’t built territories yet, follow these instructions for building a territory project and running the project markup plugin in EasyTerritory: Project Markup Plugin
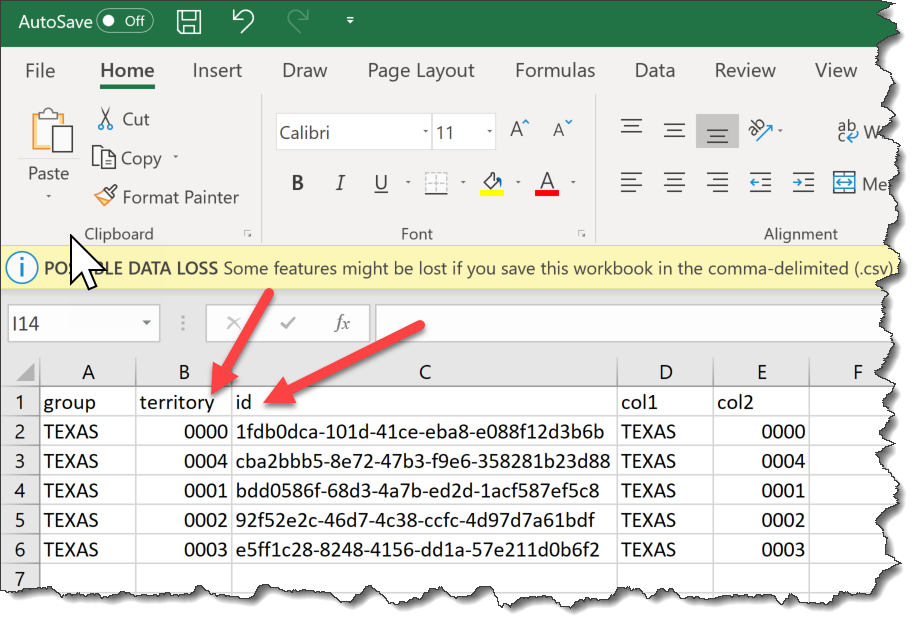
- Export the ‘territory list’ from EasyTerritory to import into SugarCRM.
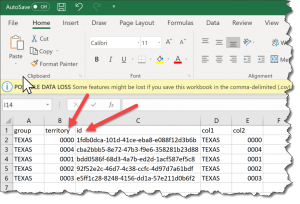
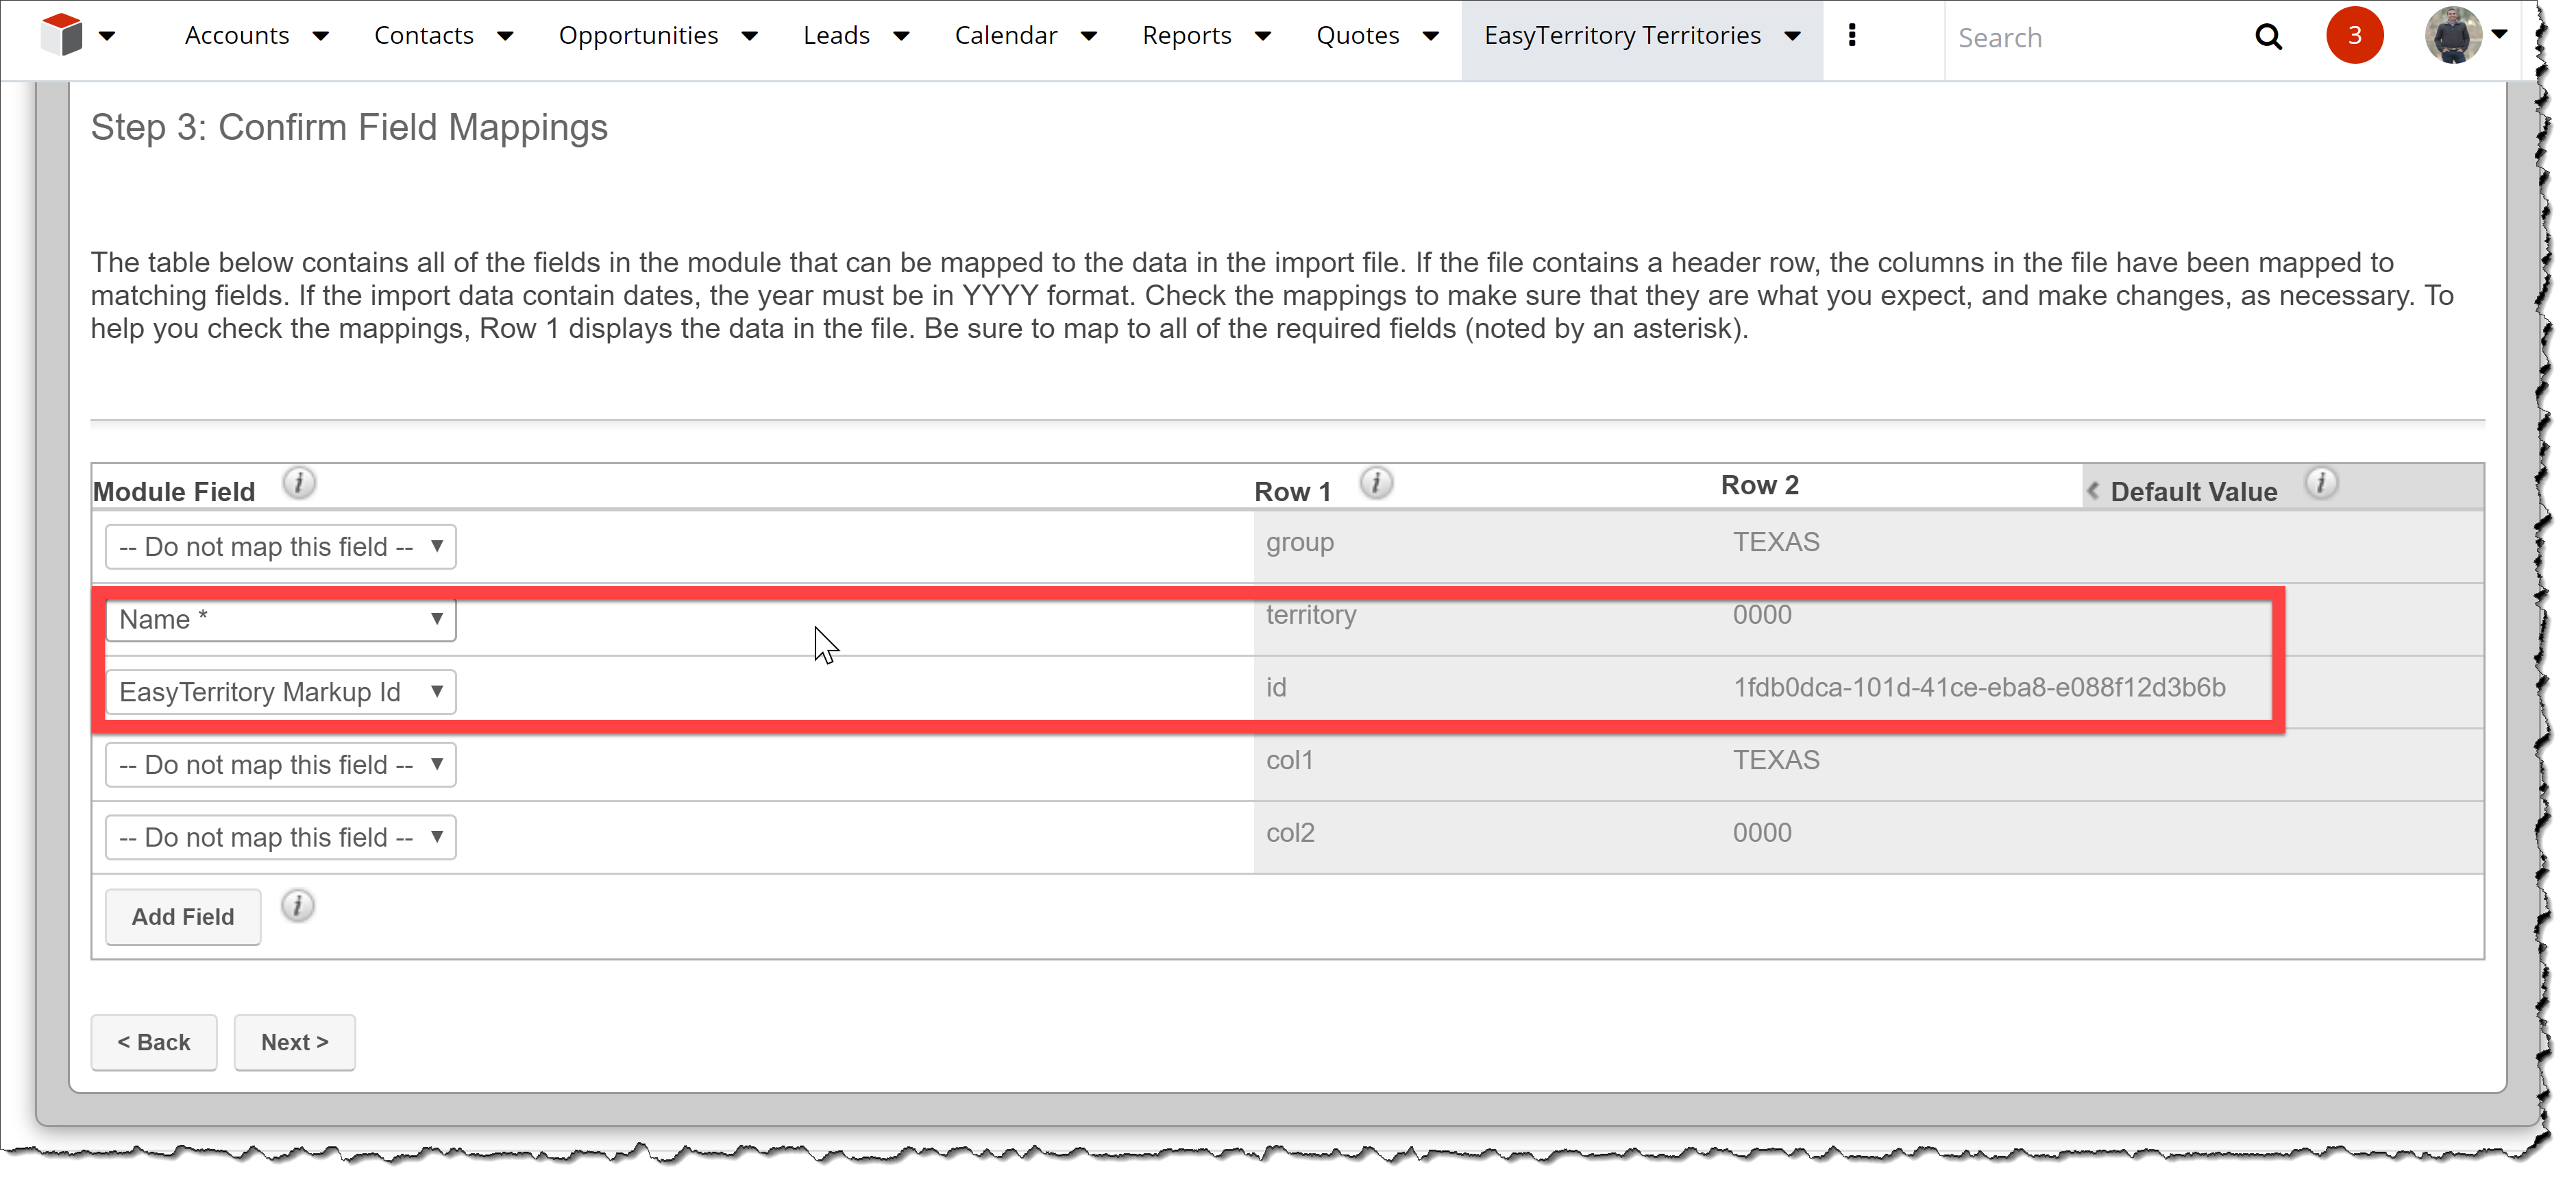
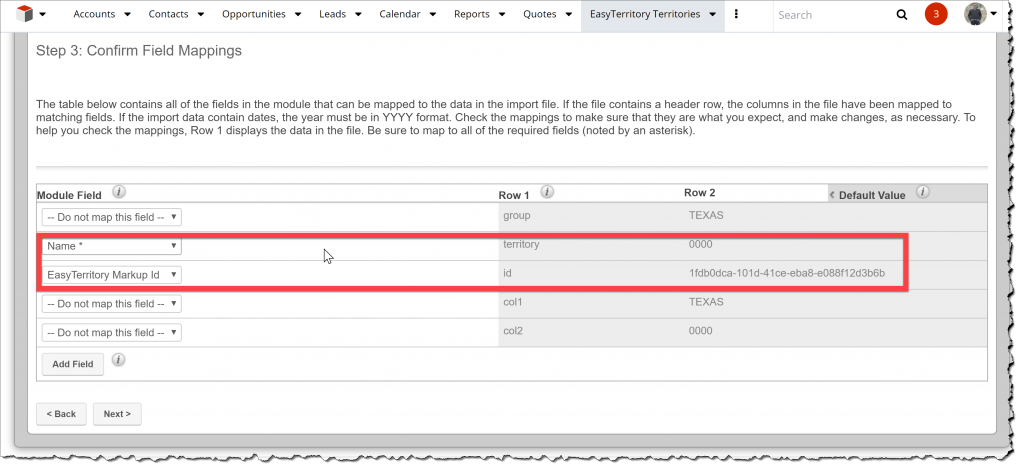
- Next, you’ll need to import this .CSV into the ‘EasyTerritory Territories’ module in SugarCRM. The ‘id’ column in the .CSV is import, as it is the value used to lookup and set a territory in SugarCRM. At minimum, you’ll want to map the ‘territory’ to ‘Name’ and the ‘id’ to ‘EasyTerritory Markup Id’ in SugarCRM.
- (Optional) You can create additional fields on the ‘EasyTerritory Territories’ module to store other column information exported from your EasyTerritory project (e.g. Group Name).
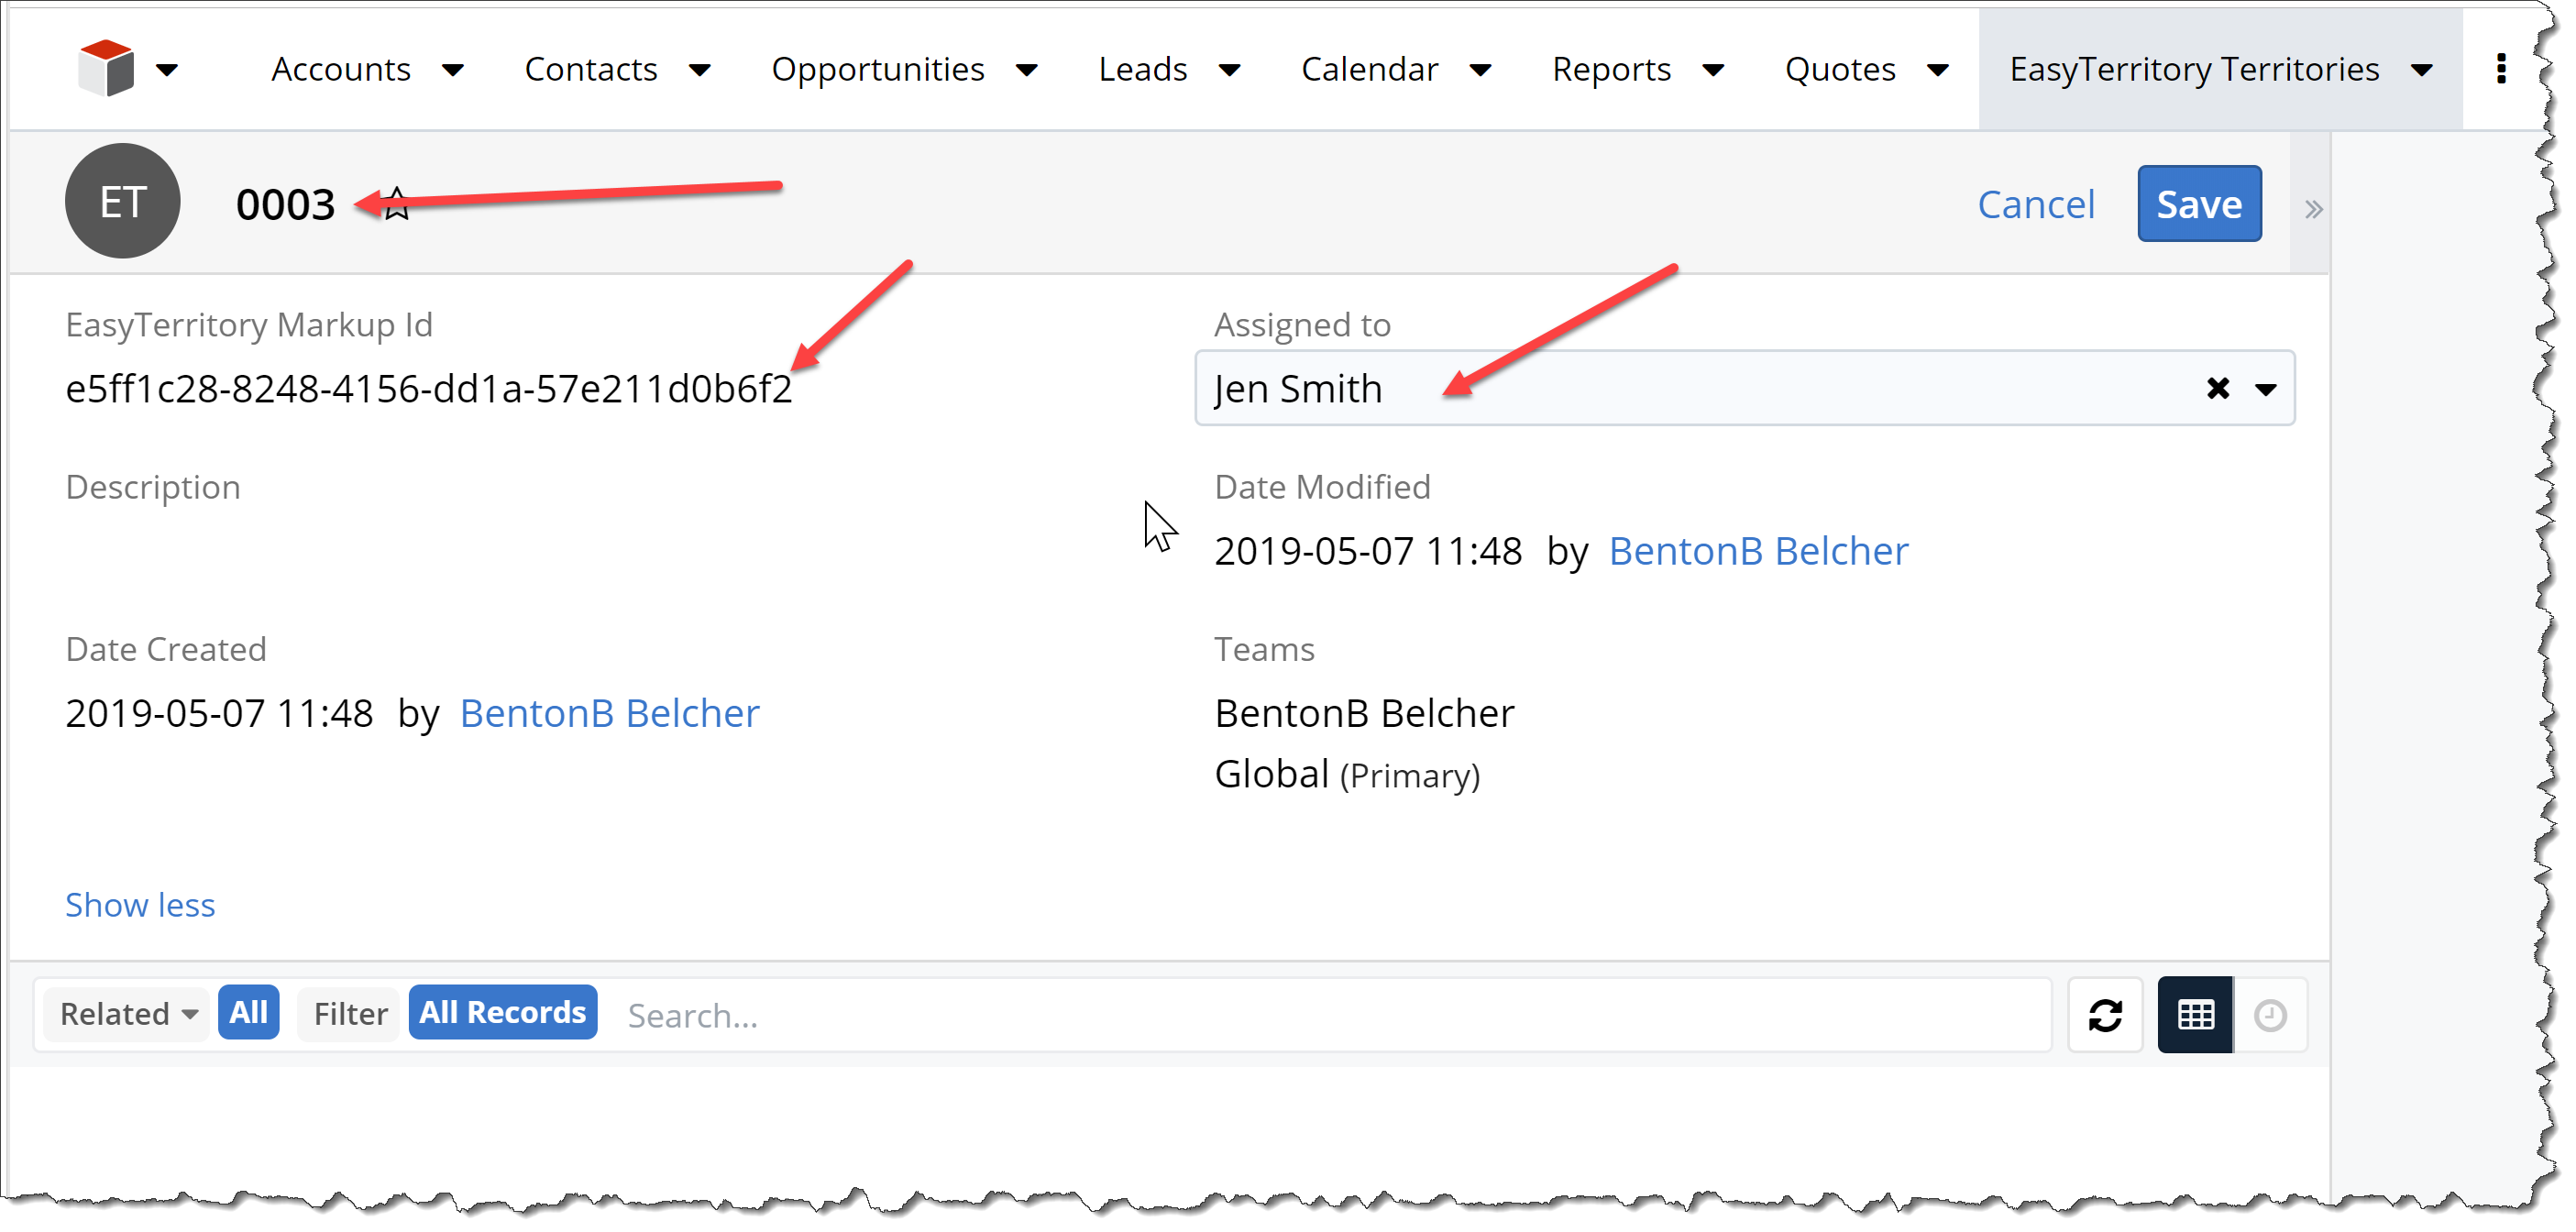
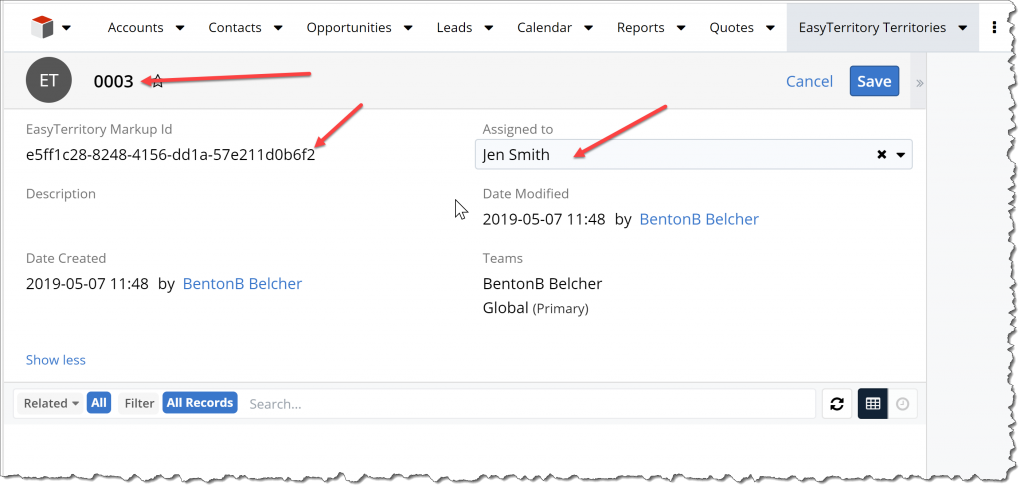
- Once you’ve imported your territories and markup ids into SugarCRM, you’ll need to set the appropriate owner for territory using the ‘Assigned to’ field. In this example, we’ll set territory ‘0003’ to ‘Jen Smith’.
- Set up the SugarCRM Workflow for performing the territory lookup
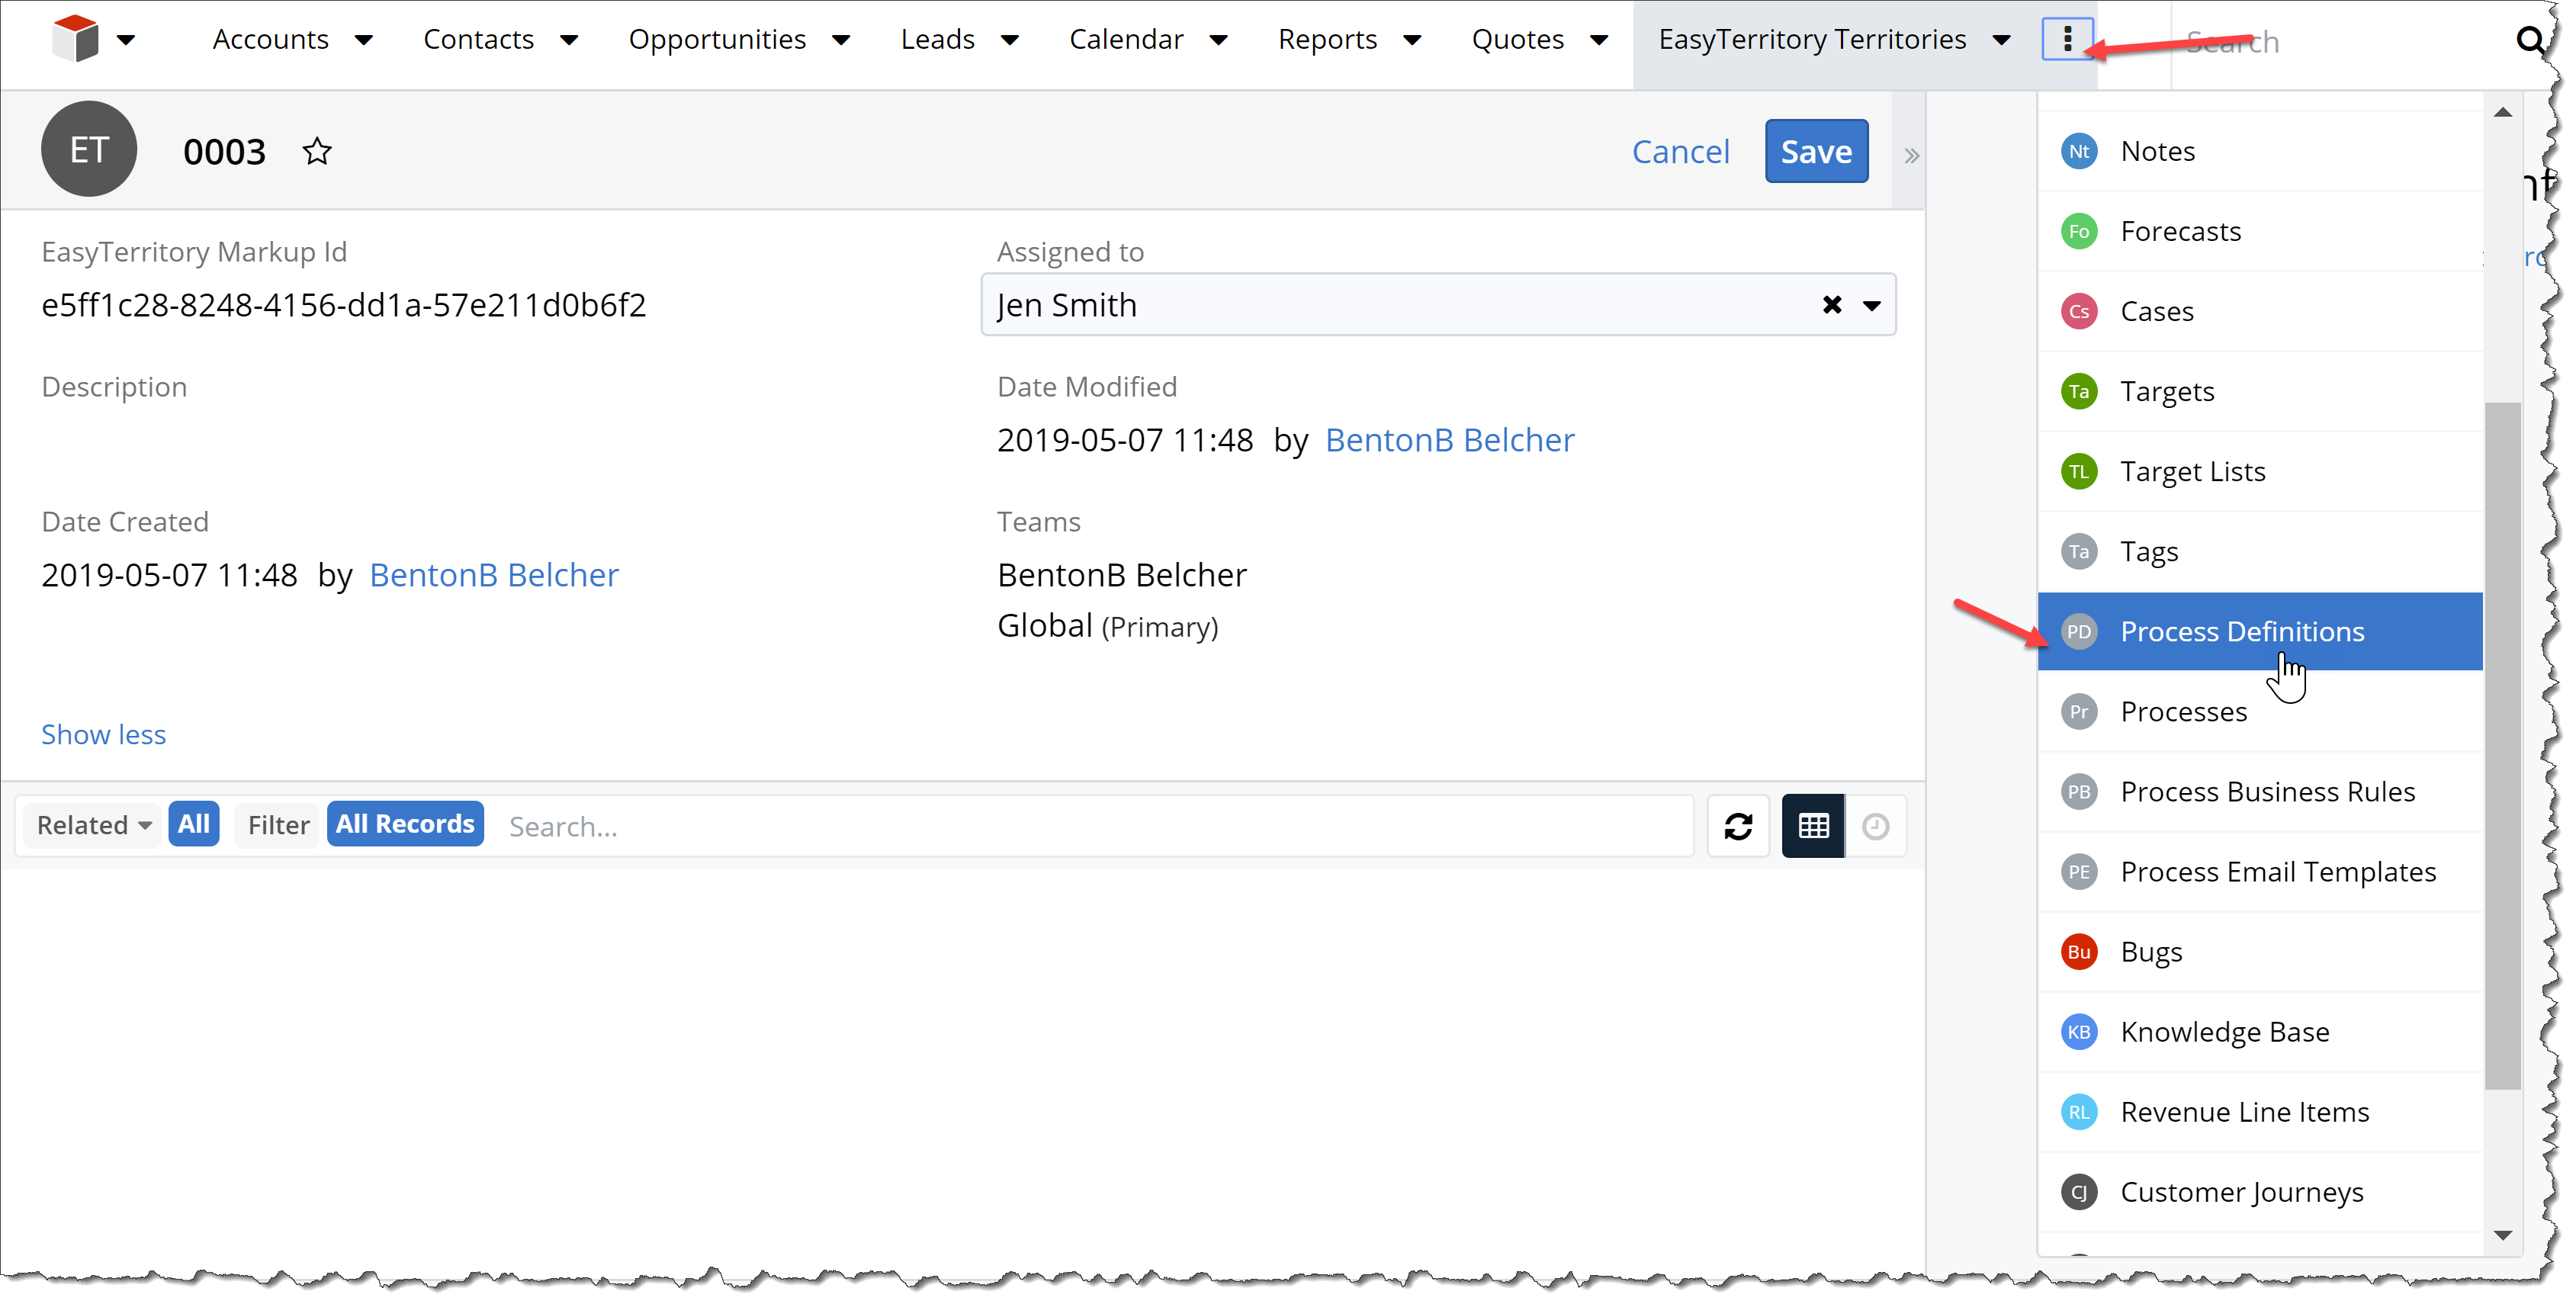
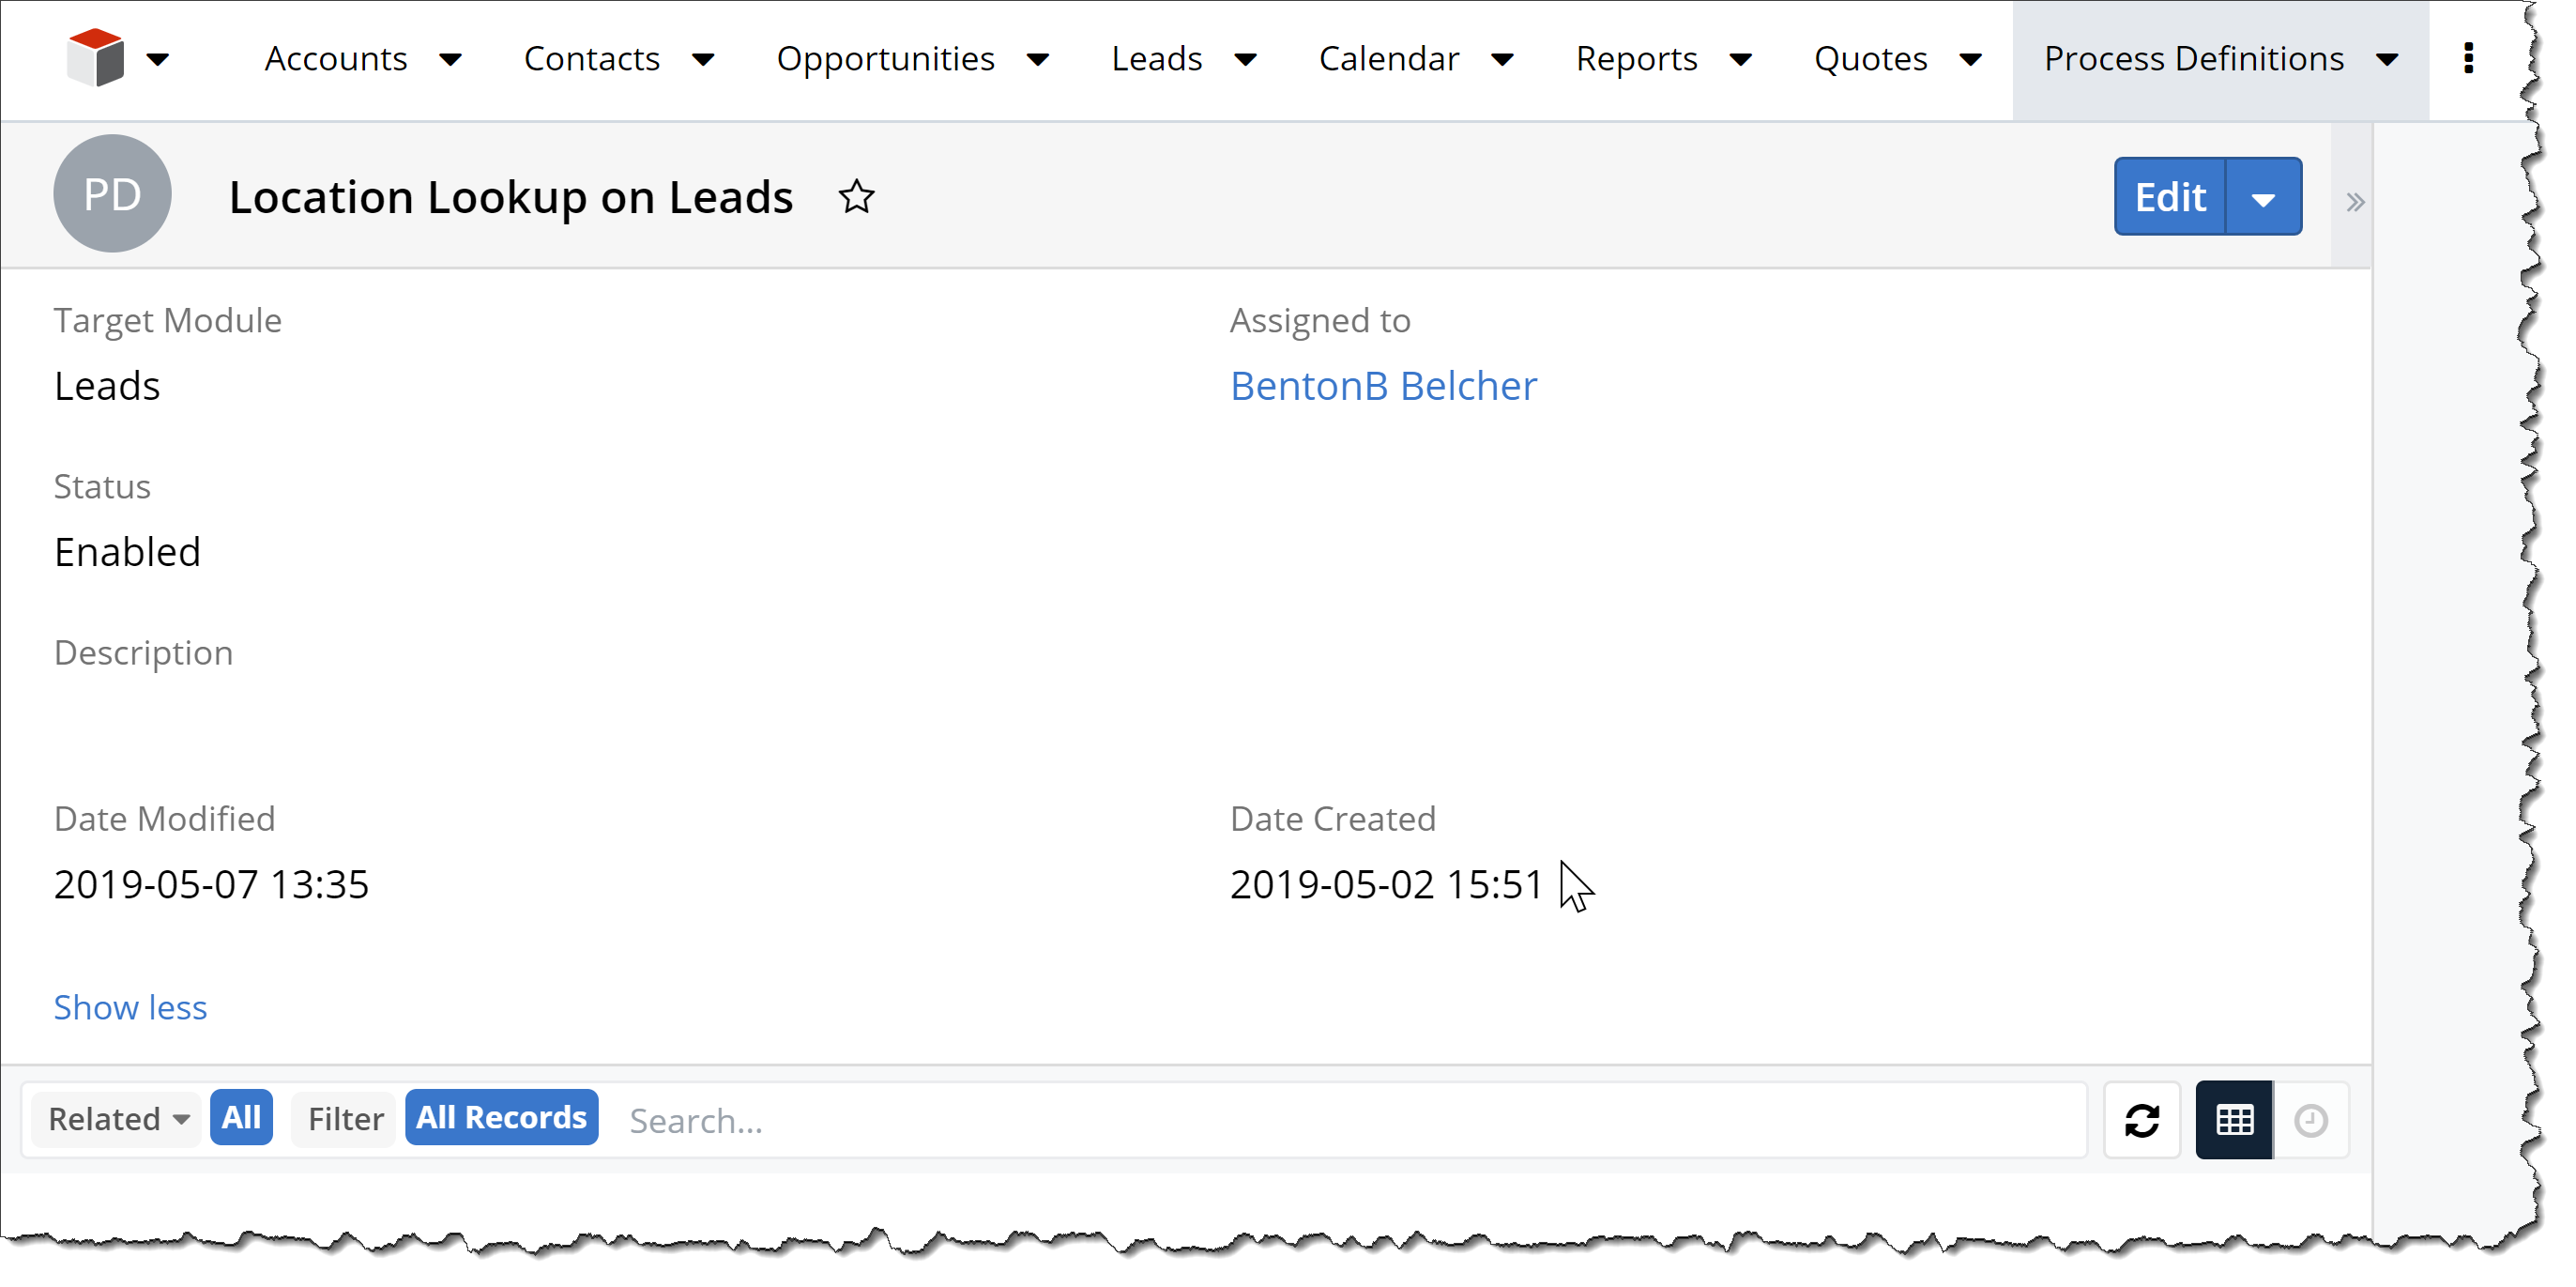
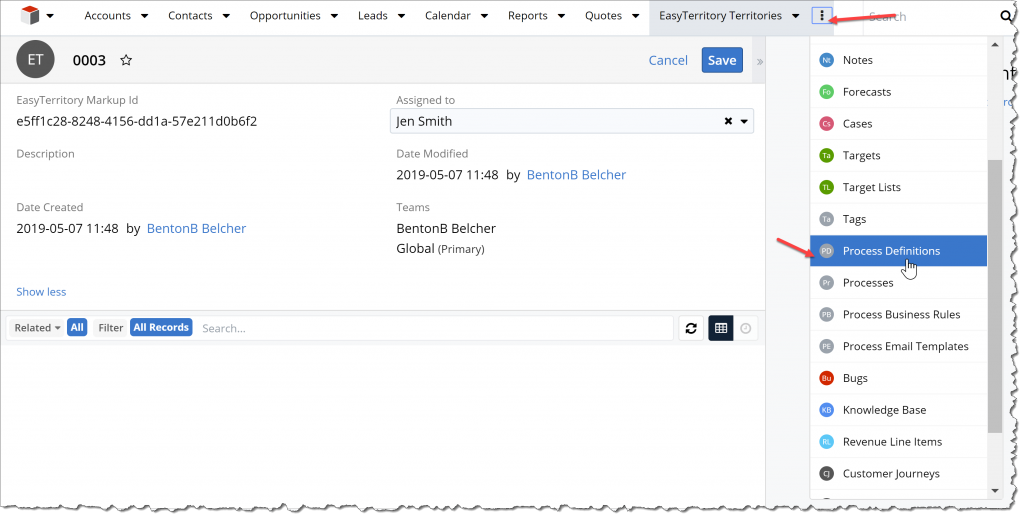
- In SugarCRM, click the ‘Process Definition’ link.
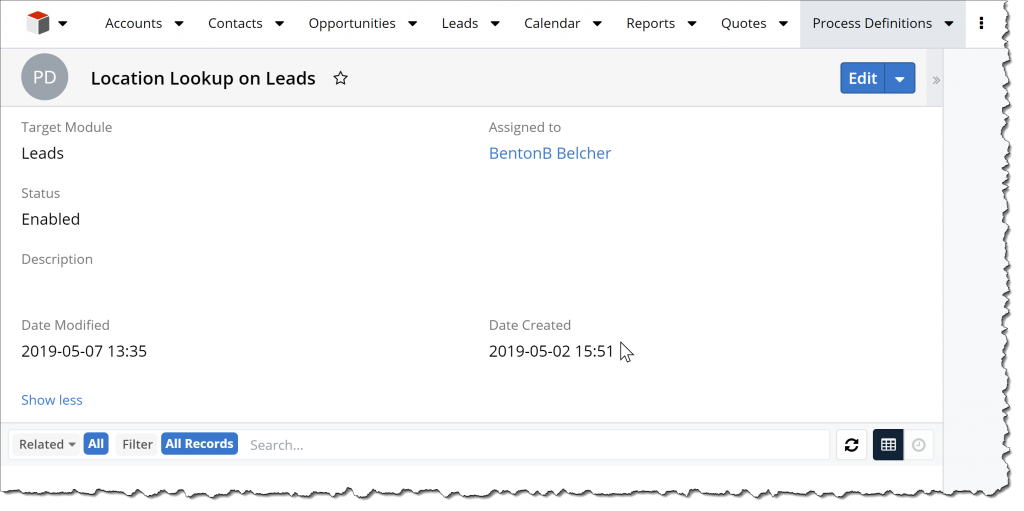
- Creating a new ‘Process Definition’ and specify what module you want the workflow to run on.
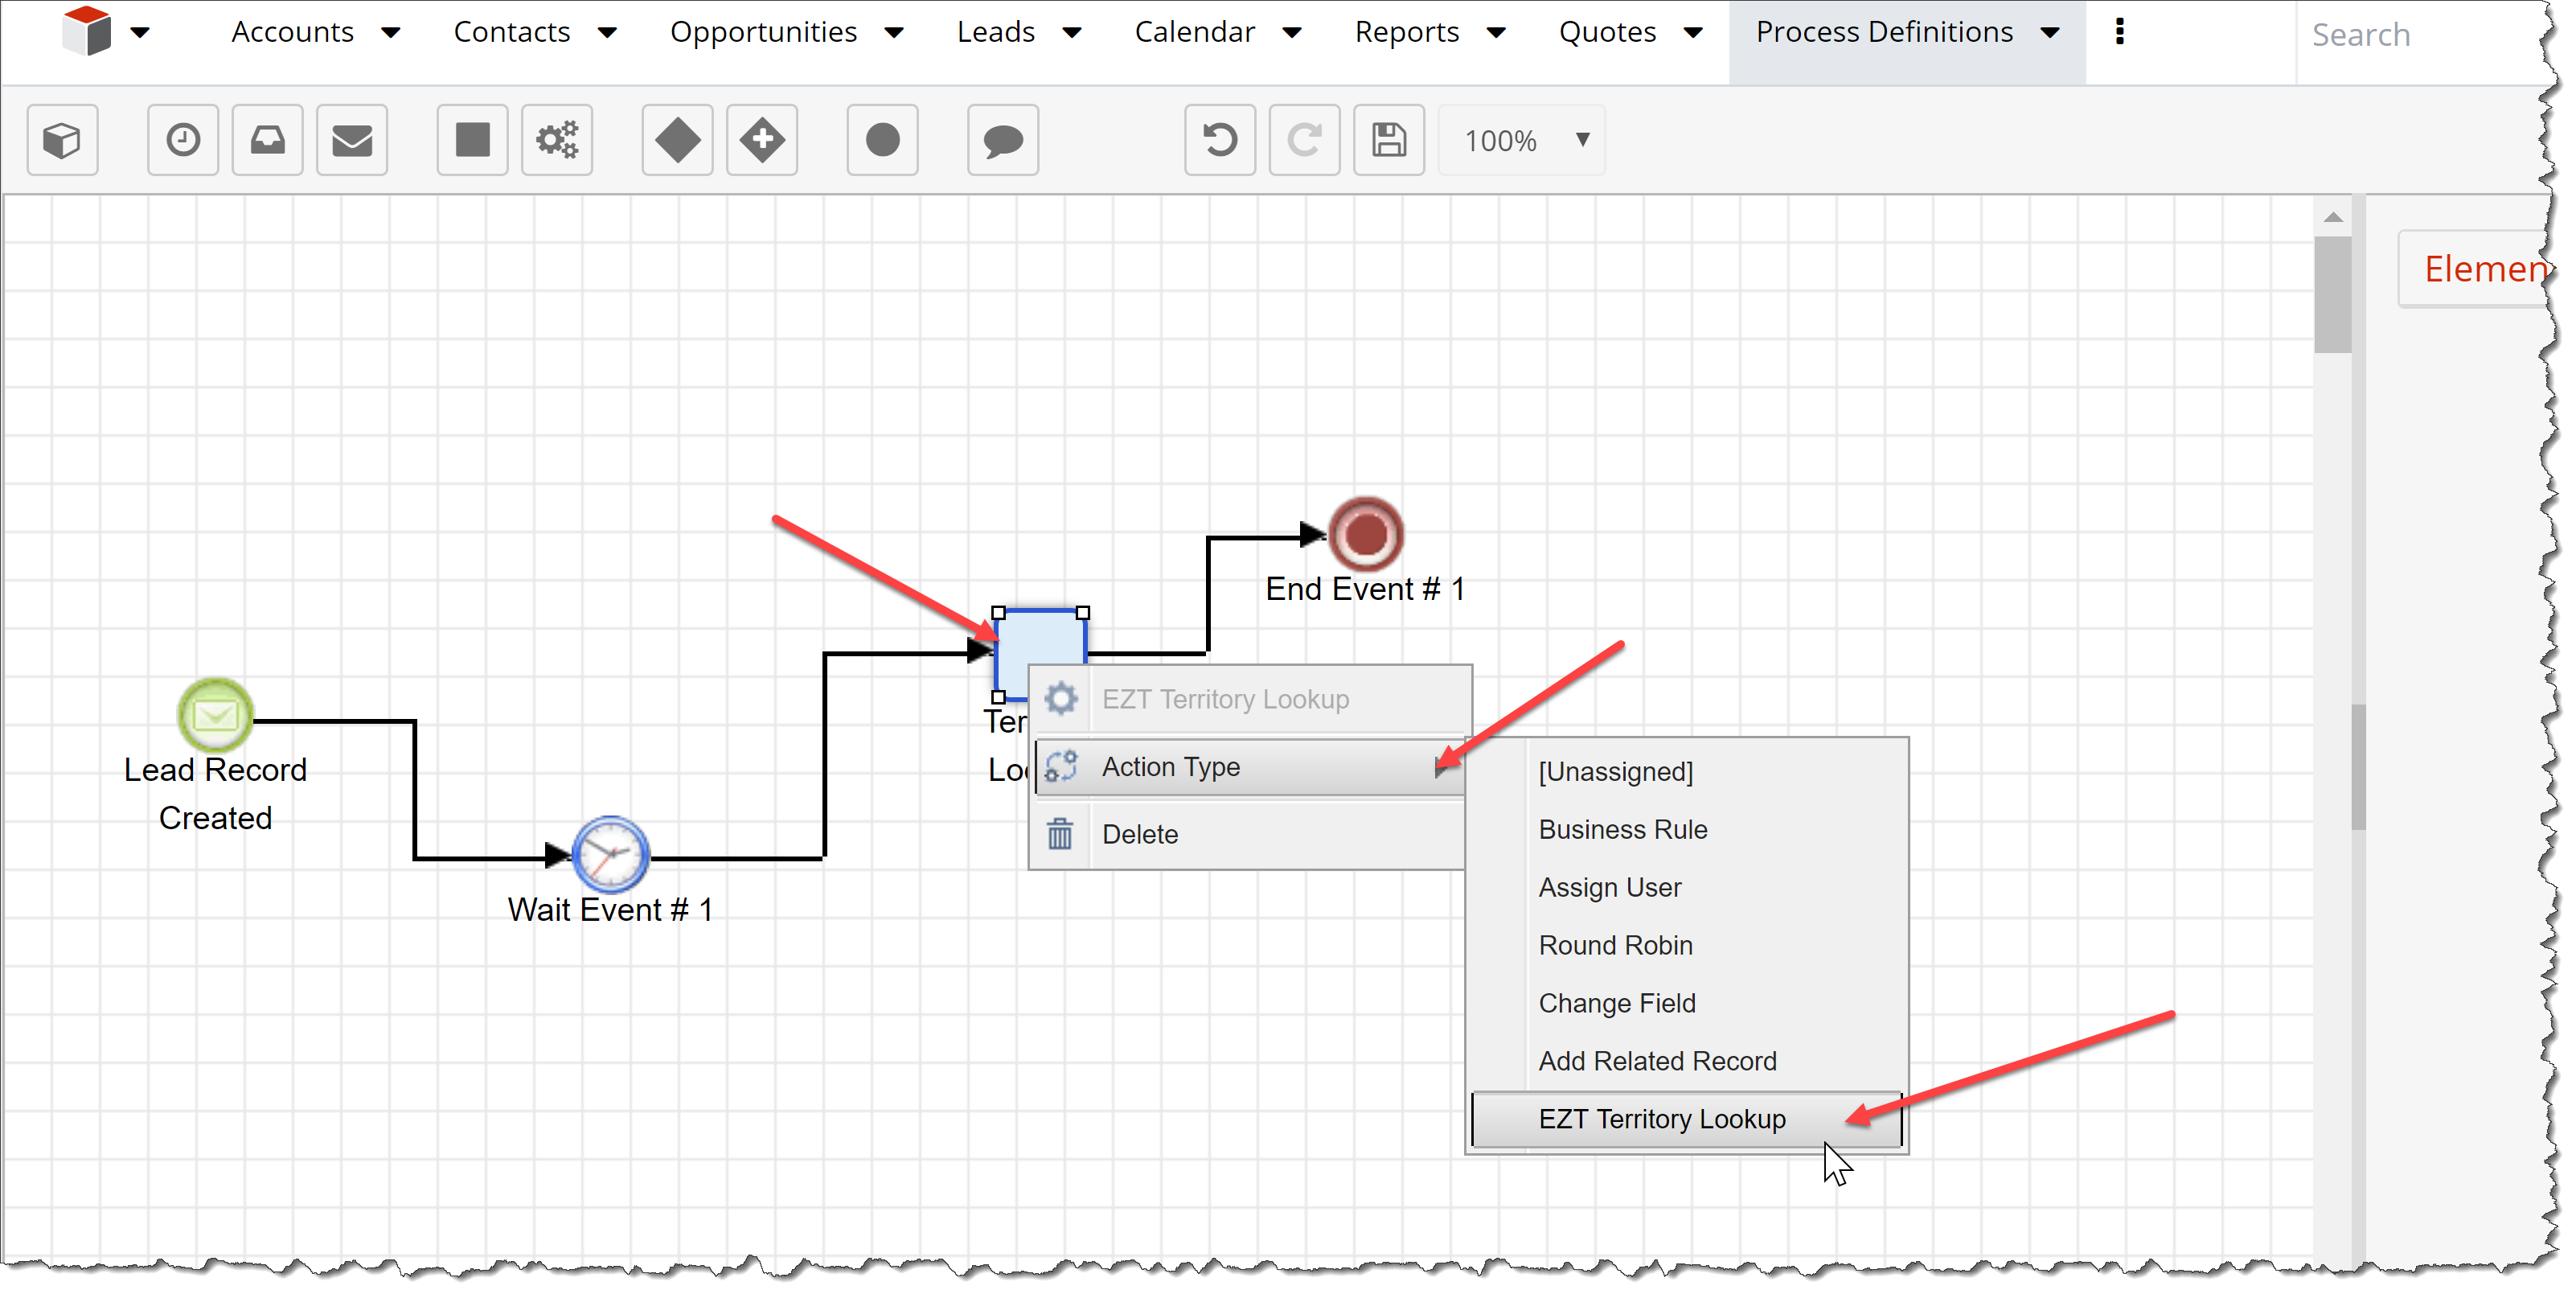
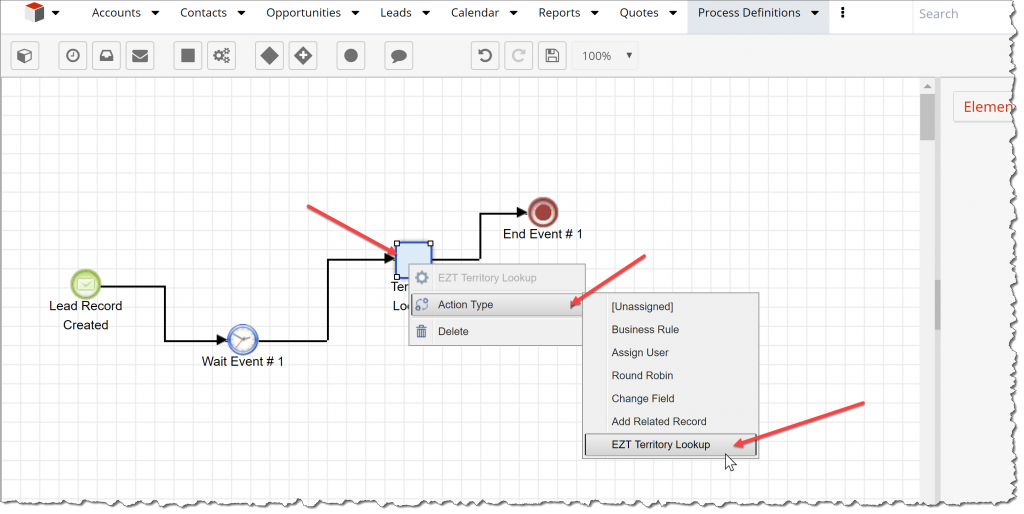
- Navigate to the ‘Process Designer’.
- Add a start event and specify when you want the plugin to run ie – on update or creation of a record.
- Important Note: You must add a wait event if you want the process to be pushed to the job queue for process to execute asynchronously.
- Next, add an action and in the ‘Action Type’ drop-down select ‘EZT Territory Lookup’.
- Finally, add a stop event in order to end the process.
- Test a territory lookup!
- Once you have saved your territory lookup configuration, you’re ready to test. Create a new Lead record with an address that will fall into one of your territories. A success test will update the Lead record with the appropriate ‘Assigned To’ user from for the territory.
- Use these two methods to troubleshoot:
- To see status of a running process navigate to the ‘Administration’ section and click ‘Process Management’. All the processes invoked by your process definition will be listed in that list.
- To troubleshoot an error with the process navigate to the ‘Administration’ > ‘System Settings’. Scroll down and click the ‘View Logs. Next click ‘ALL’ or type ‘Ezt Lookup’ to view log entries that have been entered. Most times errors have to do with an incorrect settings that has been entered in the ‘EasyTerritory Settings’ configuration records.
For more information on or support with SugarCRM integration, please email us at support@easyterritory.com