
One of the key benefits of EasyTerritory is the ability to use the REST API to find the nearest point from a given latitude and longitude. This functionality is provided through the Project Points Plugin.
In addition to proximity queries, the plugin can be used to create a reusable catalog layer based on your record point data, allowing the same points to be displayed across multiple projects.
Step 1. Creating the Source Project
To begin, create a source project that contains the records you want to use as point data.
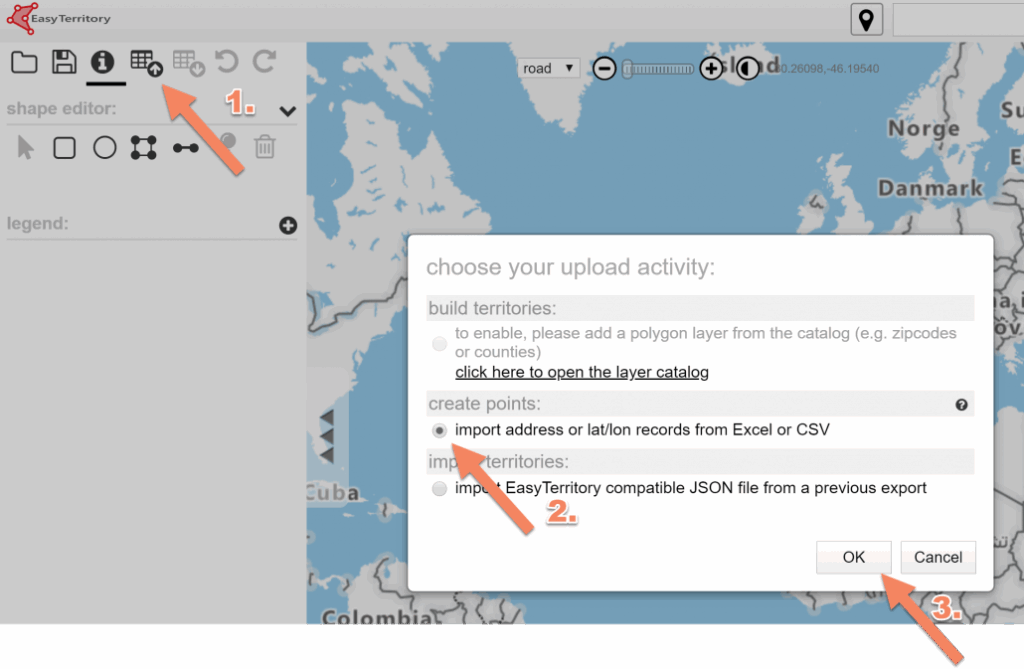
- Upload your records into a new EasyTerritory project.
- The system will automatically geocode the records and pin them on the map.
- Save the project.
- Copy the Project ID (GUID) to your clipboard.
Note: You can also retrieve the Project ID by navigating to Admin → Projects.

Step 2. Configuring the plugin
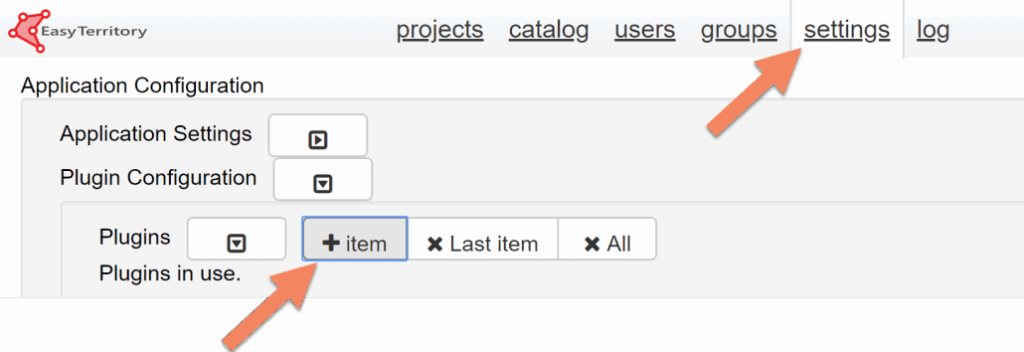
- Navigate to Admin → Settings.
- Click + Item to add a new plugin configuration.
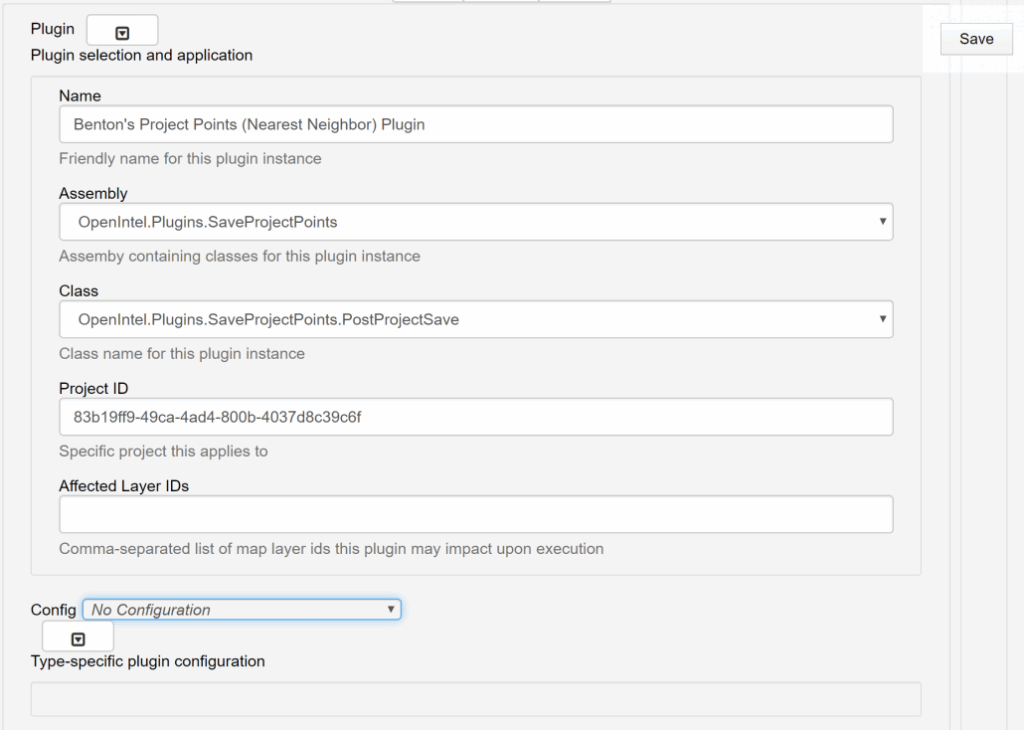
- Populate the required configuration fields.
- Paste your Project GUID into the Project ID field.
- Save the configuration.
Step 3. Running the plugin
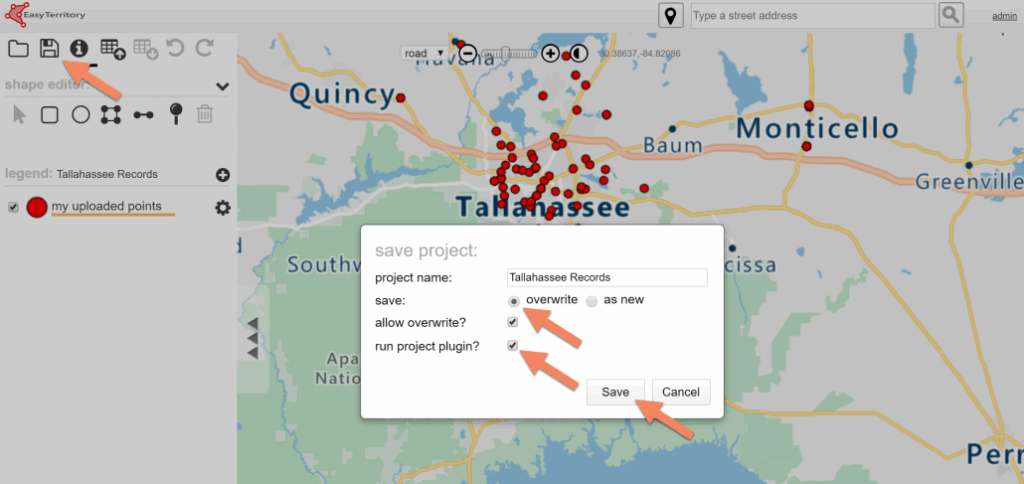
- Return to the map view for your project.
- Save the project again.
- Ensure the option Run Project Plugin is checked.
This executes the Project Points Plugin for the selected project.
- Navigate to Admin → Catalog.
- Click the + icon to create a new layer.
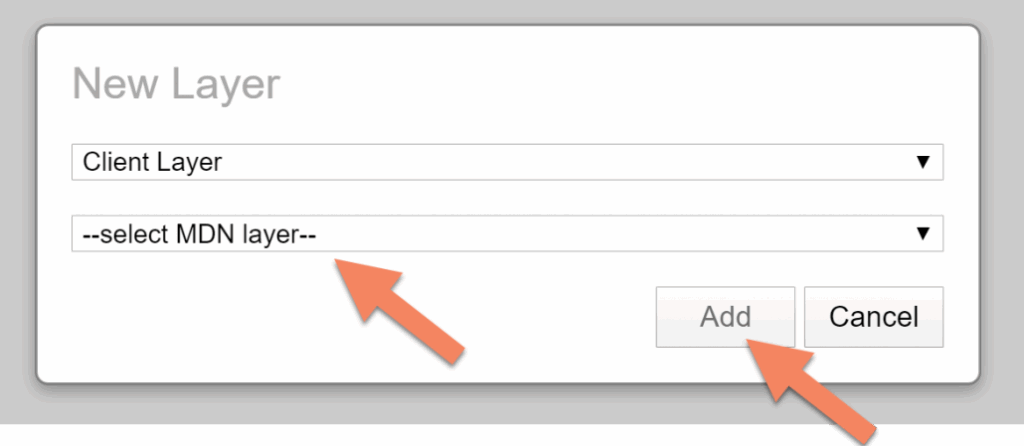
- When the New Layer dialog opens, select your desired layer type.
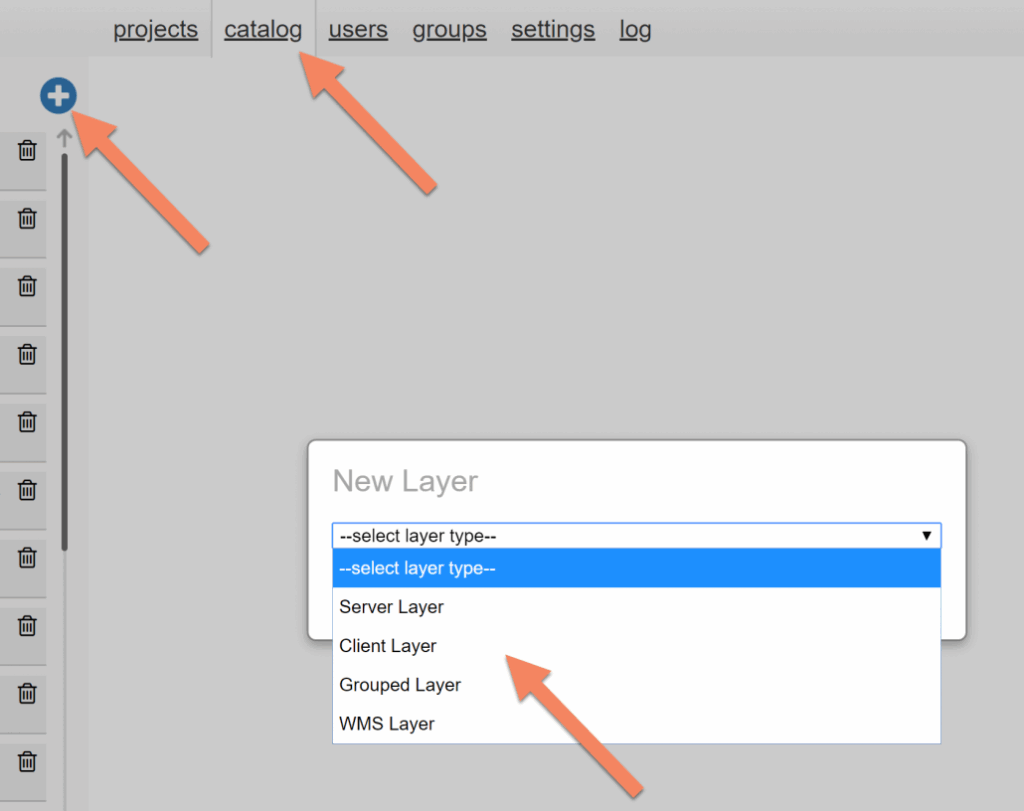
- In the Select MDN Layer dropdown, choose ProjectPointLayer.
- Click Add.
Step 5. Configure Layer
Configure the layer according to your requirements.
If you have multiple Project Points Plugins configured and want to restrict this layer to a specific project, use the Where Clause property to filter by Project ID.
projectId = ‘ProjectGuidHere’

Step 6. Add Layer to Map
- Open a new or existing project.
- Open the Rolodex.
- In the Catalog dialog, select the layer you created.
- Add the layer to your map.


For additional help please email: [email protected]