
Getting Started
Get in Touch
Where we’re located:
We live, work, and play in beautiful Tallahassee, Florida.
Billing & Payment Mailing Address:
2910 Kerry Forest Pkwy, D4-282
Tallahassee, FL 32309 USA
We are SOC 2 Compliant

OKTA Configuration for EasyTerritory
With the latest version of EasyTerritory, we can now use OKTA as an IdP so users can sign-on to EasyTerritory under OKTA. Use the following instructions to integrate EasyTerritory with your OKTA deployment.
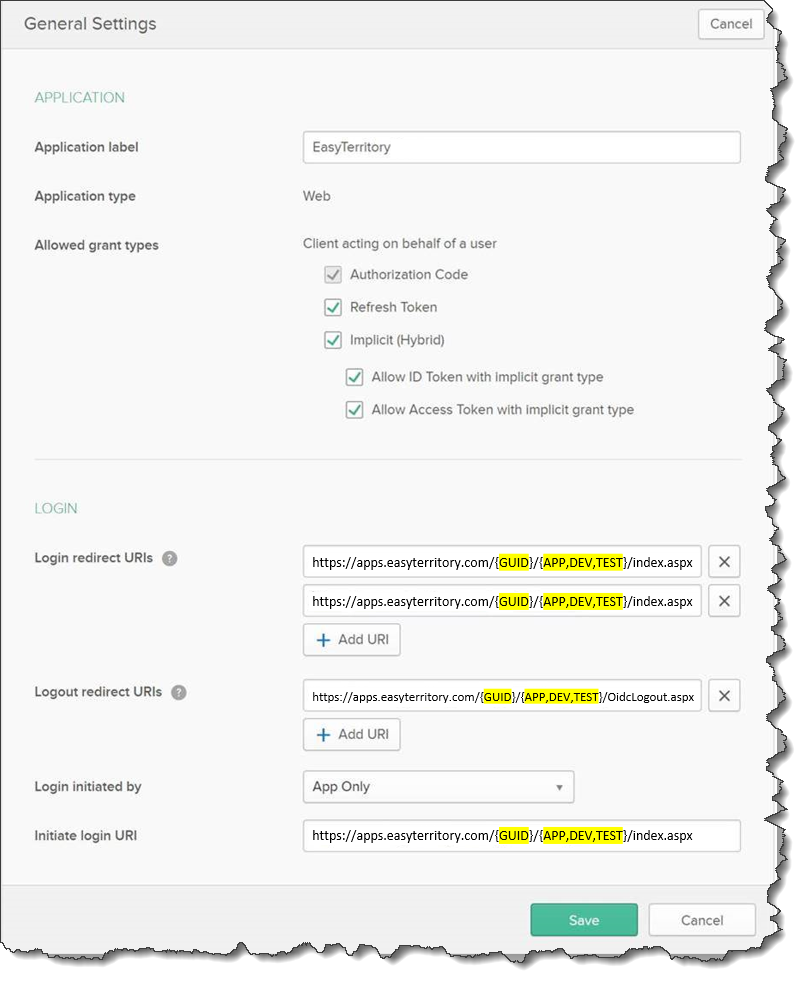
1. Register your EasyTerritory instance in OKTA using the properties shown below:
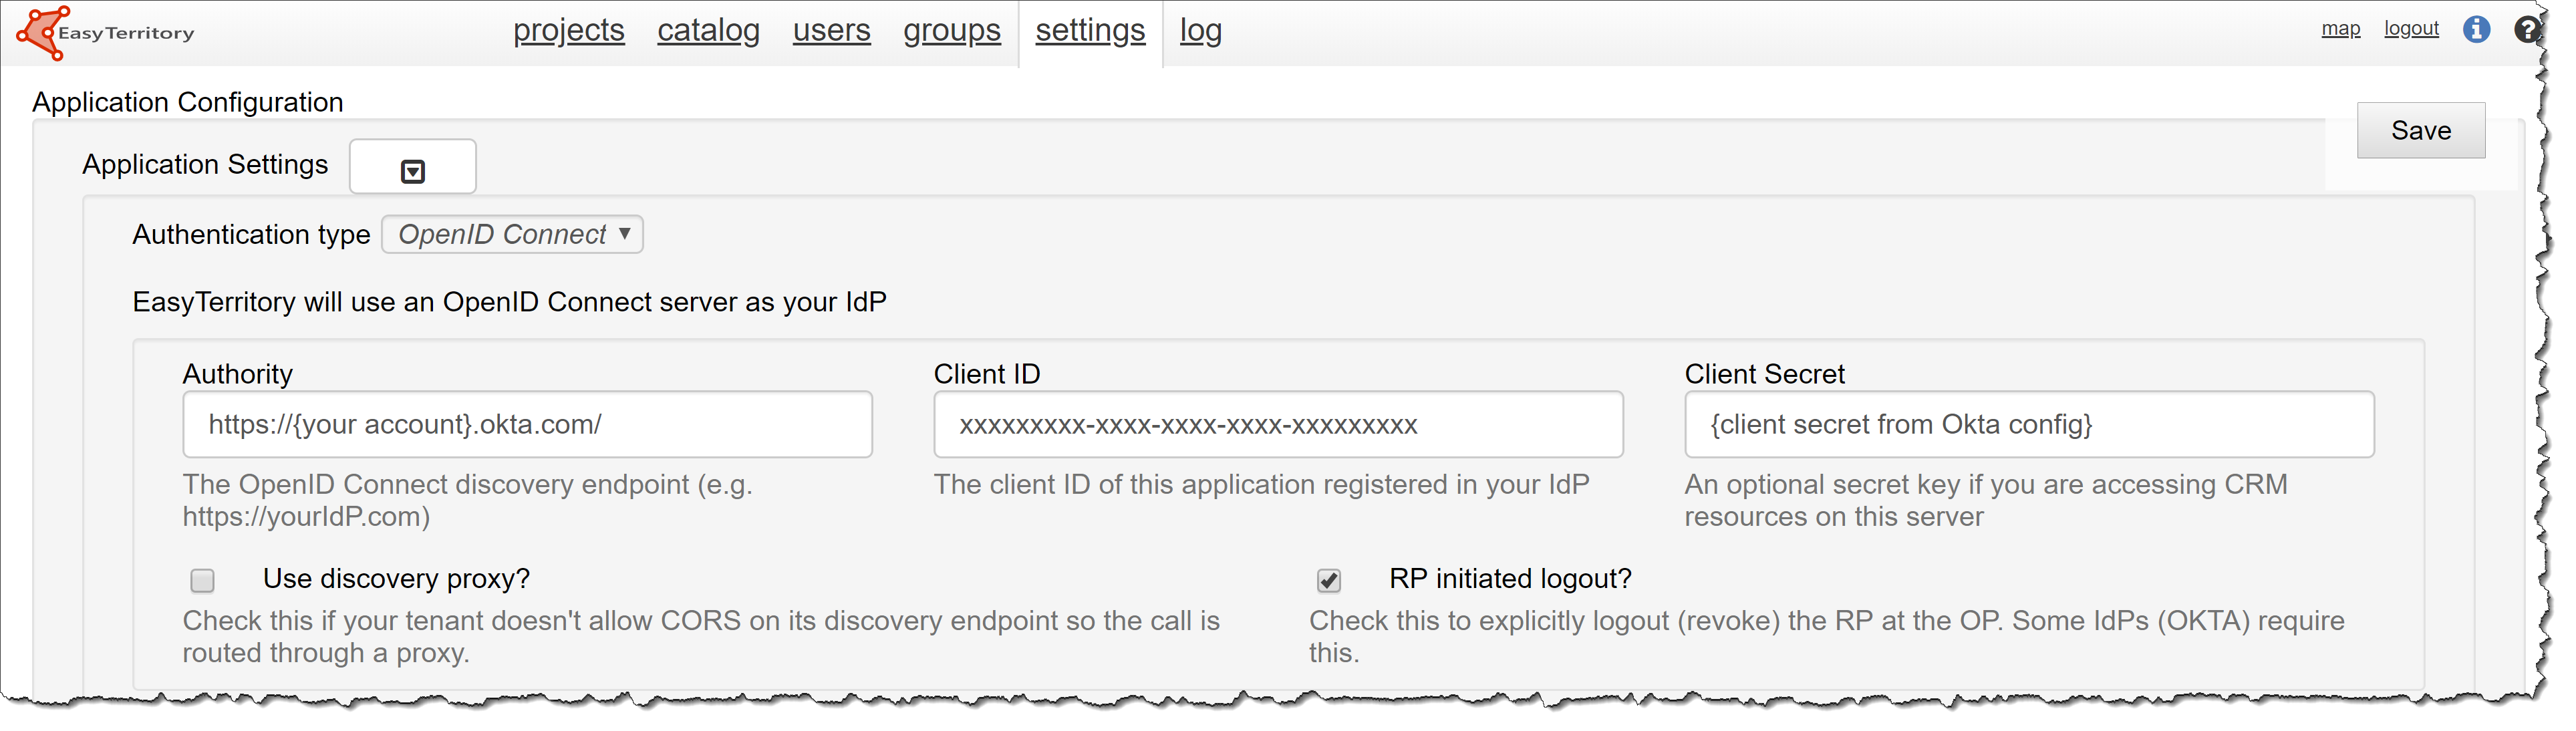
2. Access the EasyTerritory Admin Settings Panel and apply the Authority, Client ID, and Client Secret obtained from the OKTA application registration as shown below:
Note: Be sure to check the RP Initiated Logout option as shown.
Once the EasyTerritory application has been registered in your OKTA portal, users of EasyTerritory will see a Single Sign-on experience into EasyTerritory and will be prompted to log into Dynamics 365 separately from within EasyTerritory the first time they open a FetchXML project during each browsing session.
Embed, OKTA-enabled EasyTerritory Application in Dynamics 365
By default, EasyTerritory with OKTA enabled, will redirect to the IDP sign-on page in the browser. If you would like to embed EasyTerritory with a dashboard using an Iframe in Dynamics 365, you will need to append the following querystring property to the Iframe URL &useIdpPopup=true.
Example: https://apps.easyterritory.com/{YOUR GUID}/APP/index.html?projectId={YOUR PROJECT GUID}&useIdpPopup=true
An additional Redirect URL will need to be included in the EasyTerritory Application Registration in OKTA as follows:
Example: https://apps.easyterritory.com/{YOUR GUID}/APP/OidcPopupCallback.aspx
For questions, contact Support@EasyTerritory.com.