Workload partitioning is a powerful tool in EasyTerritory for planners to determine the number of resources needed in a territory or region where locations (accounts, customers, etc.) are repeatedly visited. Workload partitioning takes into account multiple factors:
- How frequently must a site be visited across the schedule period (e.g. every day, week, month, quarter, etc.)?
- How much dwell time is spent on-site?
- What is the driving distance between sites?
- How many hours per day are you targeting for your resources?
- Do you want accounts to always be visited by the same resource or can resources be interchanged?
In order to use EasyTerritory’s workload partitioning feature, there is only one required data-column which must be included in your dataset and flagged with the appropriate metadata:
- Visit frequency in weeks – this is the number of weeks between each visit. To visit a site twice a week, the value is 0.5; for every quarter it is 13. The data column must be flagged with scheduleweekfreq
- On-site time in hours – this is an optional column and specifies the amount of dwell time per visit for a given site in hours. The data column must be flagged with routestopdelayhours. If this column is not provided, then you will be prompted for the average onsite dwell time per stop.
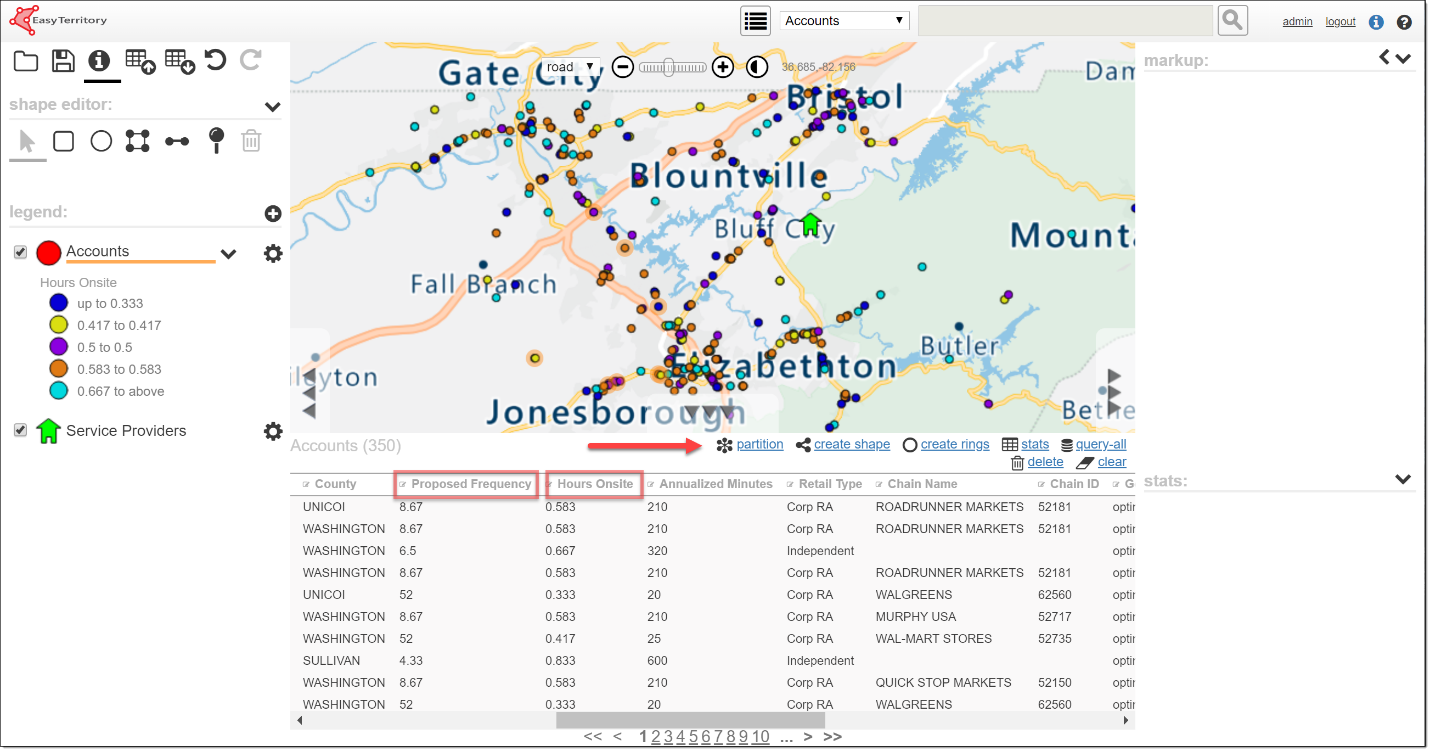
To use the workload partitioning feature, perform the following steps:
-
- Query the features you want to schedule. This may be done using any of EasyTerritory’s powerful querying capabilities (by ctrl-clicking on features; selecting by lasso, envelope or polygon).
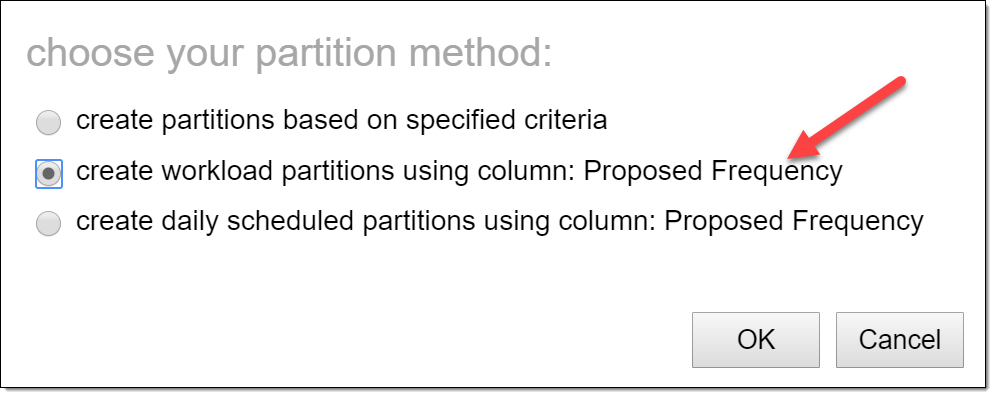
- Click on the partition link in the results-grid – this will open an options dialog:
-
- Select the create workload partitions option – this opens the scheduling dialog:
-
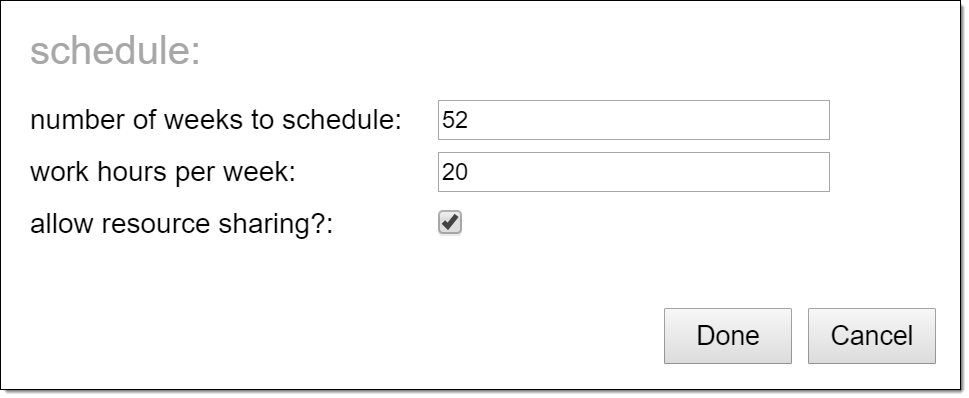
- Enter your scheduling criteria:
- Number of weeks to schedule – this is the number of weeks to analyze – typically this is set to the largest value in your scheduleweekfreq column so every stop is included in your analysis.
- Work hours per week – this is the target number of hours you want each resource to work per week.
- Allow resource sharing – check this if a location (account, store, etc.) can be visited by any resource. Leave this unchecked if your reps have a relationship with the account and must be a consistent resource on subsequent visits.
- Press done to open the partitioning dialog:
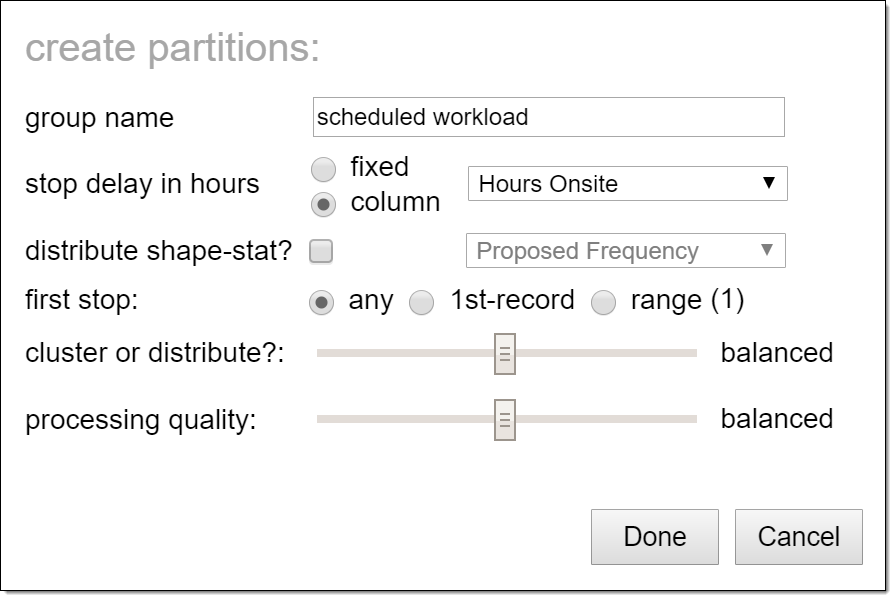
- Enter your partitioning criteria:
- Group Name: this is the name used to group the results in the markup panel
- Stop delay in hours: use your data column flagged with scheduleweekfreq or enter an average onsite dwell time in hours used across all stops
- Distribute shape-stat: this is an optional column that will be used in the partitioning process to attempt to evenly distribute (e.g. sales volume or store rating)
- First-stop: leave this set to any by default as a start-stop is not needed in this analysis
- Cluster or distribute: there is a conflict between isolated workload clusters with minimal drive times and precise distribution of workload between partitions. Set this slider to your preference.
- Processing quality: this is the amount of time spent trying to optimize the solution.
- Press done to create workload partitions:
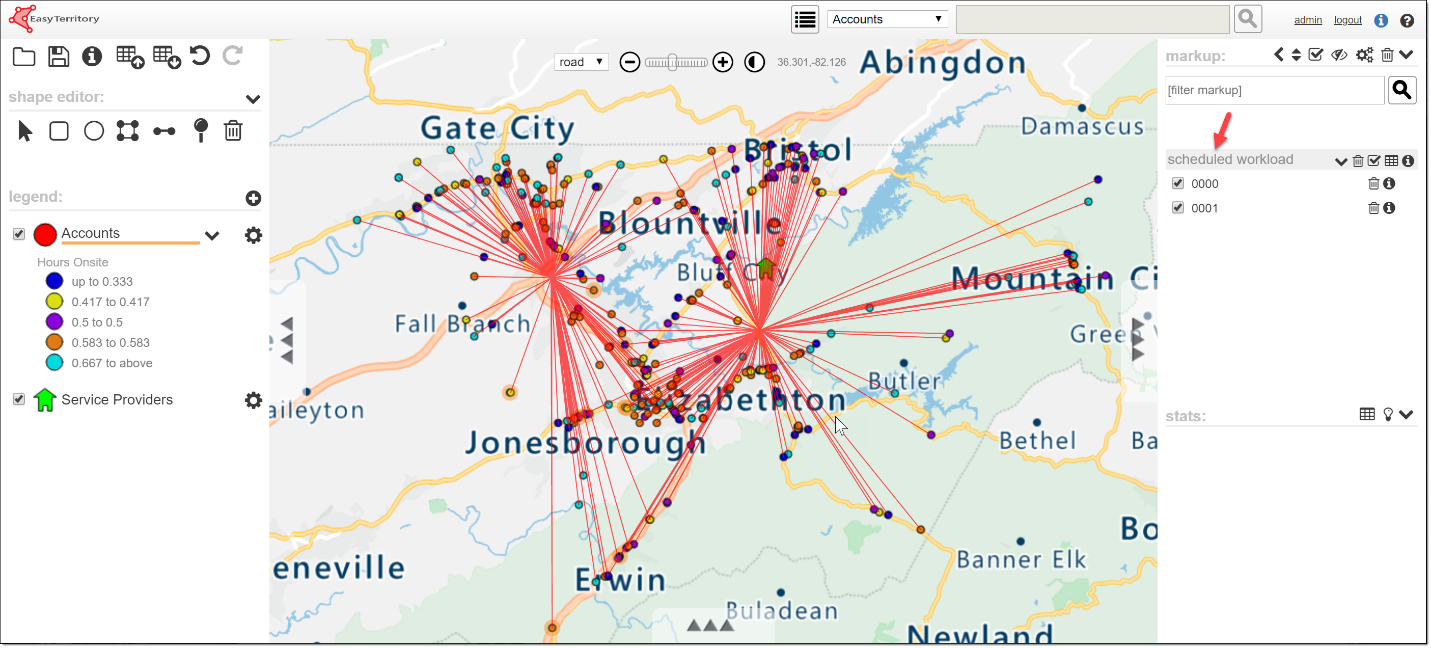
Based on the number of accounts, frequency of visits, on-site dwell time and expected weekly hours (20), we created two partitions – that is, two resources are needed for this region. From here we might select one of the partitions and use EasyTerritory’s scheduling feature to create a daily visit schedule for the resource. Please review our documentation on Scheduling for more information.

