Overview:
EasyTerritory can now be deployed as Azure Web App. To deploy EasyTerritory to an Azure Web App, you’ll need to have access to the Azure Portal: https://portal.azure.com
NOTE: EasyTerritory requires two Azure Web Apps and a SQL Azure database to run. One of the Azure Web Apps is for hosting the application and REST Services. The second Web App is for the hosting of the NODE.JS Geocoder Service.
Setup Steps:
- Request the EasyTerritory files from your support contact. The EasyTerritory files are delivered in a .ZIP download and contain the following components:
- EasyTerritory Application (Single-page HTML5 application)
- MapDotNet REST Web Services (the spatial data web services)
- EasyTerritory Geocoder (a NODE.JS Service)
- EasyTerritory Database (SQL Azure .bacpac file)
- EasyTerritory Installer that includes the MapDotNet UX Studio product (used for updating database connection strings)
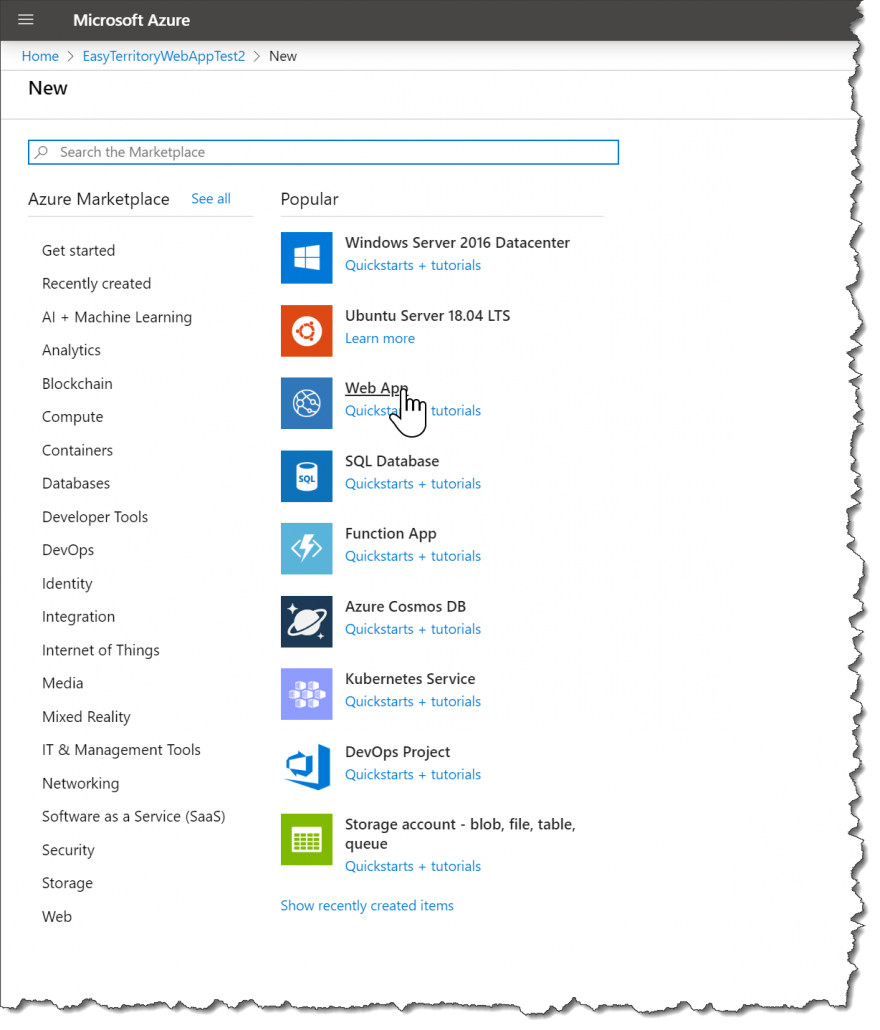
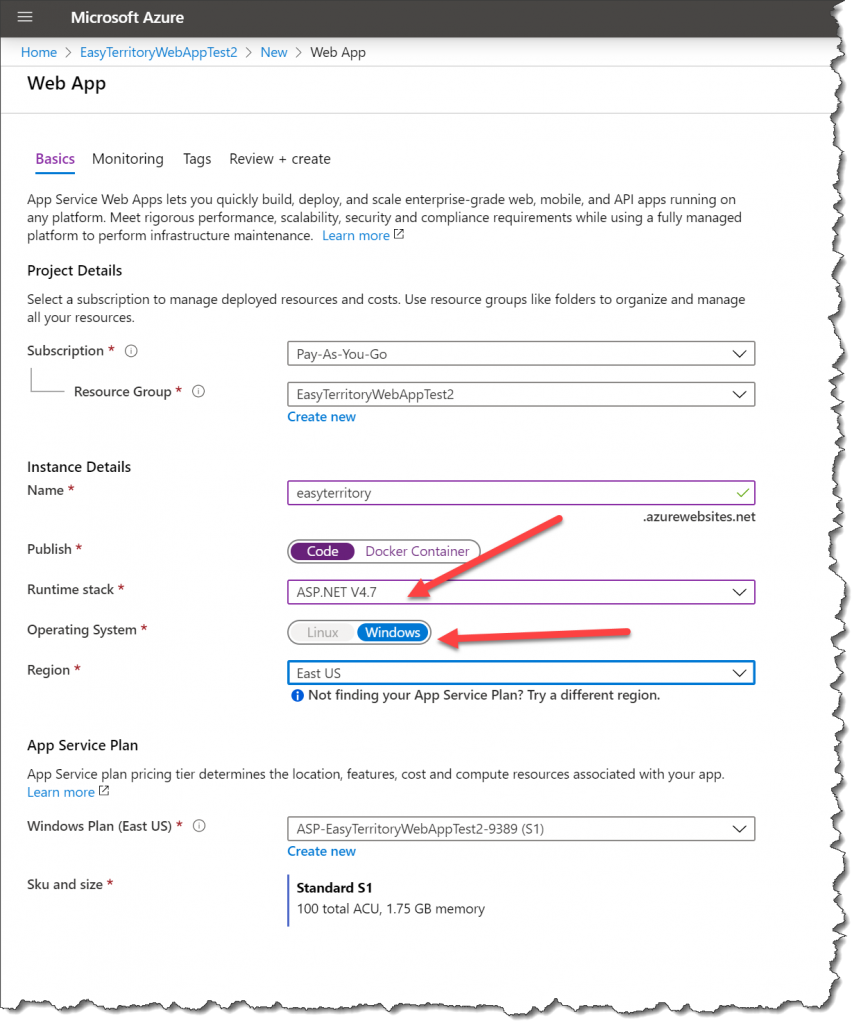
- Create Web App for the primary EasyTerritory application and MapDotNet Web Services.
- Choose a Windows instance, with ASP.NET V4.7 pre-installed.
- Restore the SQL Azure easyterritorydb.bacpac file to your SQL Azure instance.
- The SQL .bacpac files includes all of the EasyTerritory Tables (prefixed with oi_) and the spatial data (e.g. ZIP Codes, Counties, States, etc.)
- Unzip the package and update the Web.Configs for the EasyTerritory application.
- EasyTerritory App web.config changes
- In the EasyTerritory/app folder, open the web.config in a text editor and update the following:
- Update the MapDotNet URL. This is the endpoint of the ‘mdn’ folder. MapDotNet is the geospatial server used in EasyTerritory to server up catalog layers like US ZIP Codes.
- This is the global admin username and password. By default, it’s set to admin/password. Your EasyTerritory support person can provide an encrypted password upon request.
- Update the database storage configuration.
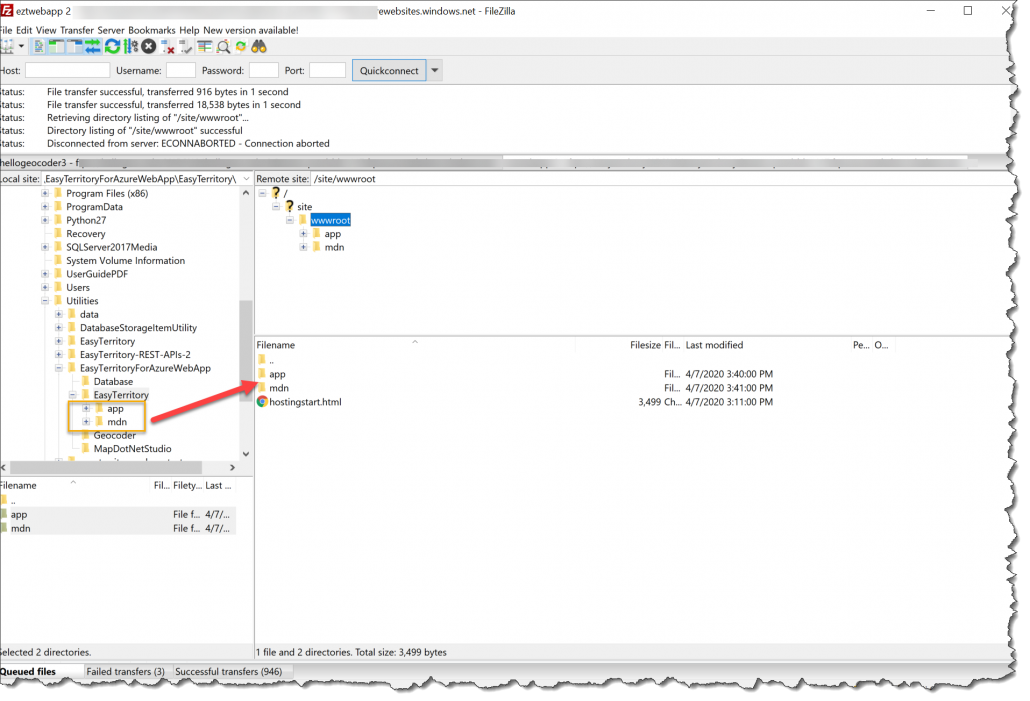
- Use an FTP Client (like FileZilla) to copy the ‘app’ and ‘mdn’ folders to the new instance.
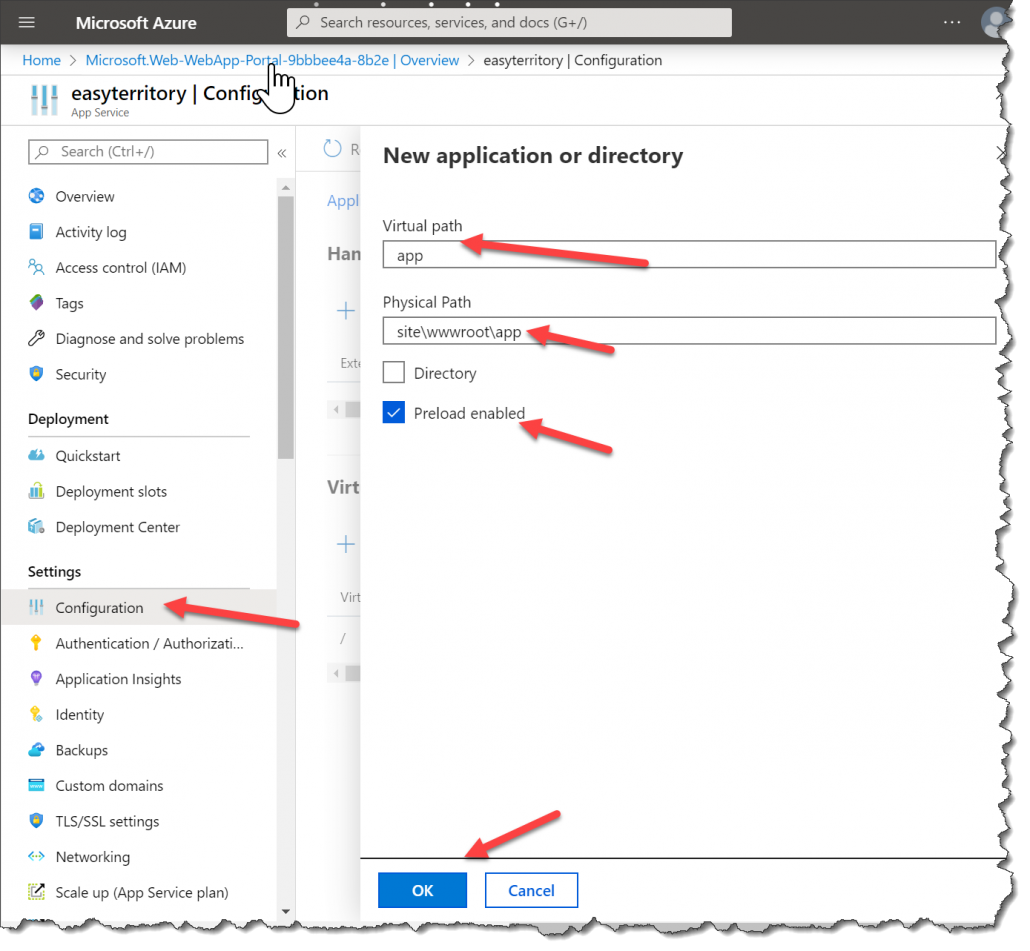
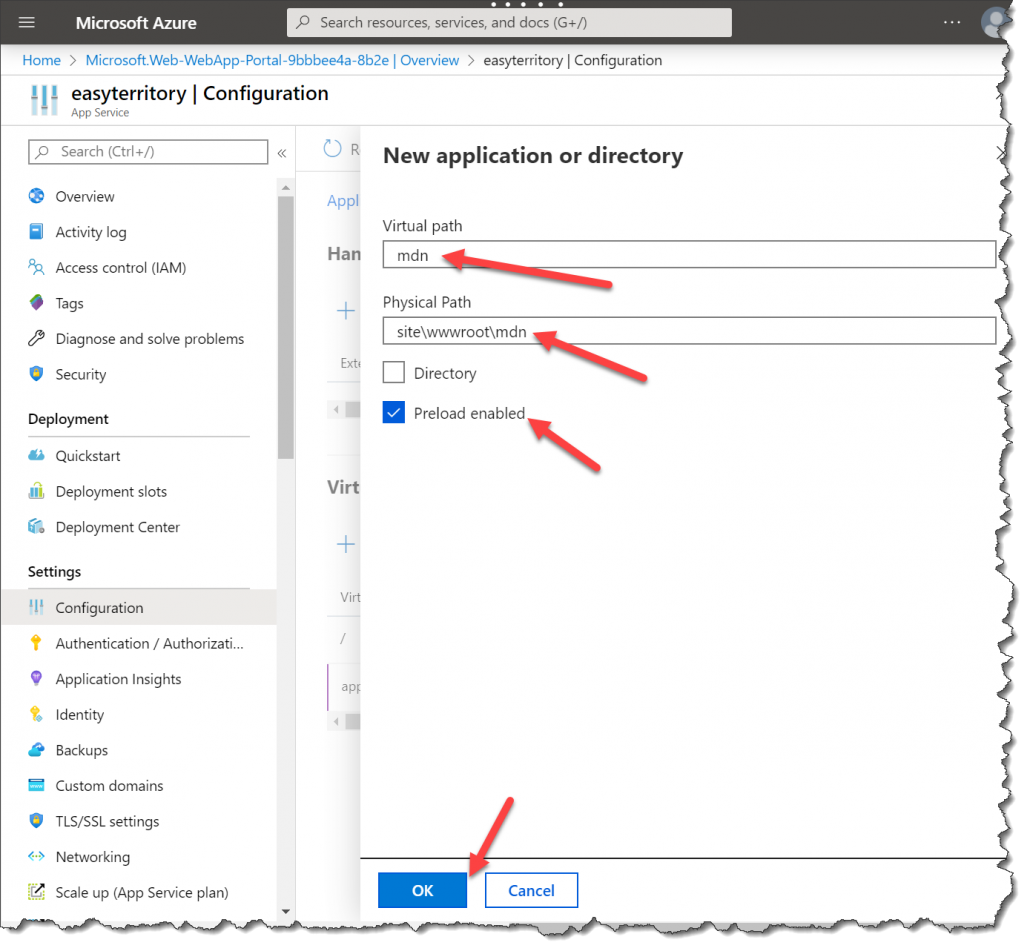
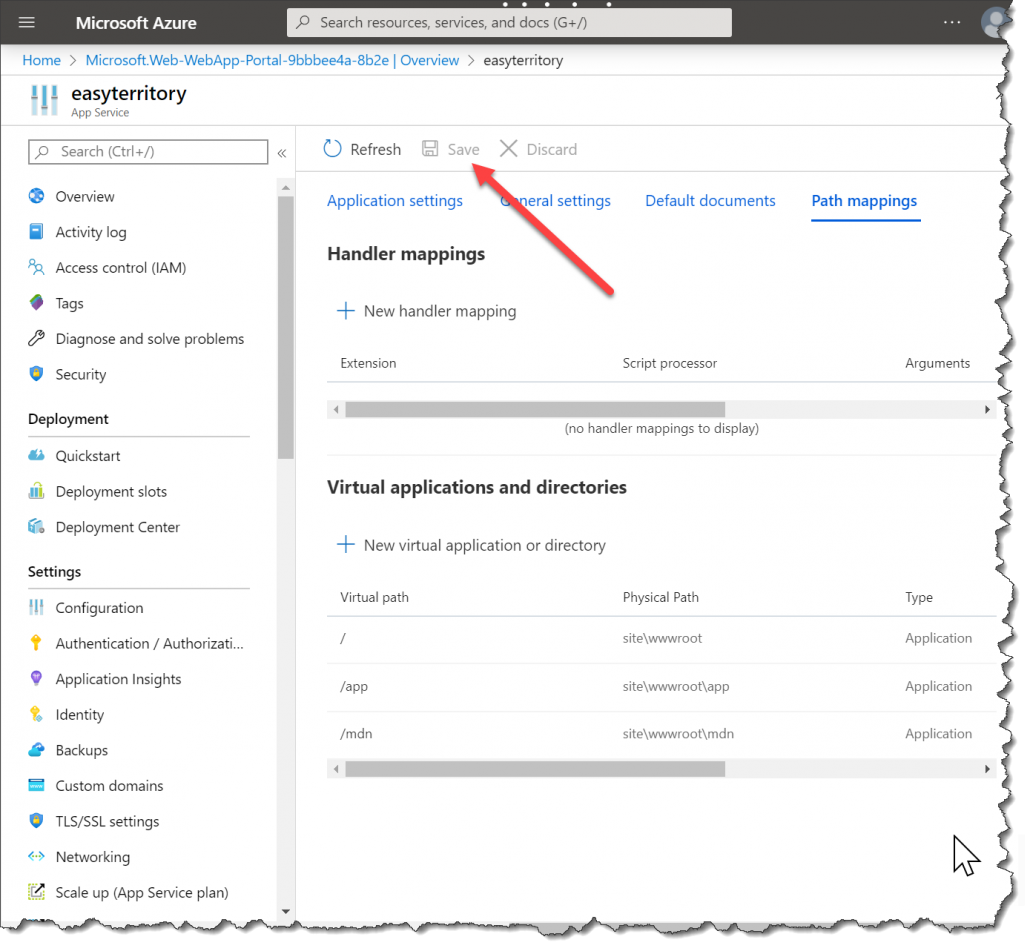
- In the Azure Portal, Create Virtual Directories for ‘app’ and ‘mdn’
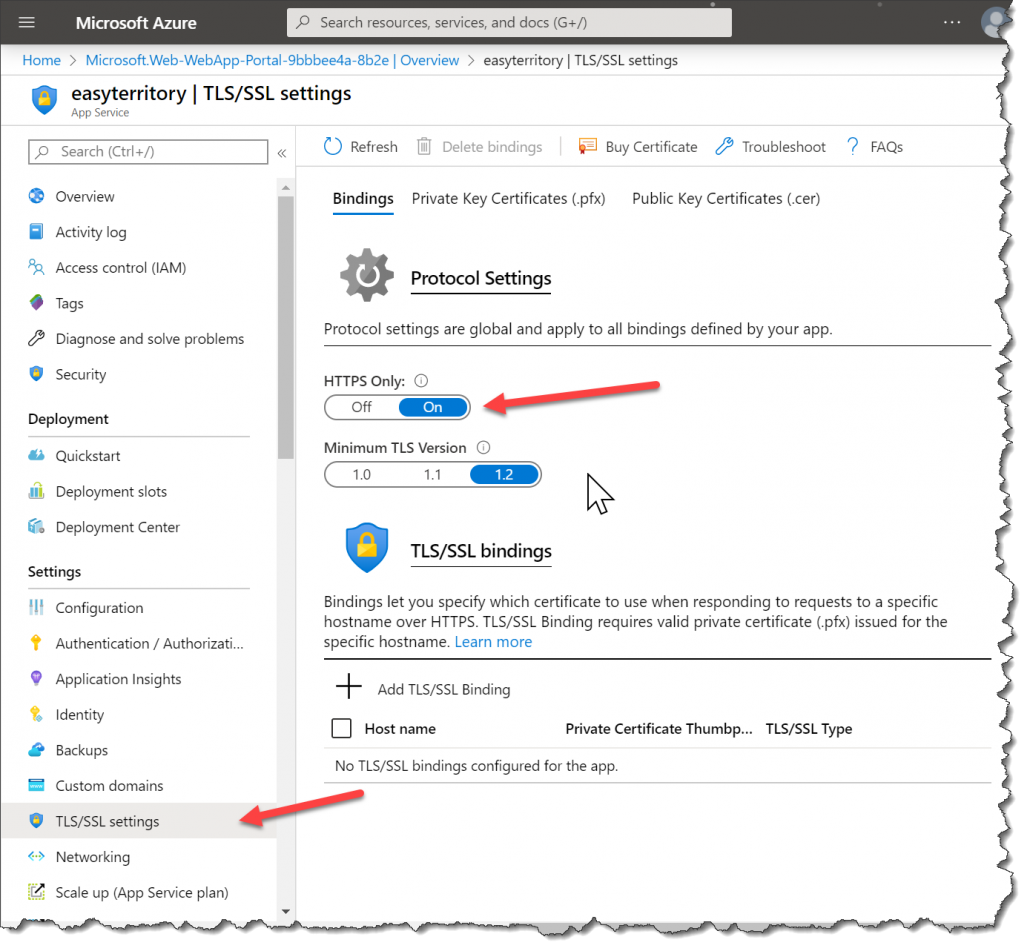
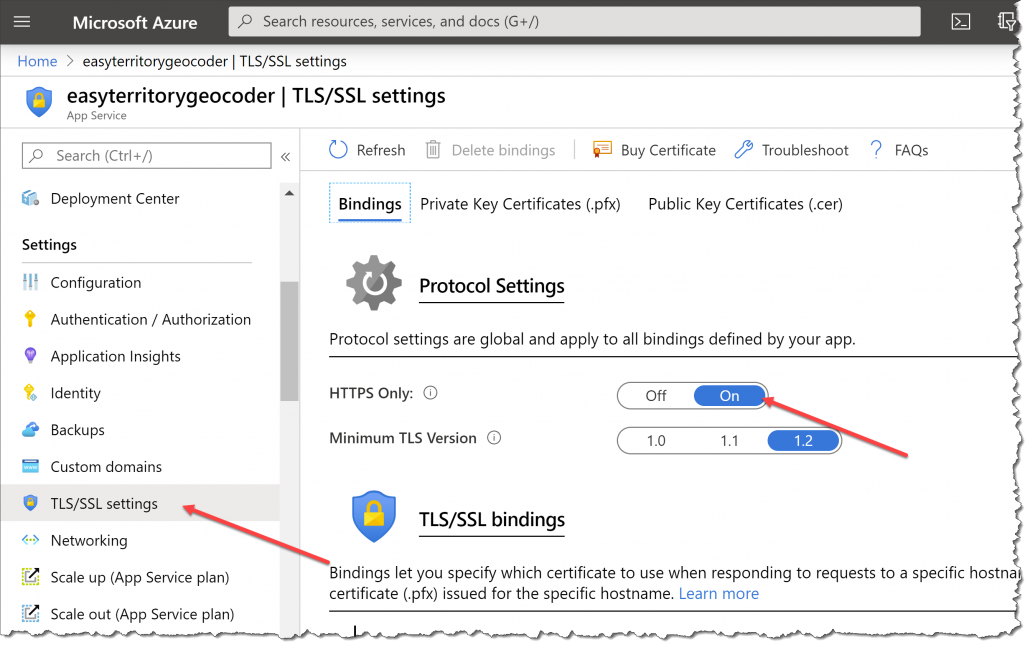
- Site the Web App to HTTPS Only
- The web.configs are preconfigured to work with SSL and TLS 1.2. Under the TLS/SSL settings set ‘HTTPS Only’ to true.
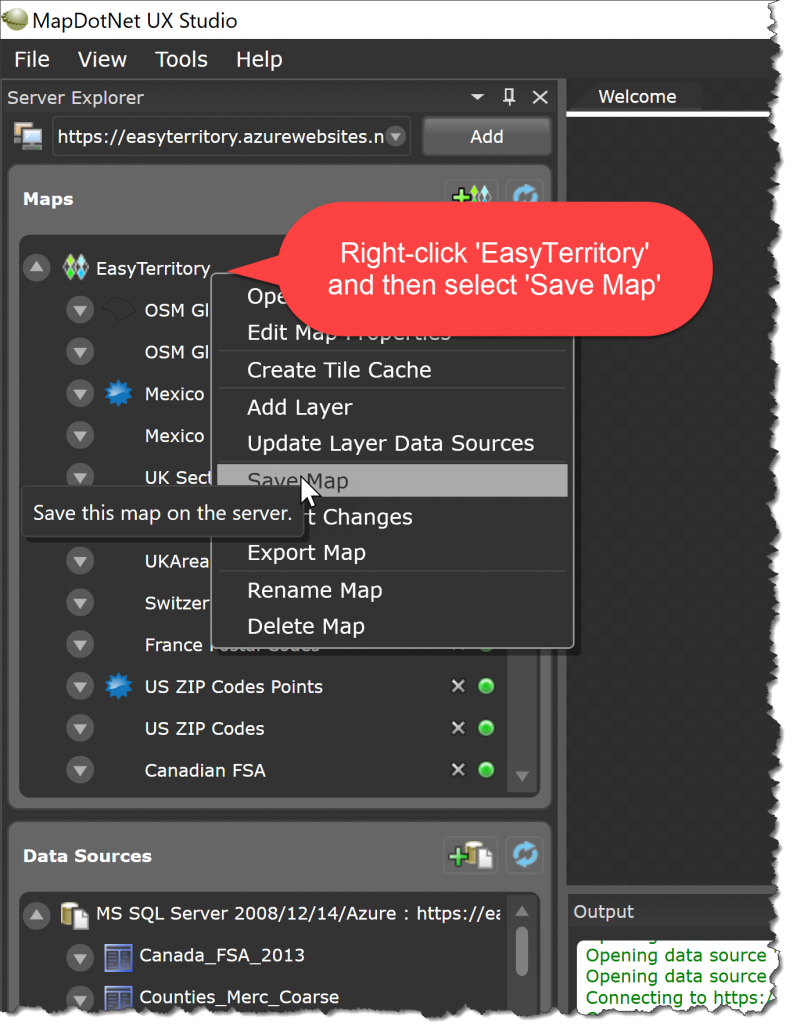
- Install MapDotNet Studio and update the data source connection strings.
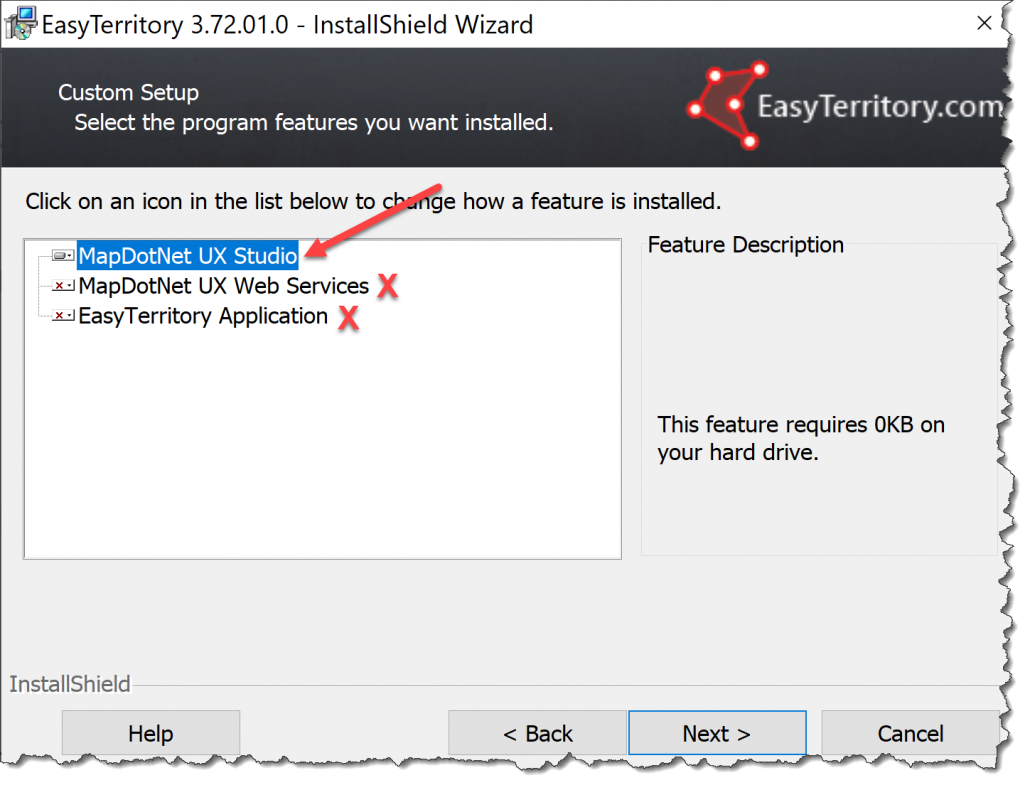
- MapDotNet UX Studio is an application developed by EasyTerritory that is used to update the MapFile that reads the spatial data from SQL. This application is used to update the default SQL connection strings in a MapDotNet MapFile (.mapx). Run the EasyTerritory installer on your desktop and choose, ‘Custom’ install, to install only MapDotNet Studio.
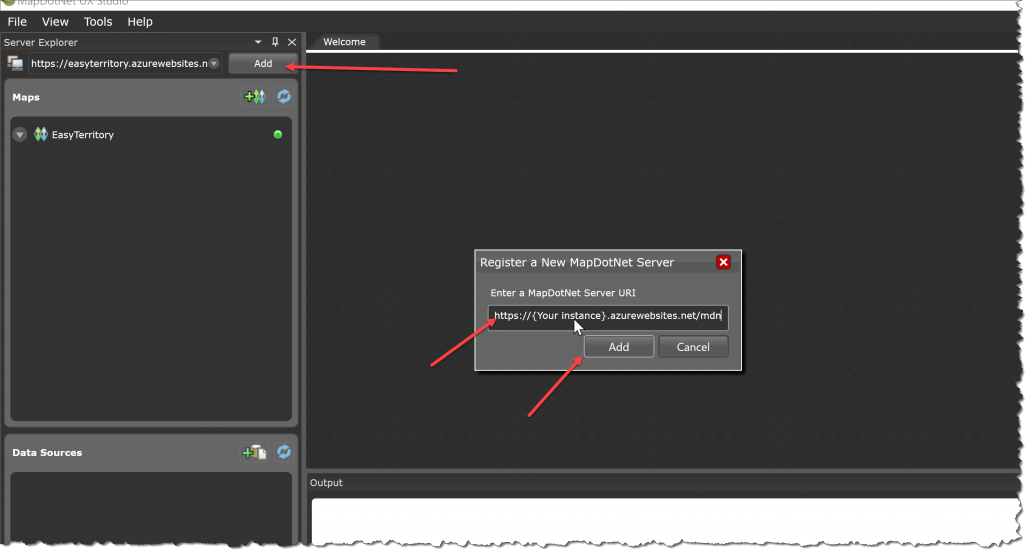
- Once MapDotNet UX Studio is installed, launch the application. Add a connection to the MDN (MapDotNet REST Services) endpoint.
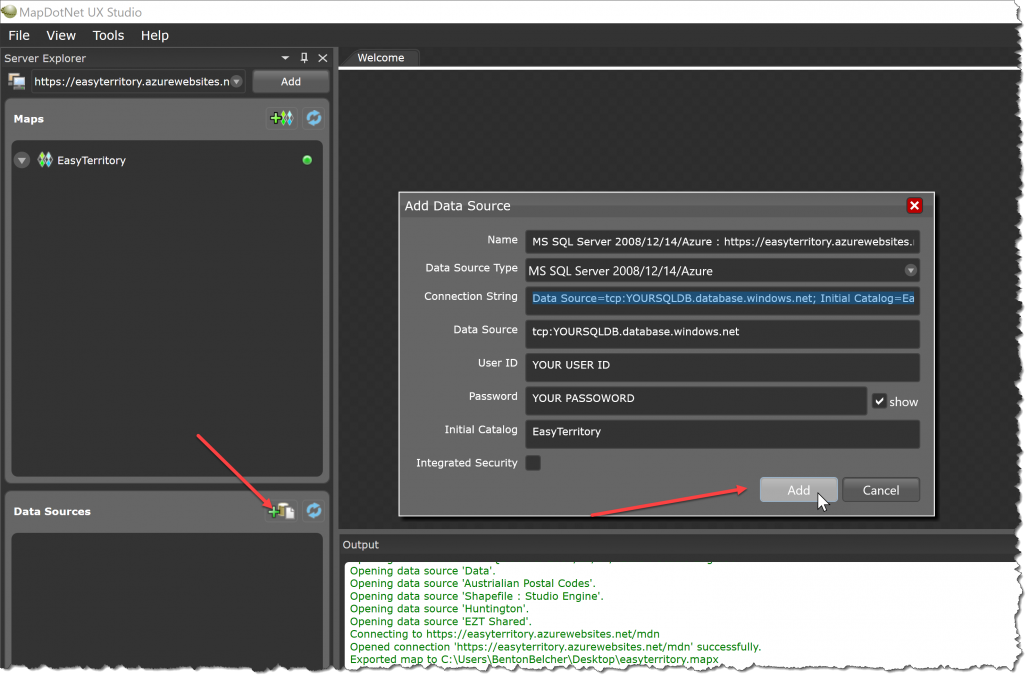
- Add a connection to your SQL database.
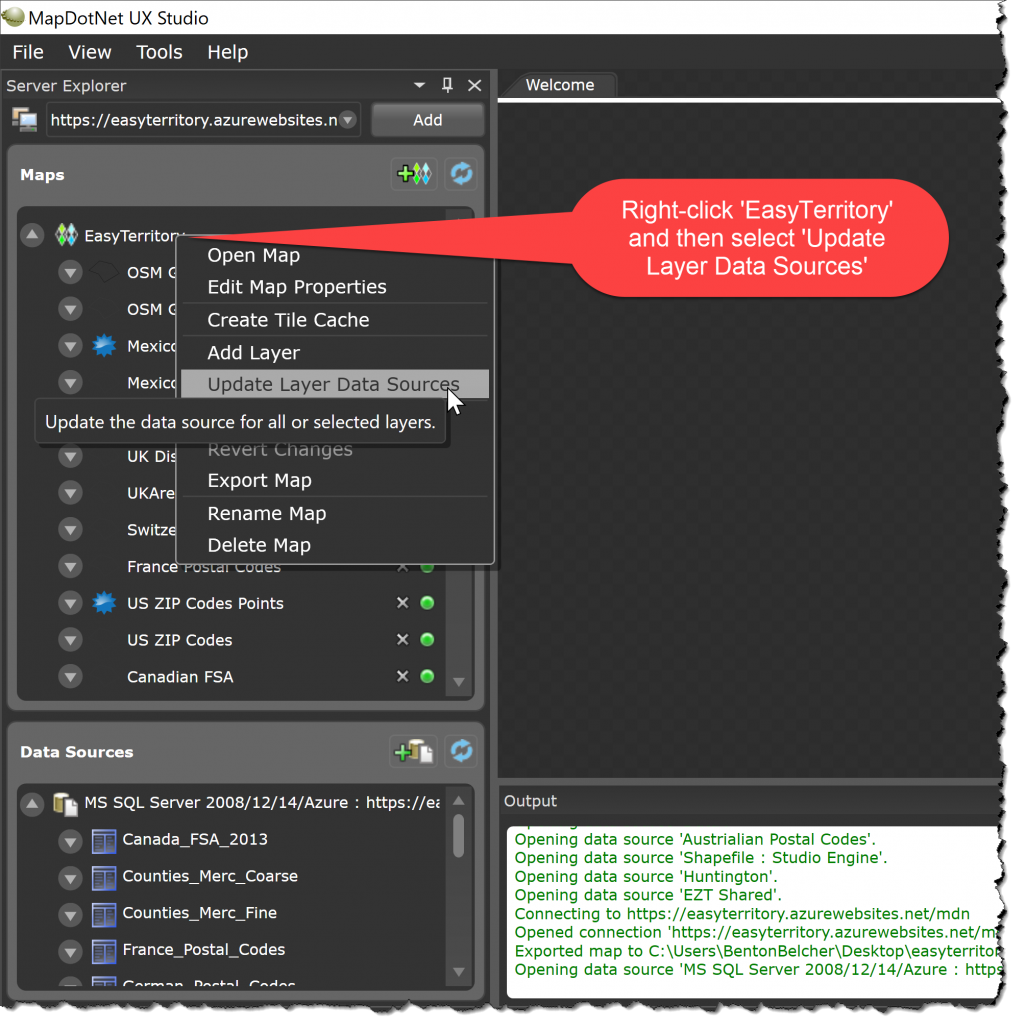
- Update the spatial layers data source.
- Select the layers and click ‘OK’
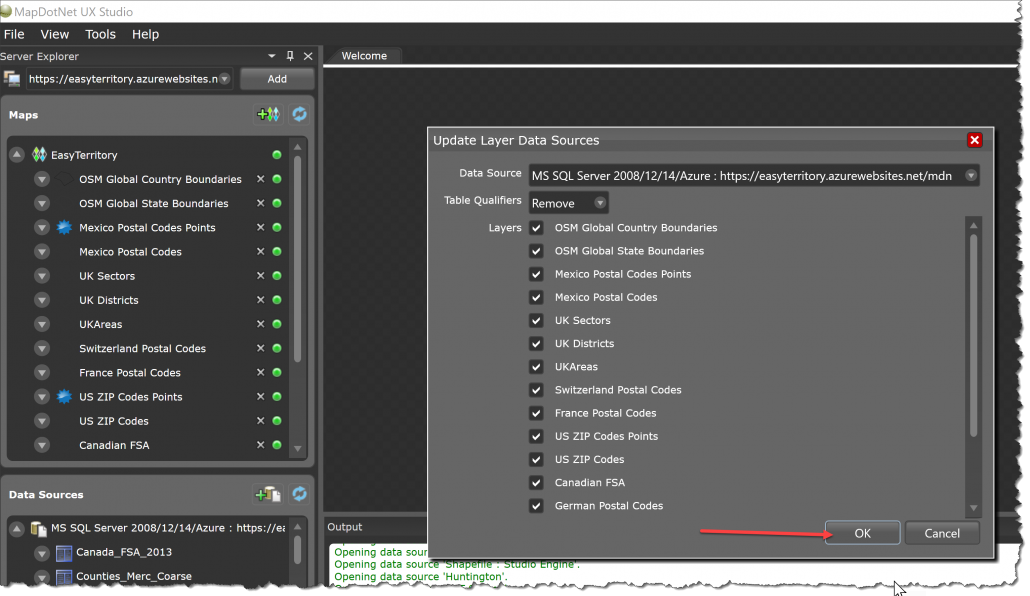
- Save the Map.
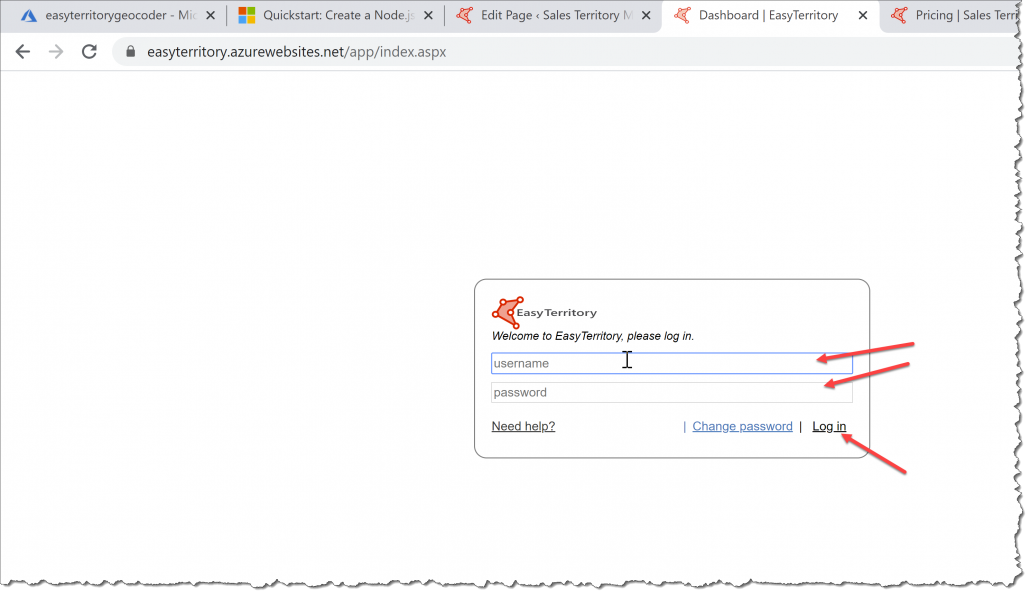
- Test the setup of the EasyTerritory application and REST services.
- Navigate to your application URL: http://{YOUR INSTANCE NAME}.azurewebsites.net/app
- You should see a login panel. Login with the credentials set in your applicaiton (app) web.config. By default, the username/password is: admin/password
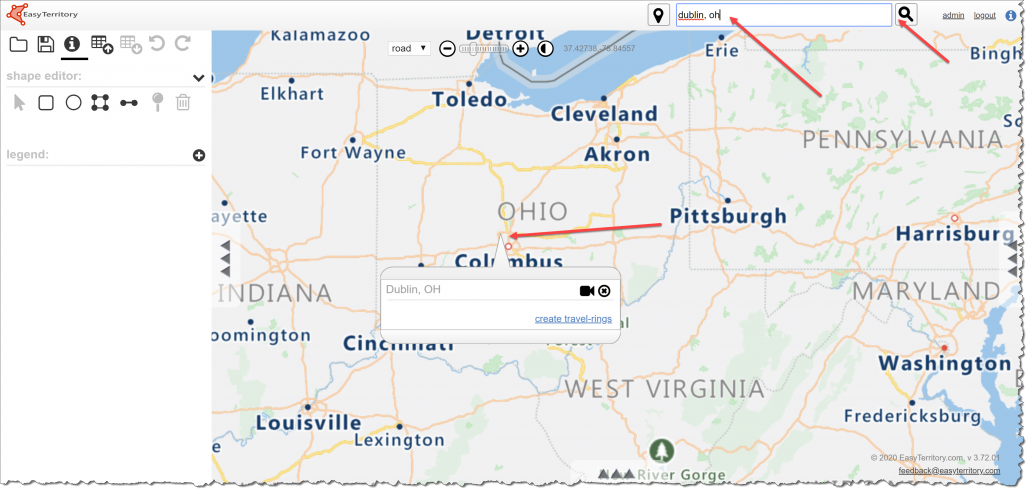
- Once you’re successfully logged into EasyTerritory, add the ‘US ZIP Codes’ layer to your to verify the MapDotNet spatial data services are running. In the rolodex dialog, click ‘catalog’ then select the ‘US ZIP Codes’ and click done.
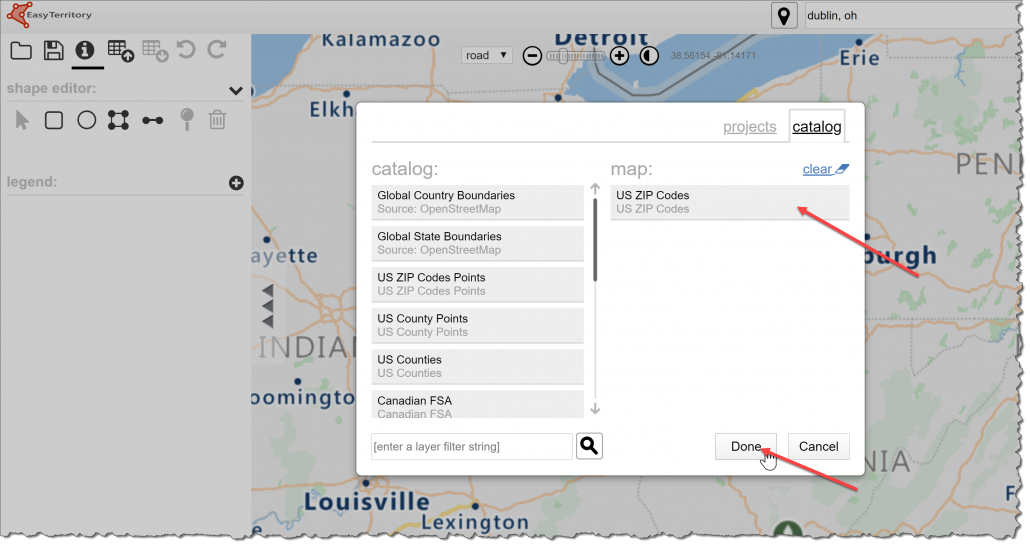
- Once the dialog closes, you should see the grey outlines of the ZIP Code boundaries on the map. This indicates that MapDotNet Spatial Services are running.

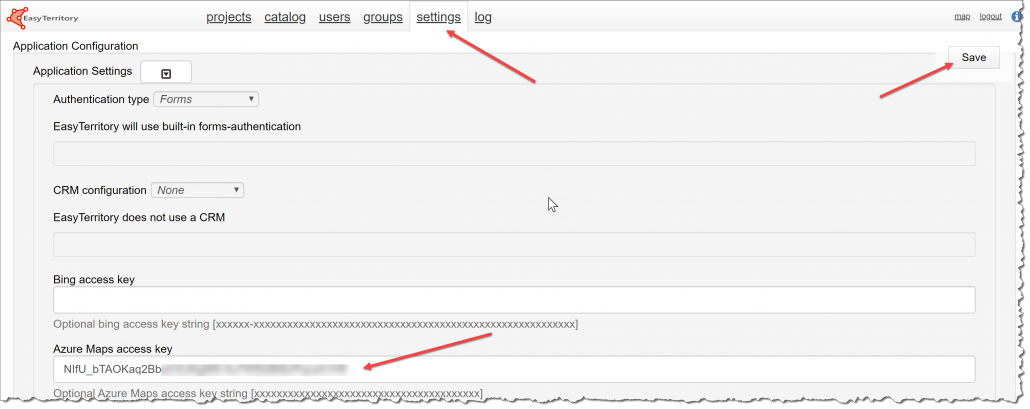
- Set your Bing Maps or Azure Maps key.
- EasyTerritory requires either an Azure Maps or Bing Maps key.
- In the admin panel of EasyTerritory, you can set the Bing Maps or Azure Maps key.
- Click ‘admin’ in the upper right corner of EasyTerritory.
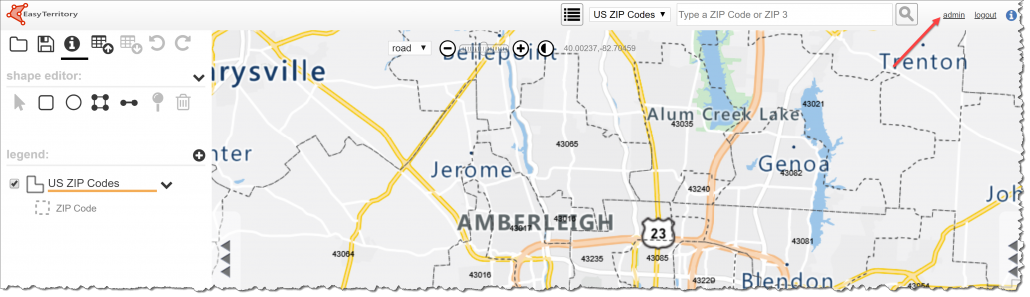
- Click ‘settings’, enter either a Bing Maps or Azure Maps key, and click ‘Save’.
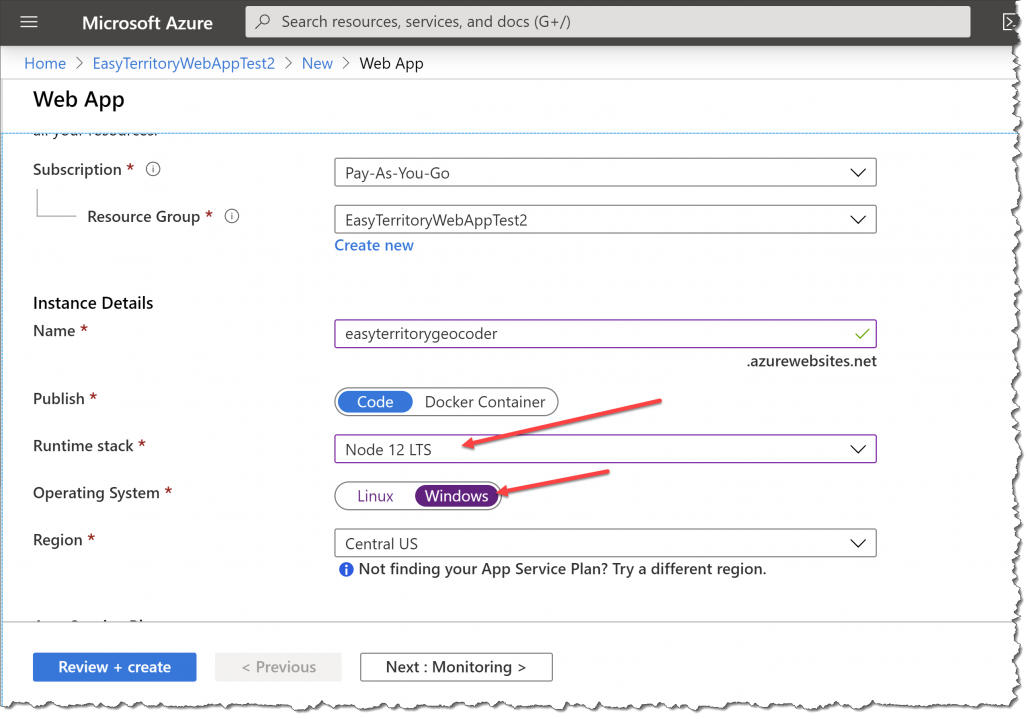
- Create second Azure Web App for the EasyTerritory Geocoder
- This Web App needs to have NODE.JS 12LTS pre-installed on Windows.
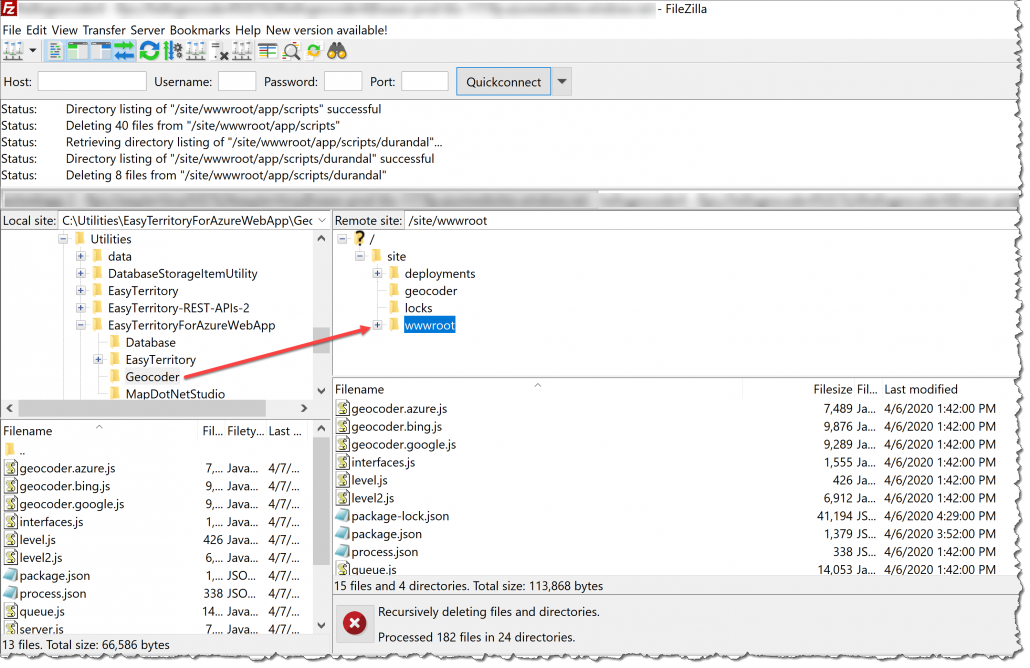
- Once the Web App is running, copy the contents of the Geocoder folder to the wwwroot folder on the Web App Server using an FTP Client.
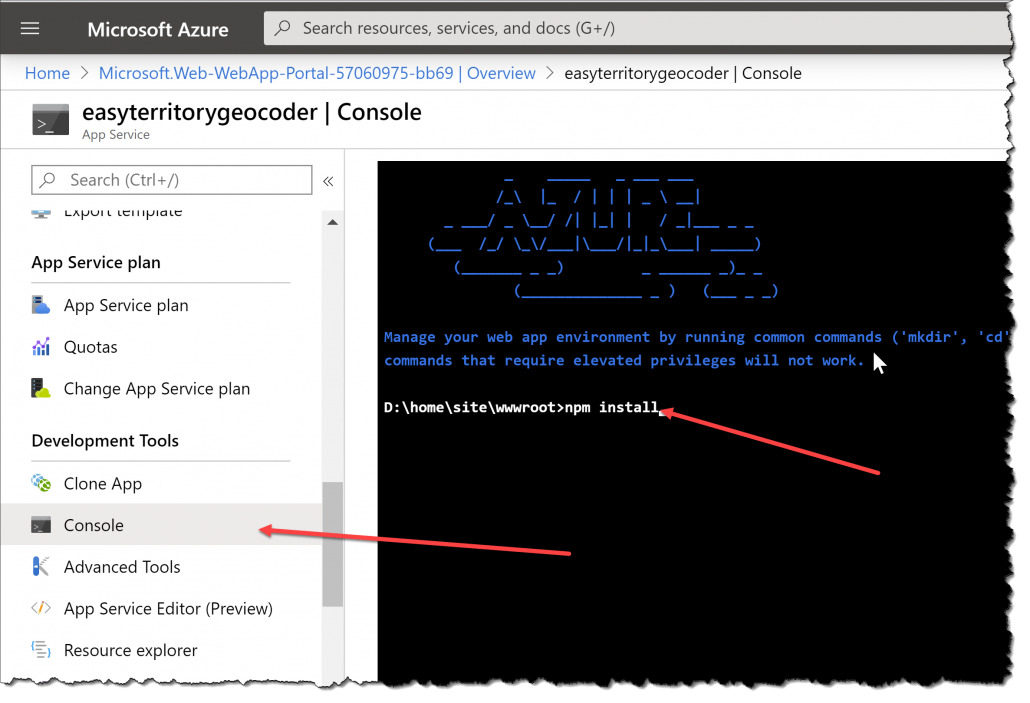
- Open the console and run NODE Package Manager Install in the wwwroot folder. ‘npm install‘
- Set the website to force SSL/HTTPS.
- Restart the Geocoder Web App.

- Update the web.config for the application (app) to specify the Geocoder endpoint.
- https://{YOUR GEOCODER INSTANCE NAME}.azurewebsites.net ” />
- Save the web.config and log into EasyTerritory to test the Geocoder. You should get a call out on the map with the address you search for.
- All done!
For questions or support please contact: support@easyterritory.com