The following are instructions for setting up EasyTerritory using the EasyTerritory forms-based authentication with Dynamics 365. Under this configuration, the EasyTerritory is prompted for EasyTerritory creds to log into the application, then prompted for Dynamics 365 credentials when adding a view from Dynamics.
NOTE: An alternative approach to this authentication model is to setup EasyTerritory with Azure Active Directory. Instructions for those configuration steps can be found here. Otherwise, follow these steps to
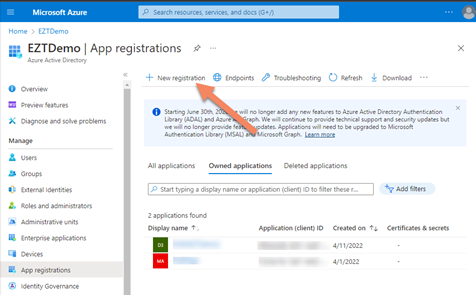
Step 1: Create an App Registration in the Azure portal > Azure Active Directory.
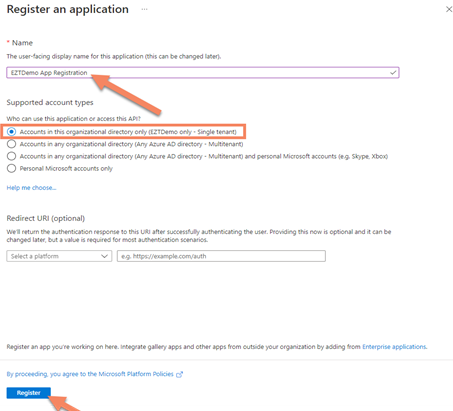
Under App registrations, select ‘New registration’
Create a friendly name to quickly identify the registration.
Select the scope of access for your organization.
Step 2: Add API permissions
Select ‘API permissions’ and ‘Add a permission’
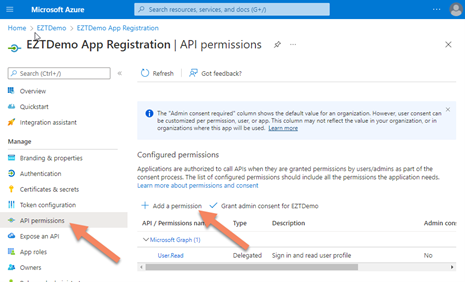
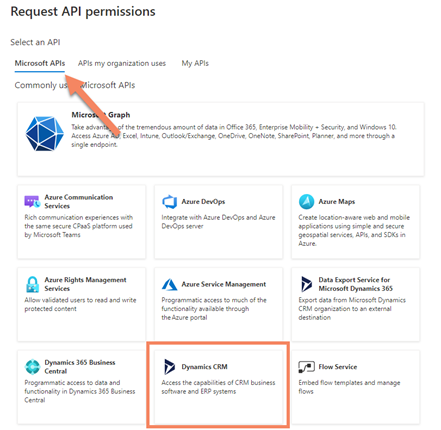
Add the Dynamics CRM API
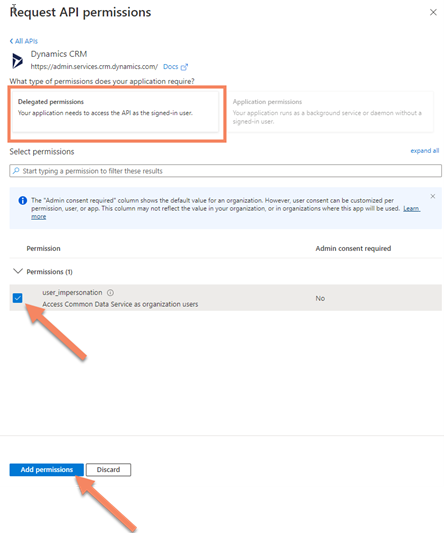
Step 3: Click ‘Delegated permissions and check the options and click on ‘user_impresonation’
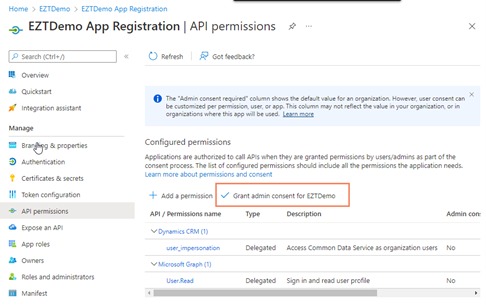
Select ‘Gran admin consent for…’
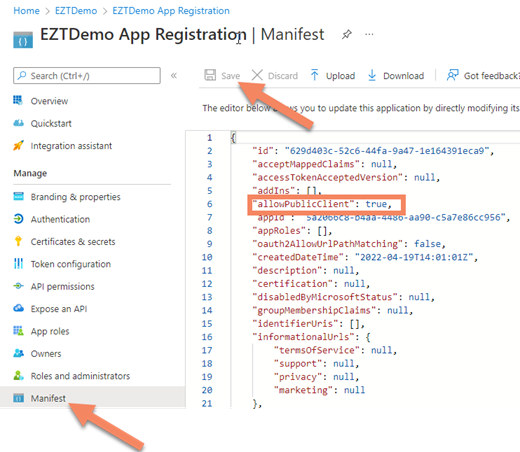
Step 4: Select the ‘Manifest’ tab and set the ‘allowPublicClient’ property to true and click ‘Save’.
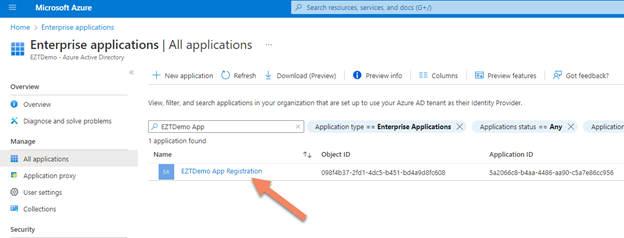
Step 5: Browse to Azure Portal > Enterprise Applications > All applications
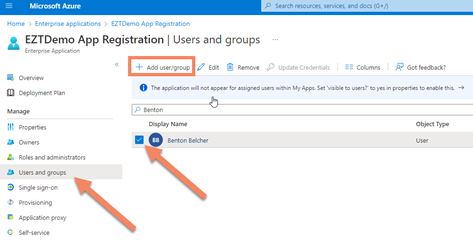
Select ‘Users and groups’ and ‘Add user/group’, to add a specific user or group of users. Lastly, select the checkbox next to desired user or group.
Step 6: Configure OAuth Configuration in you EasyTerritory App.
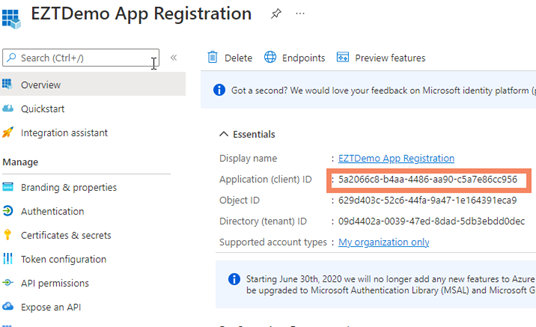
Browse to your newly created App Registration and copy the Application (client) ID
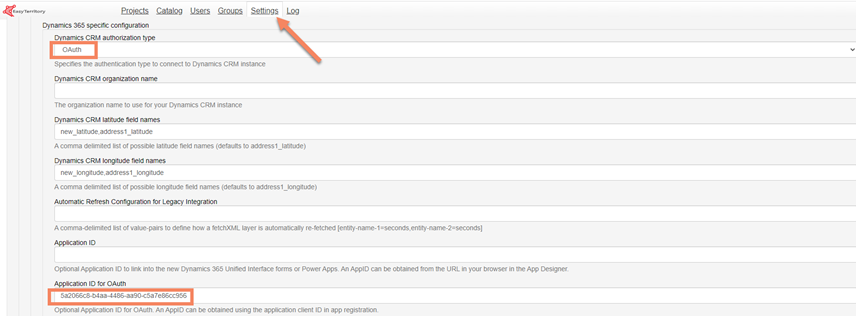
Browse to your EasyTerritory site and go to admin > settings.
Change the ‘Dynamics CRM authorization type’ from ‘Office 365’ to ‘OAuth’.
Enter the Application (client) ID from your App registration.