With the introduction of EasyTerritory version 3.5x, scheduling is now more versatile and flexible than ever. Scheduling provides planners a way to group sites (accounts, customers, etc.) into daily partitions across a scheduled period. Scheduling takes into account multiple factors making it a powerful planning tool:
- How frequently must a site be visited across the schedule period (e.g. every day, week, month, quarter, etc.)?
- How much dwell time is spent on-site?
- How do you want to balance drive time with daily workloads?
- What days are available for work and how many hours each day?
In order to use EasyTerritory’s scheduling feature, there are two required data-columns. These columns must be included in your dataset and flagged with the appropriate metadata:
- Visit frequency in weeks – this is the number of weeks between each visit. To visit a site twice a week, the value is 0.5; for every quarter it is 13. The data column must be flagged with scheduleweekfreq
- On-site time in hours – this is the amount of dwell time per visit in hours. The data column must be flagged with routestopdelayhours
To use the scheduling feature, perform the following steps:
-
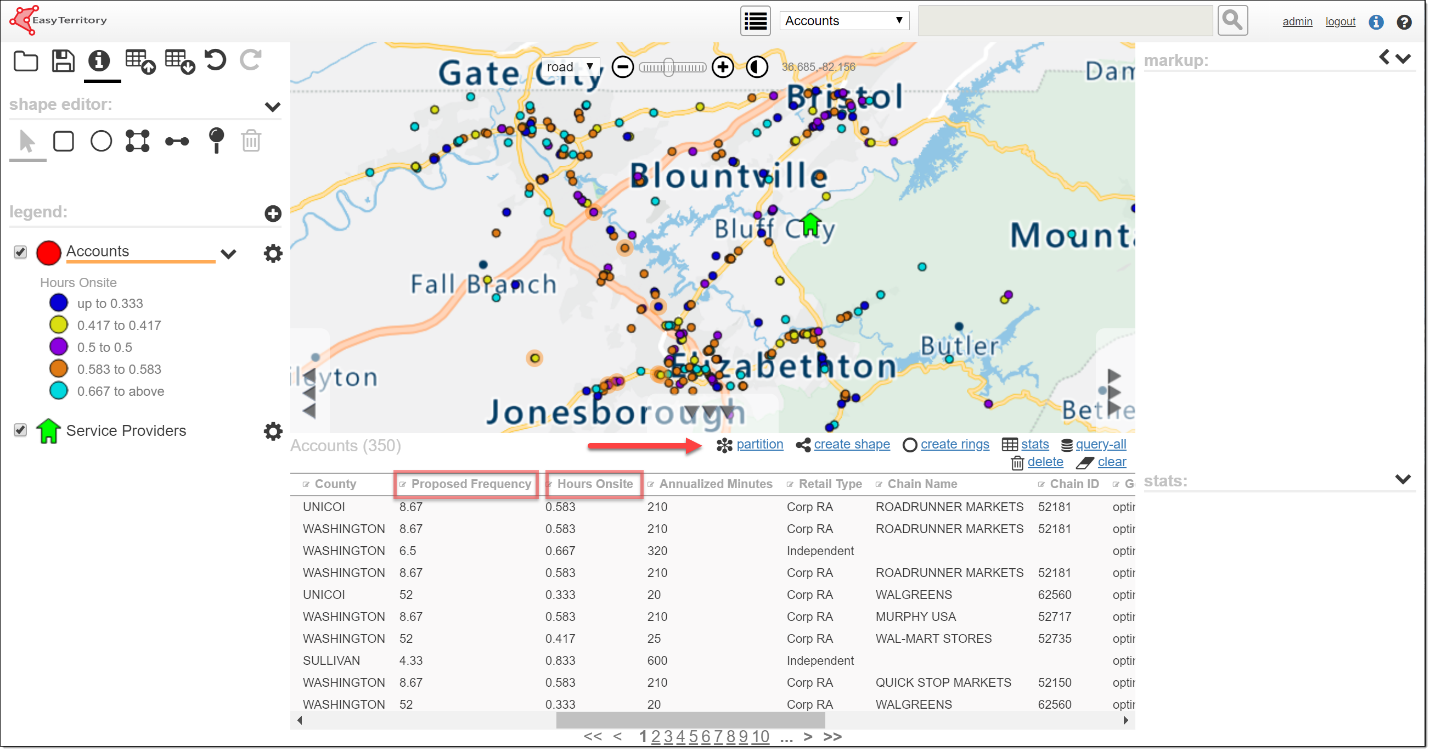
- Query the features you want to schedule. This may be done using any of EasyTerritory’s powerful querying capabilities (by ctrl-clicking on features; selecting by lasso, envelope or polygon). If you ctrl-click a start location from a different layer, like your rep’s home location, this will add a single record to the beginning of the result-set for use as the start-stop for every daily partition.
- Click on the partition link in the results-grid – this will open an options dialog:
-
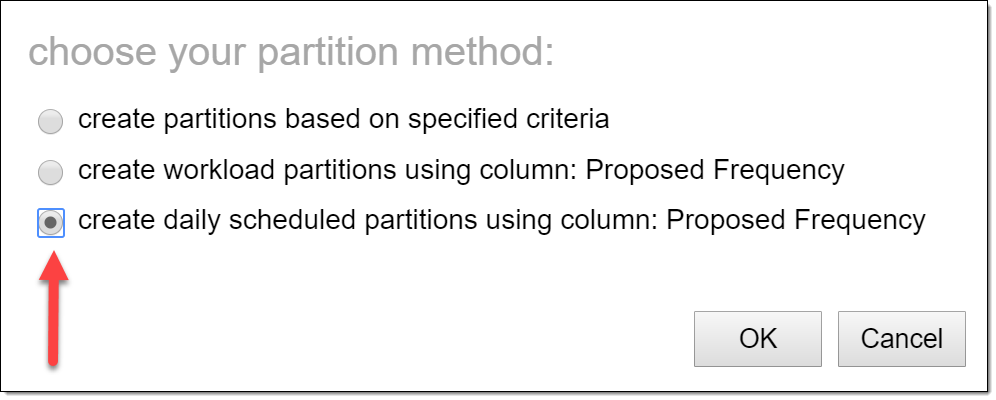
- Select the create daily scheduled partitions option – this opens the scheduling dialog:

- Enter your scheduling criteria:
- Start date – this is the first day for your schedule. If you do not select a date, the current day is used.
- Number of weeks to schedule – this is the number of weeks generated for the schedule and there will be one partition generated for each workday in the schedule period
- Optimize driving distance – there is always a conflict between minimum driving distance per day and the deviation between daily workloads and accuracy of the gap between repeat visits. If you set the slider to the left (fair) then the daily workloads will be as similar (minimum deviation) as possible; also, subsequent visits (say every 4 weeks) will be a close as possible. However, your reps will have to drive further. If you set the slider to the right (best) then driving distances will be minimized, but at the expense of fluctuation in daily workloads and variation in the frequency of visits (e.g. if a visit is every 4 weeks it might schedule the next at 3.5 weeks out).
- Available work days – these are the acceptable days to schedule work on
- Exclude dates – these are holidays and vacation days you might want to exclude from the schedule
- Press done to generate the schedule.
The schedule is generated as a set of partitions in the markup panel:
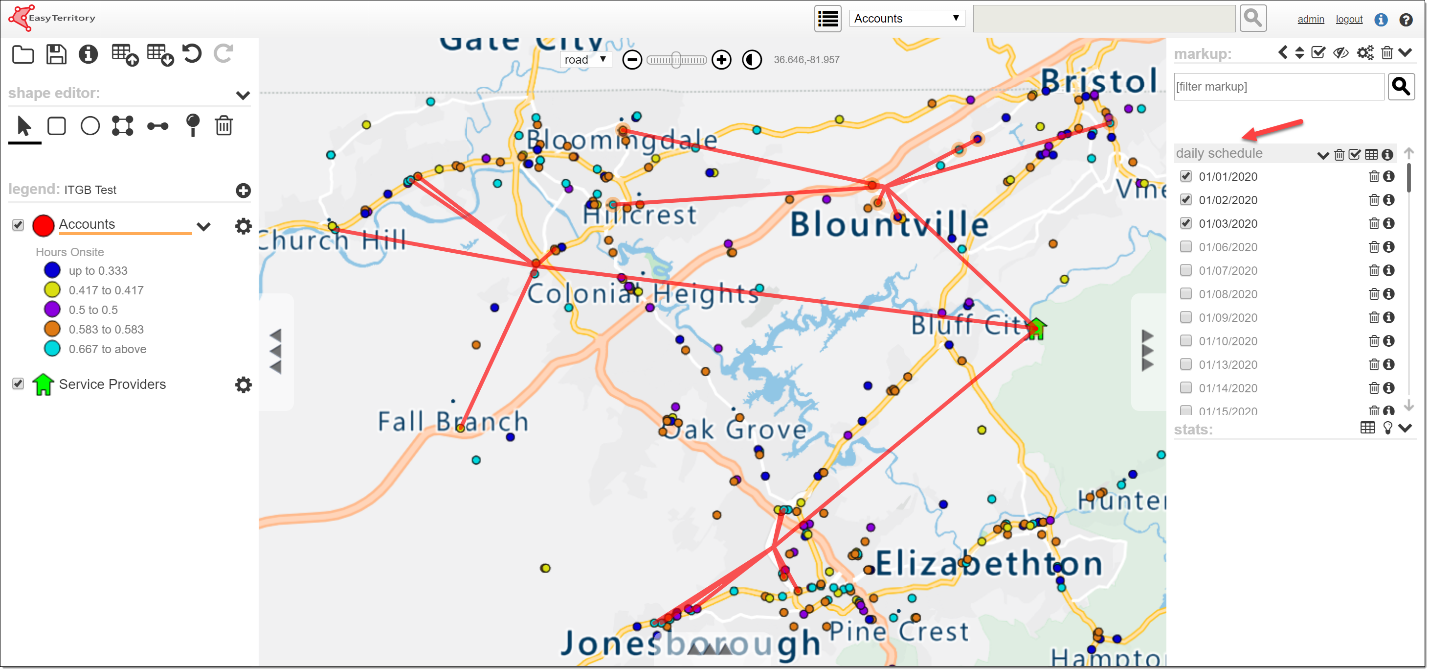
In this example we used a rep’s home location as a first-record so that each daily partition includes the start-stop. From here we can route all partitions to get fine-routes (turn-by-turn driving routes) or we can export the schedule as a spreadsheet for importing into other systems. It’s important to note, all of the accounts you queried are scheduled across the schedule period. If you need to determine the correct number of records (stops) for a given resource (or the number of resources needed in a region), please review our documentation on capacity planning and workload partitions.

